
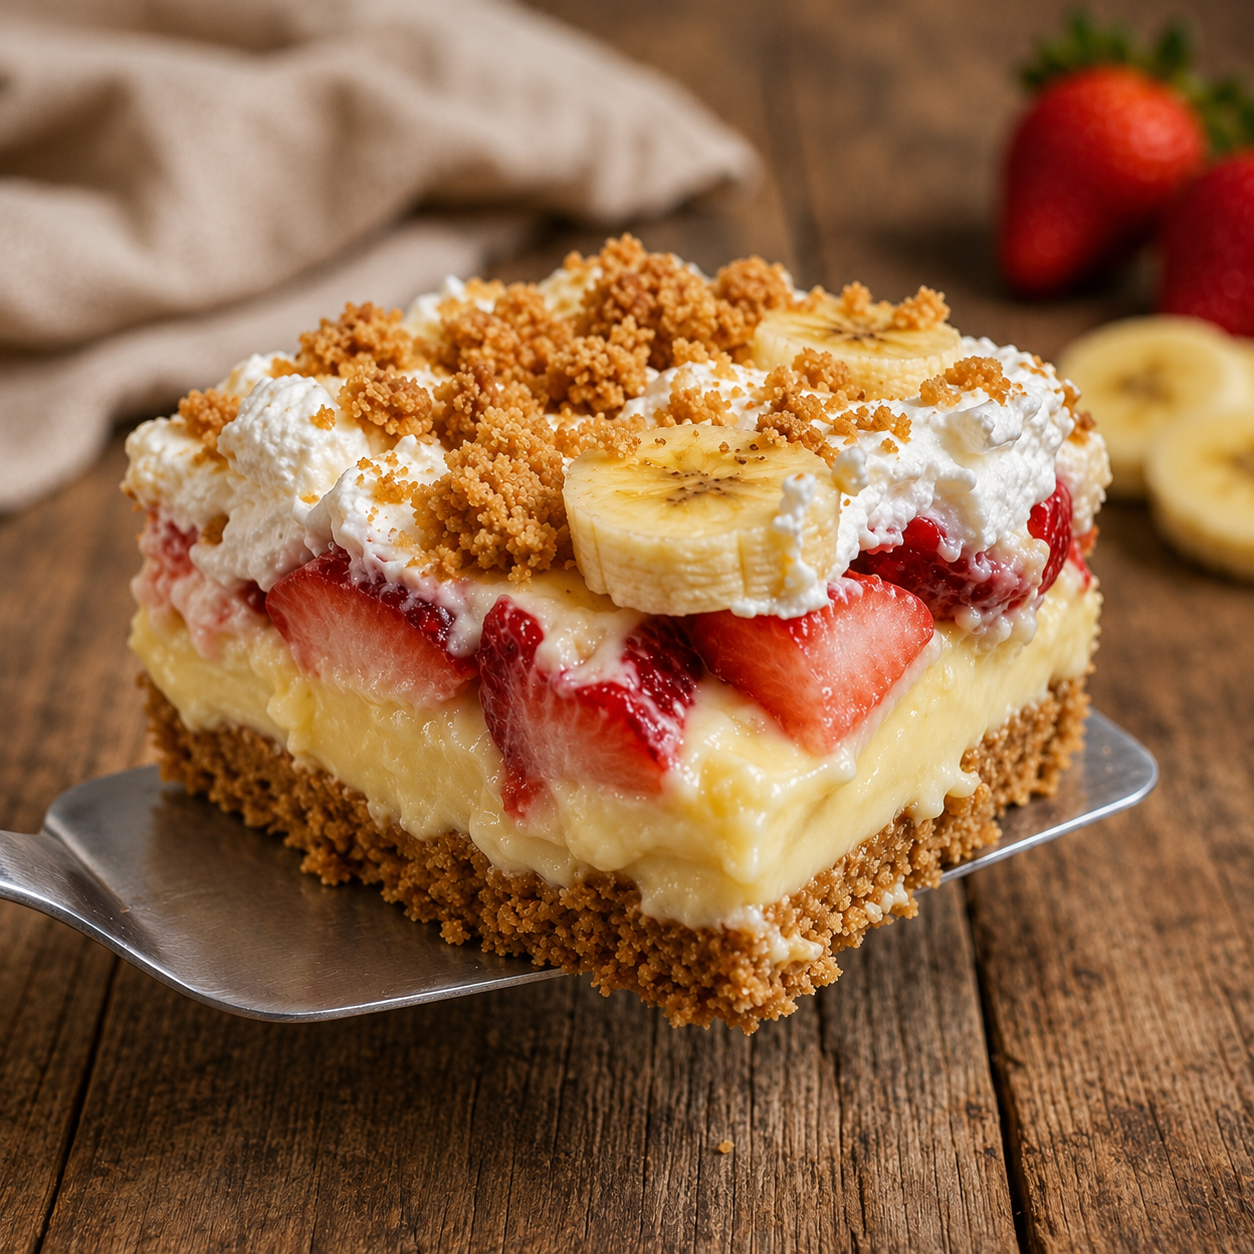
Strawberry Banana Pudding Crunch Bars combine three classic dessert flavors in one easy layered treat. A buttery graham cracker crust forms the base, followed by fresh strawberries and bananas, creamy vanilla pudding, fluffy whipped topping, and a crunchy layer of crushed vanilla wafers.
Every bite has a different texture. The crust is firm and buttery, the fruit is fresh and juicy, the pudding is smooth and creamy, and the vanilla wafer topping adds a light crunch. Together, these layers create a dessert that tastes like a cross between banana pudding, strawberry shortcake, and a classic chilled dessert bar.
This recipe makes approximately 24 bars, making it a practical choice for family gatherings, potlucks, birthday parties, summer cookouts, and other occasions when you need a dessert that serves a crowd.
The preparation is straightforward, and much of the work can be done ahead of time. The most important step is allowing the bars to chill for at least 4 hours before slicing. This gives the pudding enough time to set and helps the layers hold together.
Why You’ll Love These Strawberry Banana Pudding Bars
Fresh Fruit and Creamy Pudding
The combination of strawberries and bananas gives these bars a naturally sweet fruit flavor. The vanilla pudding surrounds the fruit with a smooth, creamy layer that ties everything together.
Buttery Graham Cracker Base
The graham cracker crust provides a firm foundation for the softer layers. Baking it briefly helps it set before the fruit and pudding are added.
Crunchy Vanilla Wafer Topping
Crushed vanilla wafers provide the final layer of texture. Their sweet vanilla flavor works especially well with both the banana and pudding.
Great for a Crowd
One 9×13-inch pan produces approximately 24 bars. That makes this recipe especially useful when you need plenty of servings without preparing individual desserts.
Easy Make-Ahead Dessert
The bars need several hours of chilling, so you can prepare them well before serving. They are particularly convenient for gatherings because the dessert is ready to slice when your guests arrive.
Ingredients You’ll Need
For the Graham Cracker Crust
- 2 cups graham cracker crumbs
- 1/2 cup unsalted butter, melted
- 1/4 cup granulated sugar
For the Fruit Layer
- 2 cups fresh strawberries, sliced
- 2 large ripe bananas, sliced
For the Pudding Layer
- 2 packages (3.4 ounces each) instant vanilla pudding
- 3 cups cold whole milk
- 1 container (8 ounces) whipped topping
For the Crunch Topping
- 1 1/2 cups crushed vanilla wafers
The ingredients are simple, but each one has a specific purpose. The butter binds the graham cracker crumbs, the pudding provides structure and creaminess, and the whipped topping gives the pudding layer a lighter texture.
How to Make Strawberry Banana Pudding Crunch Bars
Step 1: Prepare the Crust
Preheat your oven to 350°F.
In a medium bowl, combine the graham cracker crumbs, granulated sugar, and melted unsalted butter.
Stir until all of the crumbs are evenly coated with butter. The mixture should resemble damp sand and should hold together when pressed.
Transfer the mixture to a 9×13-inch baking pan.
Press it firmly and evenly across the bottom of the pan. Use the bottom of a glass or measuring cup to compact the crumbs if needed.
A firm crust is important because it will support the fruit and pudding layers.
Step 2: Bake and Cool the Crust
Place the crust in the preheated oven and bake for approximately 8 minutes.
Remove the pan from the oven and allow the crust to cool completely.
Do not add the fruit while the crust is still warm. Heat and moisture can soften the crust and make the finished bars difficult to slice.
For an easier release, you can line the baking pan with parchment paper before pressing in the crust, leaving some overhang along the sides.
Step 3: Prepare the Strawberries and Bananas
Wash the strawberries and pat them completely dry.
Slice the strawberries into even pieces.
Peel the bananas and slice them into rounds.
For the best texture, choose bananas that are ripe but still firm. Very soft bananas can become mushy after sitting in the pudding.
If you want to slow browning, lightly toss the banana slices with a small amount of lemon juice before layering them.
Step 4: Add the Fruit Layer
Once the graham cracker crust has cooled completely, arrange the sliced strawberries and bananas evenly over the crust.
Try to create a fairly tight single layer.
You want the fruit distributed throughout the pan so that each bar contains both strawberry and banana.
Avoid piling the fruit too high in certain areas because uneven layers can make the bars harder to cut.
Step 5: Prepare the Vanilla Pudding
Pour the 3 cups of cold whole milk into a large mixing bowl.
Add both packages of instant vanilla pudding mix.
Whisk continuously for about 2 minutes, or until the pudding has thickened.
Using very cold milk helps the instant pudding set quickly and gives you a thicker filling.
Step 6: Fold in the Whipped Topping
Once the pudding has thickened, gently fold in half of the 8-ounce container of whipped topping.
Use a spatula rather than vigorously stirring.
The goal is to create a light, creamy pudding mixture while maintaining some of the airiness from the whipped topping.
Step 7: Add the Pudding Layer
Pour the pudding mixture over the strawberry and banana layer.
Use a spatula to spread it evenly across the pan.
Gently work the pudding into the spaces between the fruit without pressing down too hard.
Make sure the entire surface is covered.
Step 8: Add the Whipped Topping
Spread the remaining whipped topping evenly over the pudding layer.
Try to create a smooth, even surface.
This layer provides a light contrast to the creamy pudding underneath and creates a clean base for the crunchy topping.
Step 9: Add the Vanilla Wafer Crunch
Sprinkle the 1 1/2 cups crushed vanilla wafers evenly over the whipped topping.
You can crush the wafers into fine crumbs or leave a few small pieces for extra texture.
Cover the entire surface so that every serving gets some of the crunchy topping.
Step 10: Chill Before Slicing
Cover the pan and refrigerate the dessert for at least 4 hours.
Do not rush this step.
The chilling time allows the pudding to fully set and gives the layers enough structure to hold together when sliced.
For the cleanest cuts, you can chill the dessert overnight.
My Best Tips for Perfect Crunch Bars
Use Cold Milk
The milk should be cold when you mix it with the instant pudding.
Cold milk helps the pudding thicken properly and gives the finished bars a more stable texture.
Dry the Strawberries Well
Fresh strawberries naturally contain a lot of moisture.
After washing them, pat them thoroughly dry before slicing. Excess water can make the fruit layer wetter and may soften the crust.
Choose Firm-Ripe Bananas
Very ripe bananas are sweet, but they can become too soft when layered in a chilled dessert.
Choose bananas that are ripe enough to taste sweet but still firm enough to hold their shape.
Cool the Crust Completely
This is one of the most important steps.
Adding fresh fruit and pudding to a warm crust can create condensation and soften the graham cracker base.
Wait until the crust has completely cooled before continuing.
Whisk the Pudding Long Enough
Give the pudding mixture about two full minutes of whisking.
If the pudding is still thin, continue whisking until it clearly begins to thicken before folding in the whipped topping.
Chill for the Full Four Hours
The bars need time to set.
Cutting them too early can result in pudding that spreads and layers that slide apart.
For a firm dessert that is easy to serve, refrigerate for at least four hours.
Use a Warm Knife for Clean Cuts
Dip a sharp knife into warm water, then wipe it dry.
Make each cut and clean the knife before the next slice.
This simple technique helps create neater dessert bars.
Easy Variations
Chocolate Crunch Bars
For a chocolate version, use chocolate graham crackers for the crust and crushed chocolate sandwich cookies for the topping.
The chocolate pairs especially well with both strawberries and bananas.
Tropical Strawberry Banana Bars
For a tropical variation, replace some of the strawberries with diced pineapple.
You can also experiment with coconut-flavored pudding if you want a stronger tropical flavor.
Add Chocolate Drizzle
Drizzle melted chocolate over the chilled bars just before serving.
Allow the chocolate to set briefly before slicing or serving.
Add Caramel
A light caramel drizzle adds another layer of sweetness and works particularly well with the banana flavor.
Fixing Common Problems
Why Is My Crust Soggy?
A soggy crust can happen if it was not baked long enough, if it was still warm when the fruit was added, or if the strawberries released too much moisture.
Bake the crust for about 8 minutes and cool it completely before assembling the dessert.
Also make sure the strawberries are thoroughly dried.
Why Are My Bars Too Soft?
The pudding may not have been whisked long enough, or the dessert may not have chilled for enough time.
Make sure the milk is very cold and whisk the pudding until it has noticeably thickened.
Then refrigerate the completed dessert for at least four hours.
Why Are My Bananas Turning Brown?
Bananas naturally oxidize after being sliced.
For a fresher appearance, lightly coat the banana slices with lemon juice before layering them.
Do not use too much lemon juice because it can alter the flavor.
Why Are the Layers Sliding Apart?
The dessert probably needs more chilling time.
It can also happen when the pudding layer is too thin or when the fruit contains excess moisture.
Refrigerate the bars thoroughly before cutting and use a sharp knife.
Why Did My Crunch Topping Become Soft?
Vanilla wafers naturally absorb moisture from the whipped topping and pudding.
For the crunchiest topping, add the crushed vanilla wafers closer to serving time, especially if you are preparing the dessert more than a day ahead.
How to Serve Strawberry Banana Pudding Crunch Bars
Serve these bars chilled.
They are ideal for casual gatherings because they can be cut into individual squares and arranged on a serving platter.
For a more polished presentation, garnish each piece with a small strawberry slice, banana slice, or mint leaf just before serving.
You can also add a light drizzle of chocolate or caramel sauce.
Because the bars already contain several creamy and sweet layers, you do not need a heavy topping.
Make-Ahead Instructions
These bars are an excellent make-ahead dessert.
You can prepare the crust, fruit, pudding, and whipped topping in advance and refrigerate the assembled dessert.
For the best texture, make the dessert the day before serving.
If you plan to keep it longer than 24 hours, consider keeping the crushed vanilla wafer topping separate until closer to serving. This helps preserve its crunch.
The pudding and fruit layers can continue to blend together overnight, making the dessert even more flavorful.
How to Store Leftovers
Cover the baking pan tightly or transfer individual portions to an airtight container.
Keep the bars refrigerated because they contain fresh fruit, milk-based pudding, and whipped topping.
For the best texture, enjoy them within a short period after assembly.
The longer they sit, the more moisture the graham cracker crust and vanilla wafer topping will absorb.
Frequently Asked Questions
Do these strawberry banana pudding bars need to be baked?
Only the graham cracker crust is baked. The fruit, pudding, whipped topping, and vanilla wafer layers are assembled after the crust has cooled.
How long should I chill the bars?
Chill them for at least 4 hours. Overnight chilling is also a good option and can make the bars easier to slice.
Can I make these bars the day before?
Yes. They are especially convenient as a make-ahead dessert. Assemble them the day before and keep them refrigerated.
How do I keep bananas from turning brown?
Lightly toss the banana slices with lemon juice before layering them. This helps slow oxidation and keeps the slices looking fresher.
Can I use homemade whipped cream?
The supplied recipe calls for an 8-ounce container of whipped topping. Homemade whipped cream can change the stability of the finished dessert, so the original whipped topping is the more predictable choice.
Can I use another pudding flavor?
Yes, the recipe can be adapted with other pudding flavors. Vanilla provides the classic flavor, while chocolate or coconut can create a different dessert.
Can I add pineapple?
Yes. Diced pineapple can be used as part of the fruit layer for a tropical variation. Drain it thoroughly before adding it to the dessert.
Why are my bars difficult to cut?
They may not have chilled long enough. Refrigerate them for at least four hours and use a sharp knife dipped briefly in warm water and wiped dry between cuts.
How can I keep the topping crunchy?
The vanilla wafers will gradually soften as they absorb moisture. If you want maximum crunch, add the crushed wafers shortly before serving.
Recipe at a Glance
Recipe: Strawberry Banana Pudding Crunch Bars
Prep Time: About 20 minutes
Crust Bake Time: 8 minutes
Chill Time: At least 4 hours
Servings: Approximately 24 bars
Pan: 9×13-inch baking pan
Oven Temperature: 350°F
Final Thoughts
Strawberry Banana Pudding Crunch Bars are a fun twist on classic banana pudding. Instead of serving the fruit and pudding in a bowl, everything is layered over a buttery graham cracker crust and finished with whipped topping and crunchy vanilla wafers.
The fresh strawberries add a bright fruit flavor, while bananas provide natural sweetness and creamy texture. Vanilla pudding brings all the layers together, and the crushed wafers give the dessert its signature crunch.
The recipe is simple enough for everyday baking but makes enough servings for a party or family gathering. Just remember to cool the crust completely, keep excess moisture away from the layers, and give the finished bars plenty of time to chill.
For the best experience, prepare them ahead, refrigerate until firm, and add the crunchy topping close to serving time. The result is a cool, creamy, fruity dessert with plenty of texture in every bite.