

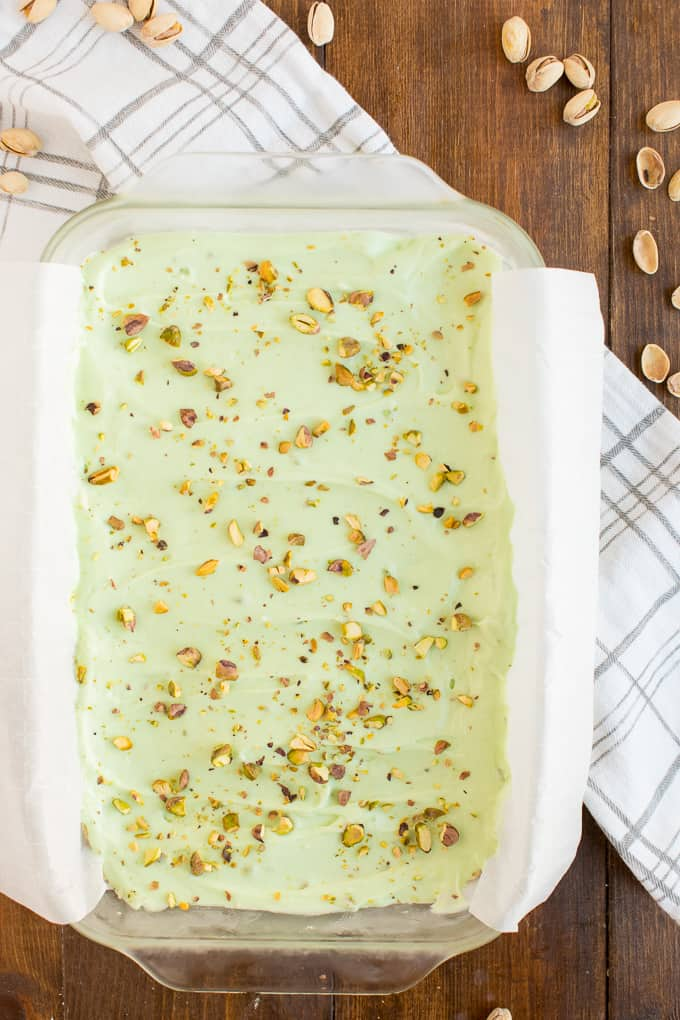
Creamy, nutty, and wonderfully easy to make, these Pistachio Dream Bars are the kind of dessert that disappears quickly at potlucks, family gatherings, and holiday tables. They combine a buttery cookie-style crust with a smooth pistachio layer and a fluffy topping for a cool, rich treat.
Why You’ll Love These Pistachio Dream Bars
These bars are especially appealing because they require very little complicated baking. The pistachio flavor gives them a beautiful color and a delicate nutty taste, while the creamy layers create a soft contrast with the crisp crust.
They’re also easy to prepare ahead of time, which makes them perfect when you want a dessert that can chill in the refrigerator while you work on the rest of the meal.
Ingredients
For the Crust
- 1 ½ cups all-purpose flour
- ½ cup unsalted butter, softened
- ¼ cup granulated sugar
- ½ cup finely chopped pistachios
For the Pistachio Layer
- 1 package instant pistachio pudding mix, about 3.4 ounces
- 2 cups cold milk
- 8 ounces cream cheese, softened
- ½ cup powdered sugar
- 1 teaspoon vanilla extract
For the Topping
- 8 ounces whipped topping, thawed
- ½ cup chopped pistachios
- Optional: white chocolate shavings for garnish
How to Make Pistachio Dream Bars
1. Prepare the Crust
Preheat your oven to 350°F (175°C).
In a mixing bowl, combine the flour, softened butter, sugar, and chopped pistachios. Mix until the ingredients come together and form a crumbly dough.
Press the mixture firmly into the bottom of a 9-by-13-inch baking dish. Try to create an even layer so the crust bakes uniformly.
Bake for approximately 15–18 minutes, or until the edges are lightly golden.
Remove the crust from the oven and allow it to cool completely before adding the creamy layers.
2. Make the Pistachio Cream Layer
In a large bowl, beat the softened cream cheese with the powdered sugar and vanilla until smooth.
In a separate bowl, whisk the instant pistachio pudding mix with the cold milk until it thickens.
Gradually combine the pudding mixture with the cream cheese mixture. Beat until smooth and creamy.
Spread the pistachio mixture evenly over the cooled crust.
3. Add the Fluffy Topping
Spoon the whipped topping over the pistachio layer.
Use a spatula to gently spread it into an even layer, covering the entire surface.
Sprinkle chopped pistachios over the top.
For an extra-pretty finish, add a few white chocolate shavings.
4. Chill the Bars
Cover the baking dish and refrigerate for at least 4 hours.
For the best texture, you can let the bars chill overnight. The crust will firm up, while the pistachio and cream layers become easier to slice.
5. Slice and Serve
Once thoroughly chilled, cut the dessert into squares using a sharp knife.
For cleaner slices, wipe the knife with a damp cloth between cuts.
Serve the bars cold and garnish individual portions with additional chopped pistachios if desired.
Tips for the Best Pistachio Dream Bars
Let the crust cool completely. Adding the pistachio layer while the crust is still warm can cause the creamy filling to soften.
Use softened cream cheese. Room-temperature cream cheese blends much more smoothly and helps prevent lumps.
Don’t rush the chilling time. These bars need several hours in the refrigerator to properly set.
Use cold milk for the pudding. Cold milk helps instant pudding thicken properly.
Chop the pistachios finely for the crust. Smaller pieces distribute more evenly and make the crust easier to cut.
Chill overnight for the easiest slicing. The longer chilling time allows the layers to firm up beautifully.
Easy Variations
Add a Chocolate Twist
Drizzle melted white chocolate over the finished bars before chilling. The sweetness pairs beautifully with pistachio.
Use a Graham Cracker Crust
If you want to skip the baked crust, use a prepared graham cracker crust mixture. Press it firmly into the baking dish and chill it before adding the filling.
Add More Pistachio Flavor
For an even stronger pistachio taste, add a small amount of finely ground pistachios to the creamy layer.
Make Individual Dessert Cups
Instead of preparing one large pan, layer the crust, pistachio filling, and whipped topping in small dessert cups. This makes an elegant option for parties.
How to Store Pistachio Dream Bars
Keep the bars covered and refrigerated.
Because the dessert contains dairy-based ingredients and whipped topping, it should not be left at room temperature for extended periods.
For the neatest presentation, keep the bars chilled until you’re ready to serve them.
Frequently Asked Questions
Can I make Pistachio Dream Bars ahead of time?
Yes. In fact, making them several hours ahead or the night before can improve the texture because the layers have more time to set.
Can I use homemade whipped cream?
Yes, although whipped topping tends to provide a more stable texture. If using homemade whipped cream, keep the dessert refrigerated and serve it relatively soon after preparation.
Why is my pistachio layer too soft?
The dessert may need additional chilling time. Also, make sure you used instant pudding mix and the correct amount of cold milk.
Can I freeze Pistachio Dream Bars?
They can be frozen, although the texture of the whipped topping and creamy filling may change slightly after thawing. For the best texture, refrigeration is preferable.
How do I get clean slices?
Chill the dessert thoroughly and use a sharp knife. Wiping the knife clean between cuts also helps create neat, defined layers.
Final Thoughts
These Pistachio Dream Bars bring together everything you want in an easy chilled dessert: a buttery pistachio crust, creamy pudding filling, fluffy topping, and plenty of nutty flavor.
They’re simple enough for a casual family dessert but pretty enough for a holiday table. Make them ahead, let them chill until firm, and you’ll have a refreshing treat ready whenever dessert time arrives.