

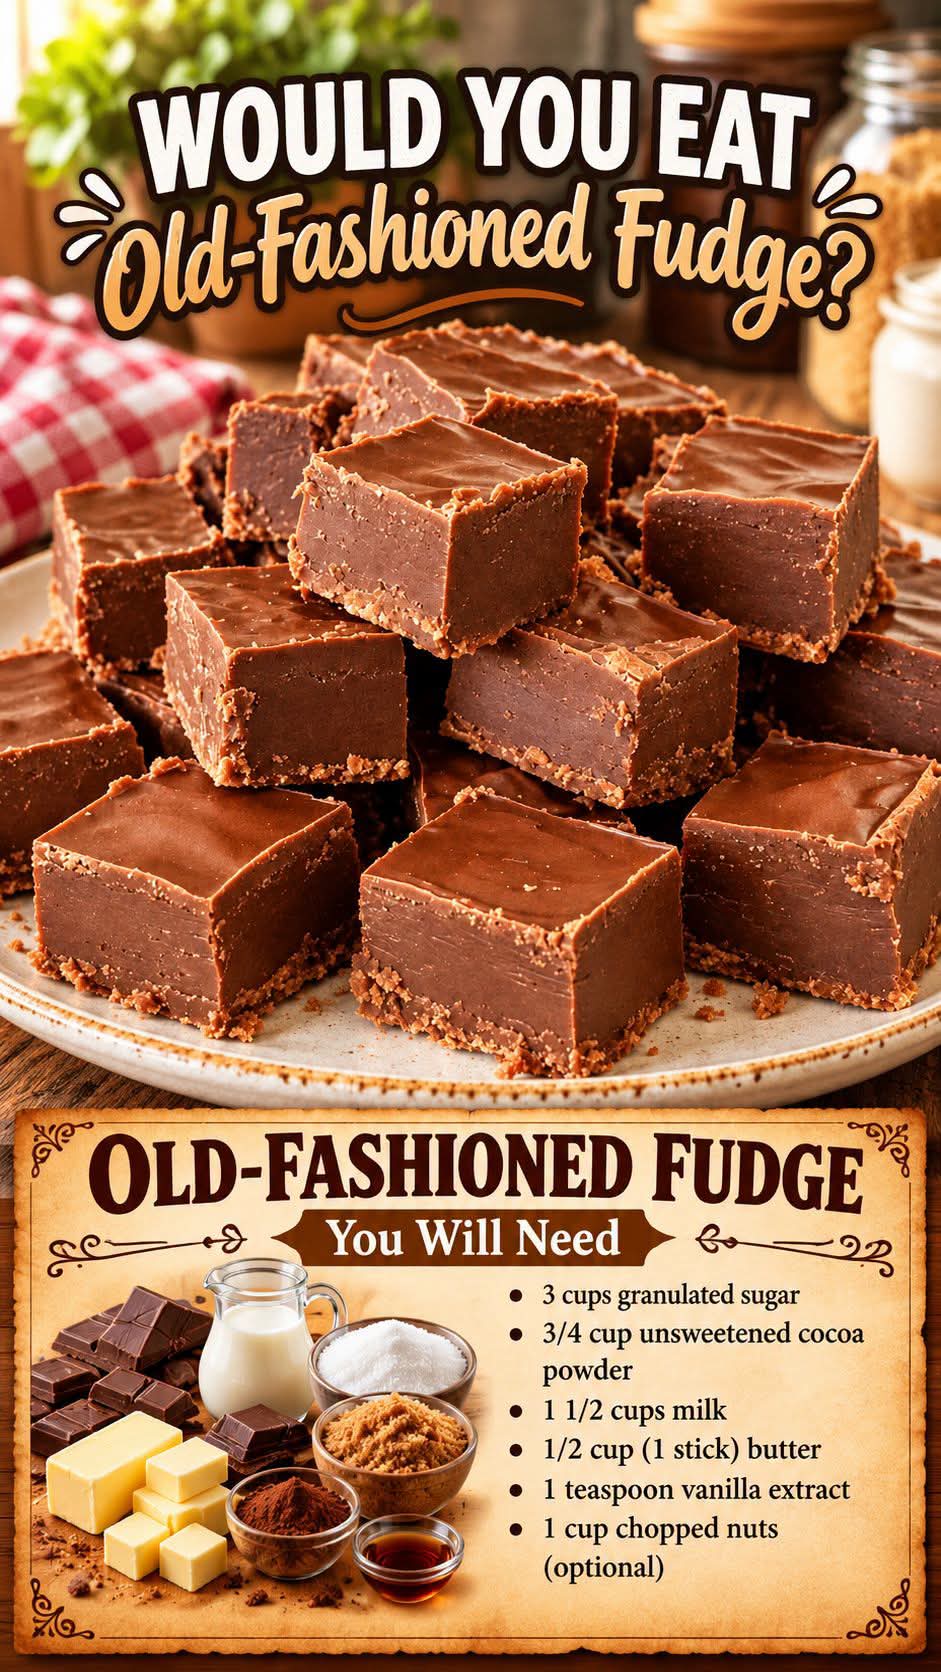
There’s nothing quite like homemade old-fashioned chocolate fudge. Rich, chocolatey, and wonderfully creamy, this classic treat is made with simple pantry ingredients and has the nostalgic flavor of the fudge many of us remember from childhood. Each bite melts in your mouth, delivering a delicious combination of cocoa, butter, vanilla, and sweetness.
This old-fashioned chocolate fudge recipe is perfect for holidays, family gatherings, homemade gifts, or whenever you’re craving a classic chocolate dessert. Made with granulated sugar, unsweetened cocoa powder, whole milk, butter, and vanilla extract, it creates a traditional fudge with a smooth, rich flavor and a firm yet tender texture.
Although making fudge on the stovetop requires a little patience, the process is straightforward when you follow the right temperatures and techniques. With a candy thermometer and a few simple tips, you can make beautiful homemade chocolate fudge that slices into neat little squares and looks just as wonderful as it tastes.
Why You’ll Love This Old-Fashioned Chocolate Fudge
- Rich chocolate flavor: Unsweetened cocoa powder gives this fudge its deep, classic chocolate taste.
- Simple ingredients: You only need six everyday ingredients to make this traditional homemade candy.
- Perfect for sharing: Cut the fudge into small squares for dessert trays, parties, or homemade gifts.
- A nostalgic classic: This traditional stovetop method creates the familiar texture and flavor of old-fashioned fudge.
- Great for special occasions: Chocolate fudge is a wonderful addition to Christmas cookie trays, holiday celebrations, and family gatherings.
- Easy to customize: Add chopped nuts, a little espresso powder, or other favorite flavorings to create your own variation.
Ingredients You’ll Need
Here are the six simple ingredients you’ll need to make this homemade chocolate fudge.
- 3 cups (600 g) granulated sugar: Sugar provides the sweetness and structure that allow traditional fudge to set properly.
- 2/3 cup (65 g) unsweetened cocoa powder: Cocoa powder delivers the rich chocolate flavor. Use unsweetened cocoa so you can control the sweetness of the finished fudge.
- 1 1/2 cups (360 ml) whole milk: Whole milk provides moisture and richness while helping the sugar and cocoa combine into a smooth mixture.
- 1/4 cup (55 g) unsalted butter: Butter contributes a creamy texture and adds richness to the fudge.
- 1 teaspoon vanilla extract: Vanilla enhances the chocolate flavor and gives the fudge a warm, sweet aroma.
- 1/4 teaspoon salt: A small amount of salt balances the sweetness and brings out the chocolate flavor.
You’ll also need parchment paper and an 8-inch square baking pan to shape the fudge, along with a heavy-bottomed saucepan and a candy thermometer for accurate cooking.
How to Make Old-Fashioned Chocolate Fudge
Step 1: Prepare the Baking Pan
Line an 8-inch square baking pan with parchment paper, leaving some overhang on two opposite sides. This will make it easier to lift the finished fudge out of the pan once it has set.
Set the prepared pan aside while you make the chocolate mixture.
Preparing the pan before cooking is important because traditional fudge begins to thicken quickly once it has been beaten. Having everything ready allows you to transfer it without delay.
Step 2: Combine the Sugar, Cocoa, and Salt
In a heavy-bottomed saucepan, whisk together the granulated sugar, unsweetened cocoa powder, and salt until evenly combined.
Gradually pour in the whole milk, stirring as you go. Continue mixing until the cocoa and sugar are moistened and the mixture looks smooth, with no large dry pockets of cocoa powder.
A heavy-bottomed saucepan helps distribute heat more evenly and reduces the risk of the sugar mixture scorching during cooking.
Step 3: Heat the Chocolate Mixture
Place the saucepan over medium heat. Stir constantly as the mixture warms, making sure to scrape the bottom and sides of the pan to help dissolve the sugar evenly.
Continue heating until the sugar has dissolved and the mixture comes to a full boil.
Once the mixture is boiling, stop stirring. This is an important step in traditional fudge making because stirring during the boiling stage can encourage unwanted sugar crystals to form, resulting in a grainy texture.
If sugar crystals are visible on the sides of the pan, carefully wash them down with a clean, wet pastry brush before the mixture reaches the later stages of cooking.
Step 4: Cook the Fudge to the Soft-Ball Stage
Allow the chocolate mixture to boil gently without stirring. Attach a candy thermometer to the saucepan, making sure the tip is submerged in the mixture but does not touch the bottom of the pan.
Cook until the thermometer reaches 234–238°F (112–114°C), the soft-ball stage.
The exact cooking time will vary depending on your saucepan, stove, and the temperature of the ingredients, so use the temperature rather than a fixed number of minutes as your guide.
Reaching the correct temperature is one of the most important parts of making traditional chocolate fudge. If the mixture does not get hot enough, the fudge may remain too soft. If it gets too hot, the finished fudge may become dry, hard, or crumbly.
Be careful when working with boiling sugar because it can cause serious burns.
Step 5: Add the Butter and Vanilla
Once the mixture reaches the correct temperature, remove the saucepan from the heat.
Add the unsalted butter and vanilla extract, but do not stir them into the hot mixture yet. Allow the butter to sit on top and the mixture to begin cooling naturally.
This cooling period helps prepare the sugar mixture for beating and encourages the smooth texture associated with old-fashioned fudge.
Step 6: Let the Mixture Cool
Allow the fudge mixture to cool undisturbed until it reaches approximately 110°F (43°C).
Avoid stirring, shaking, or scraping the mixture during this stage. Unwanted agitation while the mixture is cooling can encourage premature crystallization and affect the final texture.
Using a candy thermometer makes it easier to know when the mixture is ready for the next step.
Step 7: Beat Until Thick and Creamy
Once the mixture has cooled to approximately 110°F (43°C), use a sturdy wooden spoon to beat it.
At first, the mixture will look dark and glossy. Continue beating until it begins to thicken, loses some of its shine, and starts to hold its shape.
This process encourages the formation of tiny sugar crystals that give traditional fudge its characteristic smooth, creamy texture.
Beating can take several minutes, and the mixture will become noticeably harder to stir as it thickens. Stop when it is thick enough to hold its shape but still soft enough to spread into the prepared pan.
Avoid beating for too long, as the fudge may become too firm to spread evenly.
Step 8: Transfer the Fudge to the Pan
Quickly transfer the thickened fudge to the parchment-lined baking pan.
Use a spatula to spread it evenly into the corners and smooth the top. Work promptly because the mixture will continue to firm up as it cools.
If you want to add chopped nuts or another optional topping, gently press them into the surface before the fudge becomes too firm.
Step 9: Allow the Fudge to Set
Leave the fudge at room temperature for approximately 2–3 hours, or until it is completely cool and firm.
Avoid cutting it while it is still warm, as the squares may lose their shape or become messy.
Once set, use the parchment overhang to lift the fudge out of the pan and place it on a cutting board.
Step 10: Slice and Serve
Use a sharp knife to cut the fudge into small, even squares. For cleaner cuts, wipe the blade with a warm, slightly damp cloth between slices and dry it before cutting again.
Arrange the pieces on a serving plate or place them in a decorative tin for gifting.
Enjoy your homemade old-fashioned chocolate fudge with coffee, tea, or a cold glass of milk.
Tips for the Best Homemade Chocolate Fudge
Use a candy thermometer. Traditional fudge depends on reaching the correct temperature. A thermometer helps you avoid undercooking or overcooking the mixture.
Choose a heavy-bottomed saucepan. Even heat distribution reduces the risk of scorching and helps the mixture cook consistently.
Stir before the mixture boils. Stirring helps dissolve the sugar and combine the cocoa with the milk. Once the mixture reaches a full boil, stop stirring to reduce the chance of unwanted crystallization.
Avoid disturbing the fudge while it cools. Letting the mixture cool undisturbed before beating helps you control when crystallization begins.
Beat at the right temperature. Starting too early can affect the texture. Allow the mixture to cool to approximately 110°F (43°C) before beating.
Stop beating when the fudge thickens. The mixture should lose its glossy appearance and begin holding its shape. If you continue too long, it may become difficult to spread.
Prepare everything in advance. Have your lined pan, spatula, and other equipment ready before you begin cooking. Traditional fudge can firm up quickly once it reaches the correct consistency.
Let it set completely. Give the fudge enough time to cool and firm before slicing. This helps create neat squares with clean edges.
Delicious Variations to Try
One of the best things about homemade chocolate fudge is how easily you can customize it. The traditional recipe is delicious on its own, but a few additions can give it a different flavor or texture.
Chocolate Walnut Fudge
Stir chopped walnuts into the fudge once it has thickened but is still spreadable. The nuts add a pleasant crunch that complements the rich chocolate flavor.
Pecans or toasted hazelnuts also work well if you prefer a different nutty taste.
Chocolate Peanut Fudge
For a peanut-inspired variation, add chopped roasted peanuts to the thickened mixture before spreading it into the pan. You can also sprinkle a few peanuts over the top for extra texture.
Chocolate Mint Fudge
Add a small amount of peppermint extract along with the vanilla for a refreshing chocolate-mint flavor. Peppermint extract can be strong, so start with a little and adjust carefully.
Chocolate Espresso Fudge
Whisk a small amount of instant espresso powder into the cocoa and sugar mixture before adding the milk. Coffee enhances the depth of the chocolate flavor without necessarily making the fudge taste strongly of coffee.
Chocolate Coconut Fudge
Fold in a little unsweetened shredded coconut after beating the fudge. The coconut adds texture and a subtle tropical flavor that pairs beautifully with chocolate.
Chocolate Fudge with Sea Salt
Once the fudge has been spread into the pan, sprinkle a small pinch of flaky sea salt over the surface. The salt creates a pleasant contrast with the sweetness and makes the chocolate flavor stand out.
For the best results, keep additions moderate so they do not interfere with the fudge’s ability to set properly.
How to Store Old-Fashioned Chocolate Fudge
Proper storage helps keep homemade fudge fresh and enjoyable for longer.
At Room Temperature
Once completely set, place the fudge in an airtight container and store it in a cool, dry place away from direct sunlight and heat.
For best quality, enjoy it within about 1–2 weeks. Keep the pieces separated with parchment paper if you stack them to prevent sticking.
In the Refrigerator
If your kitchen is warm or you prefer firmer fudge, store it in an airtight container in the refrigerator.
Refrigerated fudge can generally maintain good quality for about 2–3 weeks. Let the pieces sit at room temperature briefly before serving if you prefer a softer texture.
Keep the container sealed to prevent the fudge from absorbing moisture or odors from other foods.
In the Freezer
Chocolate fudge can be frozen for longer storage.
Wrap the fudge tightly in parchment paper or plastic wrap, then place it in a freezer-safe airtight container or bag. Separate layers with parchment paper to prevent the pieces from sticking together.
For best quality, use frozen fudge within about 2–3 months. Thaw it in the refrigerator while still wrapped, then bring it to your preferred serving temperature.
Common Chocolate Fudge Problems and How to Fix Them
Why Is My Fudge Grainy?
Grainy fudge usually develops when sugar crystals form too early or grow too large. Stirring during boiling, disturbing the mixture while it cools, or having undissolved sugar crystals on the sides of the pan can contribute to this problem.
To help prevent graininess, dissolve the sugar before boiling, stop stirring once the mixture boils, and allow it to cool undisturbed before beating.
Why Didn’t My Fudge Set?
Fudge that remains too soft may not have reached the required cooking temperature. Accurate temperature control is particularly important in traditional recipes that rely on sugar crystallization rather than melted chocolate or other setting ingredients.
For your next batch, use a candy thermometer and cook the mixture to 234–238°F (112–114°C).
Why Is My Fudge Too Hard?
Fudge can become hard or crumbly if the sugar mixture is cooked above the recommended temperature or if too much moisture evaporates during cooking.
Use medium heat, monitor the thermometer carefully, and remove the saucepan from the heat as soon as the mixture reaches the correct range.
Why Did My Fudge Become Too Thick Before I Could Spread It?
The mixture may have been beaten for too long or allowed to cool too much before being transferred to the pan.
Prepare your pan in advance and stop beating as soon as the fudge thickens, loses its glossy appearance, and begins to hold its shape.
Can I Make Fudge Without a Candy Thermometer?
Yes, although a thermometer is the most reliable option. Traditionally, the soft-ball stage can be checked by dropping a small amount of the boiling mixture into cold water. If it forms a soft ball that flattens when removed, it has reached the correct stage.
However, this test requires care and practice, so a candy thermometer is recommended for consistent results.
Frequently Asked Questions
What is old-fashioned chocolate fudge made of?
Traditional chocolate fudge is made with sugar, cocoa powder or chocolate, milk or another liquid, and butter. Vanilla and salt are often added for flavor.
This recipe uses granulated sugar, unsweetened cocoa powder, whole milk, butter, vanilla extract, and salt to create a classic stovetop fudge.
How long does homemade chocolate fudge take to make?
The active preparation and cooking time will vary depending on your stove and how quickly the mixture reaches the required temperature. After cooking and beating, allow approximately 2–3 hours for the fudge to cool and set completely.
The exact total time depends on the equipment you use and how long the mixture takes to cool.
Can I use evaporated milk instead of whole milk?
Evaporated milk has a different concentration and water content from regular whole milk. Substituting it may change the cooking behavior and final texture, so the most reliable results come from using the whole milk specified in this recipe.
For a different milk option, choose a recipe specifically developed and tested for that ingredient.
Can I use Dutch-process cocoa powder?
Dutch-process cocoa powder can be used, although it has a different acidity and flavor profile from natural cocoa powder. It may produce a darker color and a slightly different chocolate flavor.
For the most predictable results, use the type of unsweetened cocoa powder you know works well in traditional fudge.
How do I cut fudge into neat squares?
Allow the fudge to cool completely before removing it from the pan. Use a sharp knife and make firm, straight cuts. Wiping the blade clean between cuts helps prevent chocolate residue from dragging across the surface.
For bite-sized pieces, cut the slab into a grid of evenly spaced squares.
Can I double this chocolate fudge recipe?
You can make a larger batch, but doubling the ingredients may change the cooking time and how evenly the mixture heats. A larger quantity also takes longer to cool and may be more difficult to beat.
For the most consistent results, consider making two separate batches unless you have a sufficiently large, heavy-bottomed saucepan and experience with traditional candy making.
Can I add nuts to this recipe?
Yes. Chopped walnuts, pecans, peanuts, or almonds make delicious additions. Stir them into the fudge once it has thickened enough to hold its shape but is still spreadable, then transfer the mixture to the prepared pan.
Is homemade chocolate fudge a good gift?
Absolutely. Chocolate fudge is a classic homemade gift for holidays, birthdays, and special occasions. Once the fudge has completely set, cut it into neat squares and arrange the pieces in a decorative tin or food-safe gift box.
Keep it protected from heat and moisture during storage and transport.
Final Thoughts
Old-Fashioned Chocolate Fudge is a timeless homemade treat that combines rich cocoa flavor, creamy butter, sweet vanilla, and a wonderfully satisfying texture. With just six simple ingredients, you can create a classic chocolate dessert that is perfect for sharing with family and friends.
The key to successful traditional fudge is reaching the correct cooking temperature, allowing the mixture to cool undisturbed, and beating it until it thickens and loses its shine. Follow these steps carefully, and you’ll be rewarded with delicious chocolate squares that are perfect for holiday dessert trays, homemade gifts, or an everyday chocolate craving.
Prepare a batch, let it set completely, and enjoy the rich, nostalgic flavor of homemade chocolate fudge one sweet square at a time.