Bhindi Fry stands among the most loved Indian side dishes for a reason. It combines crispy texture, bold spices, and earthy flavors into one irresistible recipe. Many people know bhindi as okra or ladies finger, but regardless of the name, this vegetable transforms into something truly addictive when coated with seasoned flour and fried until golden brown.
In Indian households, Bhindi Fry appears alongside dal, rice, chapati, or even as a tea-time snack. The beauty of this dish lies in its simplicity. You don’t need complicated ingredients or advanced cooking skills. With the right preparation and a few useful techniques, you can create restaurant-style crispy bhindi at home.
This guide explains everything you need to know about making crunchy Bhindi Fry from scratch. You’ll learn how to prepare okra properly, why certain flours matter, how to avoid slimy texture, and ways to enhance flavor with crunchy garnishes like peanuts, cashews, curry leaves, and green chilies.
Bhindi Fry
Ingredients
For the Bhindi Fry
- 250 g ladies finger (bhindi/okra)
- 1/4 cup gram flour (besan)
- 1/4 cup rice flour
- 1 tbsp corn flour
- 1/4 tsp turmeric powder
- 2 tsp chilli powder
- 1 tsp coriander powder
- 1 tsp cumin powder
- 1 tsp salt
- 1 cup oil (for frying)
For Garnishing and Extra Crunch
- 1 handful cashew nuts
- 1 handful peanuts
- 6 green chilies
- 1 handful curry leaves
Why Bhindi Fry Is So Popular
Bhindi Fry delivers everything people love in comfort food. It tastes spicy, crunchy, savory, and deeply satisfying. Unlike soft vegetable curries, this recipe focuses on texture. Every bite offers crisp coating around tender okra.
The combination of gram flour, rice flour, and corn flour creates a light but crunchy exterior. Meanwhile, spices like cumin, coriander, turmeric, and chili powder build layers of flavor.
Another reason for its popularity comes from versatility. You can serve Bhindi Fry with:
- Steamed rice
- Dal tadka
- Sambar
- Chapati
- Paratha
- Curd rice
- Tea as a crispy snack
This flexibility makes it suitable for lunch, dinner, or appetizers.
Understanding the Main Ingredient: Bhindi
Bhindi, also called okra or ladies finger, belongs to one of the healthiest vegetables used in Indian cooking. It contains fiber, vitamins, antioxidants, and minerals while remaining low in calories.
However, many home cooks avoid okra because of its slimy texture. Fortunately, Bhindi Fry solves that problem completely.
The secret lies in:
- Drying the okra thoroughly
- Using high-heat frying
- Coating it properly with flour
- Avoiding excess moisture
When prepared correctly, bhindi becomes crispy instead of sticky.
Step-by-Step Preparation
Step 1: Wash and Dry the Bhindi
Start by washing the ladies finger thoroughly under running water. Remove any dirt or residue carefully.
Next comes the most important step: drying.
Spread the bhindi on a kitchen towel and allow it to dry completely. You can also wipe each piece gently with a clean cloth.
Moisture causes sliminess, so never skip this stage.
Step 2: Cut the Bhindi
Trim the top and bottom ends of each okra.
Slice them lengthwise into thin strips. Thin slices fry better and become extra crispy.
Uniform cutting also ensures even cooking.
Step 3: Prepare the Spice Coating
Take a large mixing bowl and combine:
- Gram flour
- Rice flour
- Corn flour
- Turmeric powder
- Chilli powder
- Coriander powder
- Cumin powder
- Salt
Mix everything thoroughly.
This combination creates the signature crispy coating:
- Gram flour adds nutty flavor
- Rice flour boosts crispiness
- Corn flour creates light texture
Step 4: Coat the Bhindi
Add the sliced bhindi into the flour mixture.
Toss gently until every piece gets coated evenly.
Avoid adding water. The natural moisture from the okra helps the flour stick lightly.
The coating should remain dry and crumbly rather than wet like batter.
Step 5: Heat the Oil
Pour oil into a deep frying pan or kadai.
Heat it over medium flame. To test readiness, drop a tiny bit of flour into the oil. If it rises immediately, the oil is ready.
Do not overheat the oil because very hot oil burns the coating quickly.
Step 6: Fry Until Crispy
Carefully add the coated bhindi in small batches.
Do not overcrowd the pan. Too much bhindi lowers oil temperature and causes sogginess.
Fry until:
- Golden brown
- Crispy
- Crunchy
Stir occasionally for even frying.
Once done, transfer to paper towels to remove excess oil.
Preparing the Crunchy Garnish
The garnish elevates this dish from simple fried okra to restaurant-style Bhindi Fry.
Fry the Cashews and Peanuts
In the same oil:
- Fry cashew nuts until golden
- Fry peanuts until crunchy
Remove and drain.
These nuts add rich flavor and texture contrast.
Fry Green Chilies and Curry Leaves
Carefully add green chilies and curry leaves into hot oil.
Stand back slightly because curry leaves may splutter.
Fry briefly until crisp.
This step creates incredible aroma and authentic South Indian flavor.
Final Assembly
Place the crispy bhindi in a serving bowl.
Top with:
- Fried peanuts
- Fried cashews
- Crispy curry leaves
- Fried green chilies
Mix lightly or serve layered for presentation.
The result looks vibrant, crunchy, and deeply flavorful.
Tips for Perfect Crispy Bhindi Fry
1. Dry the Bhindi Completely
This remains the most important rule.
Any moisture creates sliminess and prevents crispiness.
2. Slice Thinly
Thin slices fry faster and crisp better than thick chunks.
3. Use Rice Flour
Rice flour creates airy crunch that gram flour alone cannot achieve.
4. Fry in Batches
Crowding the pan traps steam and softens the bhindi.
5. Serve Immediately
Bhindi Fry tastes best fresh and hot.
Over time, humidity softens the coating slightly.
Flavor Variations
Spicy Bhindi Fry
Increase chili powder or add crushed black pepper for extra heat.
Garlic Bhindi Fry
Add garlic powder or fried garlic chips for bold flavor.
Chatpata Bhindi Fry
Sprinkle chaat masala and lemon juice before serving.
Air Fryer Version
You can air fry the coated bhindi at 200°C (390°F) for 15–18 minutes.
Spray lightly with oil and shake halfway through cooking.
This method reduces oil while keeping good crispiness.
Best Dishes to Serve with Bhindi Fry
Bhindi Fry complements many Indian meals beautifully.
Dal and Rice
The crunch pairs perfectly with soft dal and steamed rice.
Curd Rice
Crispy spicy bhindi balances cool creamy curd rice wonderfully.
Chapati or Paratha
Wrap the bhindi inside flatbread for a satisfying meal.
Sambar Rice
The crunchy texture contrasts beautifully with comforting sambar.
Health Benefits of Okra
Despite being fried, okra itself provides several nutrients.
Bhindi contains:
- Dietary fiber
- Vitamin C
- Vitamin K
- Folate
- Antioxidants
It may support:
- Digestion
- Heart health
- Blood sugar management
Using moderate oil and proper frying temperature helps maintain good texture without excessive greasiness.
Common Mistakes to Avoid
Adding Water to the Coating
Wet batter creates clumps and reduces crispiness.
Frying on Low Heat
Low heat makes bhindi absorb excess oil.
Using Wet Okra
Even slight moisture increases sliminess dramatically.
Covering After Frying
Steam trapped under a lid softens the crispy coating.
Storage and Reheating
Bhindi Fry tastes best fresh, but you can store leftovers.
Place cooled bhindi in an airtight container and refrigerate for up to two days.
To reheat:
- Use an oven
- Use an air fryer
- Reheat in a dry skillet
Avoid microwaving because it softens the texture.
Why This Recipe Works So Well
This Bhindi Fry recipe succeeds because it balances:
- Texture
- Spice
- Crunch
- Aroma
Each flour contributes something important. Gram flour brings flavor, rice flour creates crispiness, and corn flour adds lightness.
The garnishes transform the dish further by introducing layers of crunch and fragrance.
Most importantly, the recipe avoids the sliminess many people dislike in okra. Instead, it highlights everything delicious about this vegetable.
Final Thoughts
Bhindi Fry proves that simple ingredients can create extraordinary flavor. Crispy okra coated in aromatic spices and topped with crunchy peanuts, cashews, curry leaves, and green chilies delivers comfort and excitement in every bite.
Whether you prepare it as a side dish for a traditional Indian meal or serve it as a crispy snack, this recipe offers satisfying texture and bold flavor with minimal effort.
Once you master the techniques of drying, coating, and frying correctly, you’ll find yourself making Bhindi Fry again and again. It’s quick, delicious, customizable, and always crowd-pleasing.
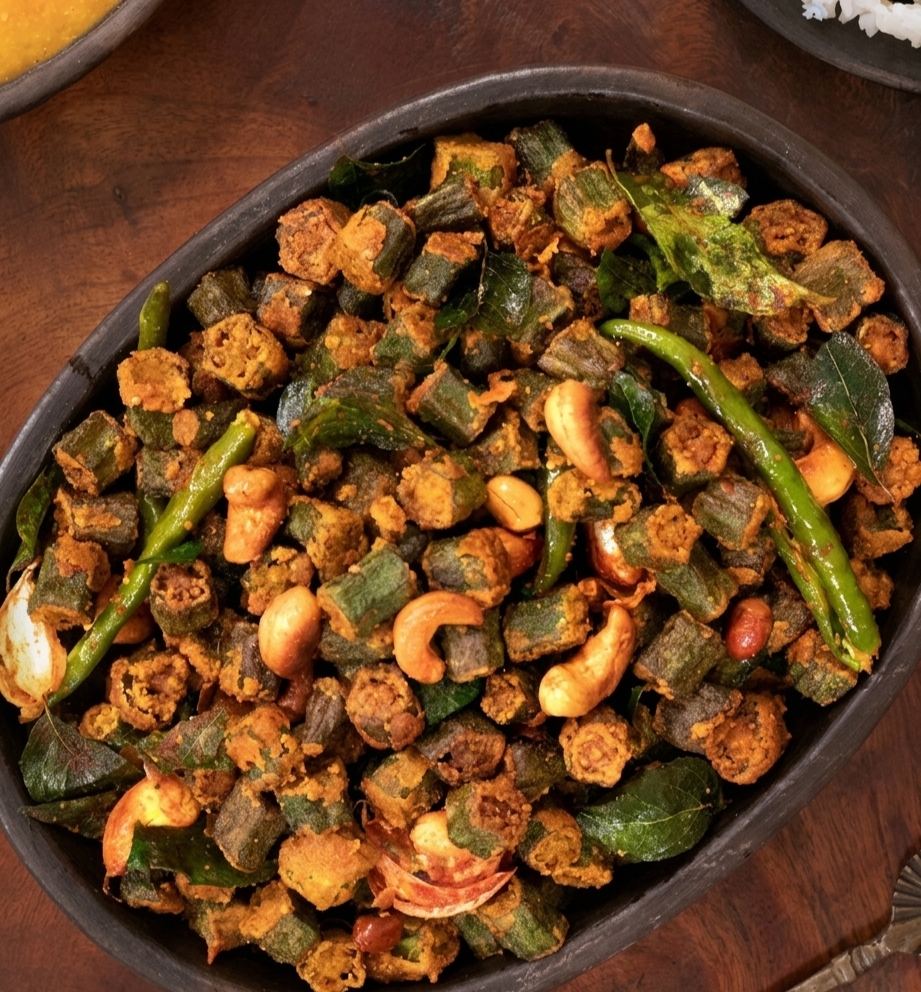

Bhindi Fry: The Ultimate Crispy Okra Recipe for a Flavorful Indian Side Dish
Description
Bhindi Fry is a crispy and spicy Indian side dish made with ladies finger (okra) coated in a seasoned flour mixture and fried to golden perfection.
Ingredients
Instructions
- Wash the okra thoroughly under running water. Spread on a kitchen towel and dry completely.
- Trim the ends and slice the bhindi lengthwise into thin strips.
- In a large bowl, combine gram flour, rice flour, corn flour, turmeric powder, chilli powder, coriander powder, cumin powder, and salt. Mix well.
- Toss the sliced bhindi in the flour mixture until evenly coated. Avoid adding water.
- Heat oil in a deep frying pan or kadai over medium flame. Test readiness by adding a tiny bit of flour; it should rise immediately.
- Fry coated bhindi in small batches, turning occasionally until golden brown and crispy.
- Fry cashews and peanuts until golden and crunchy. Then fry green chilies and curry leaves briefly.
- Place crispy bhindi in a serving bowl and top with fried nuts and crispy greens.