

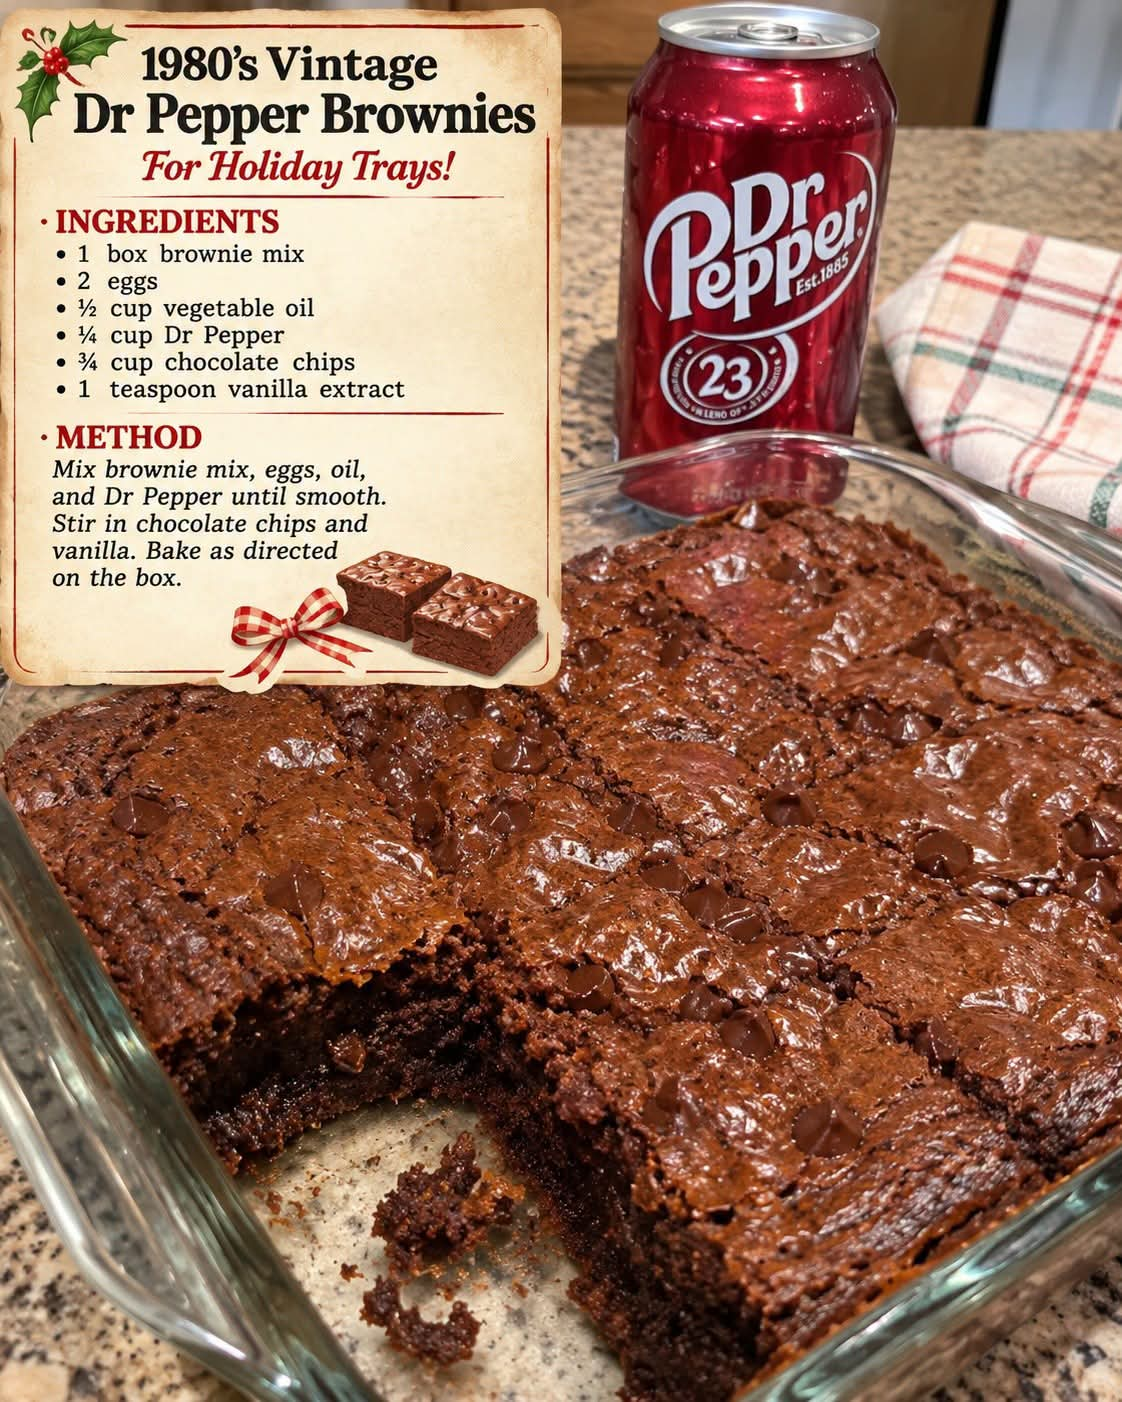
Take a delicious trip back in time with these 1980s Vintage Dr Pepper Brownies! This nostalgic chocolate dessert combines a classic boxed brownie mix with Dr Pepper soda, semi-sweet chocolate chips, and vanilla for an extra-rich, fudgy treat.
The Dr Pepper adds a subtle sweetness and helps create a moist brownie texture, while the chocolate chips melt into delicious pockets of chocolate throughout every bite. Add chopped pecans for a little crunch, or keep them simple and extra chocolatey.
These easy brownies are perfect for holiday gatherings, Christmas dessert trays, potlucks, bake sales, or whenever you’re craving an old-fashioned homemade treat without spending hours in the kitchen.
Why You’ll Love These Dr Pepper Brownies
- Easy shortcut recipe: Starting with boxed brownie mix makes preparation quick and simple.
- Rich chocolate flavor: Semi-sweet chocolate chips add extra chocolate goodness.
- Moist and fudgy: Dr Pepper adds moisture and a subtle sweetness to the batter.
- Nostalgic dessert: A fun vintage-inspired recipe that brings back memories of classic soda-shop treats.
- Customizable: Add chopped pecans or extra chocolate chips to make them your own.
- Perfect for sharing: Cut them into squares for holiday parties, family gatherings, and dessert platters.
Ingredients You’ll Need
- Brownie mix: One box of brownie mix, approximately 18–18.3 ounces, provides the chocolate base and makes this recipe convenient.
- Eggs: Two large eggs help bind the ingredients and create structure.
- Vegetable oil: Adds moisture and contributes to the soft brownie texture.
- Dr Pepper: One-quarter cup adds moisture and a subtle soda-inspired flavor.
- Semi-sweet chocolate chips: Three-quarters of a cup adds extra chocolate flavor and texture.
- Vanilla extract: Enhances the chocolate flavor and gives the brownies a warm, familiar aroma.
- Chopped pecans: Optional, but they add a lovely nutty crunch.
- Extra chocolate chips: Optional for sprinkling over the batter before baking.
How to Make 1980s Vintage Dr Pepper Brownies
Step 1: Prepare the Oven and Baking Dish
Preheat your oven to 350°F (175°C), or follow the temperature recommended on your brownie mix package. Lightly grease a 9×9-inch baking dish or line it with parchment paper.
Step 2: Combine the Main Ingredients
In a large mixing bowl, add the brownie mix, eggs, vegetable oil, and Dr Pepper soda.
Step 3: Mix the Batter
Stir everything together using a whisk or wooden spoon until the batter is smooth and well combined.
Step 4: Add the Vanilla
Pour in the vanilla extract and gently mix it into the brownie batter.
Step 5: Fold in the Chocolate Chips
Add the semi-sweet chocolate chips and fold them into the batter until evenly distributed.
Step 6: Add the Pecans
If using chopped pecans, gently stir them into the mixture. They add a delicious nutty flavor and extra texture.
Step 7: Transfer to the Baking Dish
Pour the brownie batter into the prepared baking dish. Use a spatula to spread it evenly into the corners.
Step 8: Add Extra Chocolate Chips
Sprinkle a few additional chocolate chips over the top if desired. This creates an extra chocolatey finish.
Step 9: Bake the Brownies
Place the dish in the preheated oven and bake according to the brownie mix package directions, usually 30–40 minutes for a 9×9-inch pan.
Step 10: Check for Doneness
Insert a toothpick approximately 2 inches from the edge of the pan. It should come out with a few moist crumbs but no raw batter. Avoid overbaking if you want a fudgy texture.
Step 11: Cool Completely
Remove the brownies from the oven and place the baking dish on a wire cooling rack. Allow them to cool completely for approximately 45–60 minutes.
Step 12: Slice and Serve
Once cooled, cut the brownies into 12–16 equal squares using a sharp knife. Arrange them on a serving platter or festive holiday tray and enjoy.
Tips for the Best Dr Pepper Brownies
- Use the correct brownie mix size: Choose a box measuring approximately 18–18.3 ounces for the ingredient proportions listed.
- Follow the package directions: Different brownie mixes may recommend slightly different baking temperatures and times.
- Don’t overmix: Stir until the ingredients are combined to avoid developing a tougher texture.
- Avoid overbaking: Check the brownies toward the beginning of the recommended baking window.
- Cool before slicing: Letting the brownies cool completely helps them set and makes cleaner slices.
- Use parchment paper: Leave a little overhang on the sides to make lifting the brownies out of the pan easier.
- Choose quality chocolate chips: Semi-sweet chocolate chips provide a balanced chocolate flavor without making the brownies overly sweet.
Easy Variations
Dr Pepper Chocolate Fudge Brownies
Add an extra sprinkle of chocolate chips before baking for an even richer chocolate finish.
Pecan Dr Pepper Brownies
Use the optional chopped pecans for a nutty flavor that pairs beautifully with the chocolate.
Dr Pepper Cherry Brownies
Add a small amount of finely chopped maraschino cherries, thoroughly drained and patted dry, for a cherry-inspired twist.
Double Chocolate Brownies
Replace the semi-sweet chocolate chips with dark chocolate chips or use a mixture of both.
Holiday Dr Pepper Brownies
Sprinkle festive red and green candy pieces over the batter before baking for a colorful Christmas dessert.
What to Serve with Dr Pepper Brownies
These brownies are delicious on their own, but a few simple additions can make them feel extra special.
- A scoop of vanilla ice cream
- Fresh strawberries or raspberries
- A drizzle of chocolate sauce
- A little whipped cream
- A glass of cold milk
- Hot coffee or cocoa
For a festive holiday dessert platter, arrange the brownie squares alongside cookies, fudge, and other homemade Christmas treats.
How to Store Dr Pepper Brownies
At room temperature: Allow the brownies to cool completely, then place them in an airtight container. Store at room temperature for up to 3–4 days.
In the refrigerator: Keep the brownies in a covered airtight container for up to one week. Let them come to room temperature before serving, or warm them briefly if you prefer a softer texture.
In the freezer: Wrap individual brownie squares tightly in plastic wrap and place them in a freezer-safe container or bag. Freeze for up to 3 months for best quality.
To reheat: Warm an individual brownie in the microwave for approximately 10–15 seconds. Serve with vanilla ice cream for a simple dessert.
Frequently Asked Questions
Does Dr Pepper make brownies taste like soda?
Not strongly. The soda adds moisture and a subtle sweetness, but the chocolate remains the main flavor. The finished brownies taste like rich chocolate brownies with a little nostalgic twist.
Can I use Diet Dr Pepper?
Regular Dr Pepper is recommended because it contains sugar and provides the intended flavor and sweetness. Diet soda may change the texture and sweetness of the finished brownies.
Can I use a different brownie mix?
Yes, but choose a box close to the specified 18–18.3-ounce size. Smaller or larger mixes may require adjustments to the other ingredients.
Do I have to add pecans?
No. Pecans are completely optional. Leave them out for a classic chocolate brownie texture.
How do I know when the brownies are done?
Insert a toothpick about 2 inches from the edge. It should come out with a few moist crumbs but no raw batter. The center should look set rather than liquid.
Why should I let the brownies cool before cutting?
Cooling allows the brownies to finish setting. Cutting them too early can make the squares fall apart or appear overly soft.
Can I make these brownies ahead of time?
Absolutely. Bake them a day ahead, let them cool completely, and store them in an airtight container. Cut and arrange them on a serving platter when you’re ready to serve.
1980s Vintage Dr Pepper Brownies Recipe Card
Prep Time: 10 minutes
Bake Time: 30–40 minutes
Cooling Time: 45–60 minutes
Total Time: Approximately 1 hour 25 minutes to 1 hour 50 minutes
Servings: 12–16 brownies
Category: Dessert
Cuisine: American
Ingredients
- 1 box (18–18.3 oz) brownie mix
- 2 large eggs
- 1/2 cup vegetable oil
- 1/4 cup Dr Pepper soda
- 3/4 cup semi-sweet chocolate chips
- 1 teaspoon vanilla extract
- 1/2 cup chopped pecans (optional)
- Extra chocolate chips for topping (optional)
Instructions
- Preheat your oven to 350°F (175°C), or the temperature recommended on your brownie mix package. Lightly grease a 9×9-inch baking dish or line it with parchment paper.
- In a large mixing bowl, add the brownie mix, eggs, vegetable oil, and Dr Pepper soda.
- Stir everything together using a whisk or wooden spoon until the batter is smooth and well combined.
- Add the vanilla extract and gently mix it into the brownie batter.
- Fold in the semi-sweet chocolate chips, making sure they are evenly distributed throughout the mixture.
- If using chopped pecans, gently stir them into the batter for an extra nutty crunch.
- Pour the brownie batter into the prepared baking dish and spread it evenly with a spatula.
- Sprinkle a few extra chocolate chips over the top for an extra rich, chocolatey finish.
- Place the baking dish in the preheated oven and bake according to the brownie mix package directions, usually 30–40 minutes for a 9×9-inch pan.
- Check for doneness by inserting a toothpick about 2 inches from the edge. It should come out with a few moist crumbs but no raw batter.
- Remove the brownies from the oven and place the baking dish on a wire cooling rack.
- Allow the brownies to cool completely for approximately 45–60 minutes before cutting.
- Once cooled, cut the brownies into 12–16 equal squares using a sharp knife.
- Arrange the brownies on a serving platter or festive holiday tray.
- Serve at room temperature or slightly warm with a scoop of vanilla ice cream if desired.
Final Thoughts
These 1980s Vintage Dr Pepper Brownies are a fun and easy way to bring a little nostalgia into your kitchen. With boxed brownie mix, a splash of Dr Pepper, and plenty of chocolate chips, you can create a rich, fudgy dessert with very little effort.
Whether you’re making them for Christmas, sharing them at a family gathering, or simply satisfying a chocolate craving, these brownies are sure to disappear quickly. Save this recipe and enjoy a sweet taste of vintage-inspired baking!