

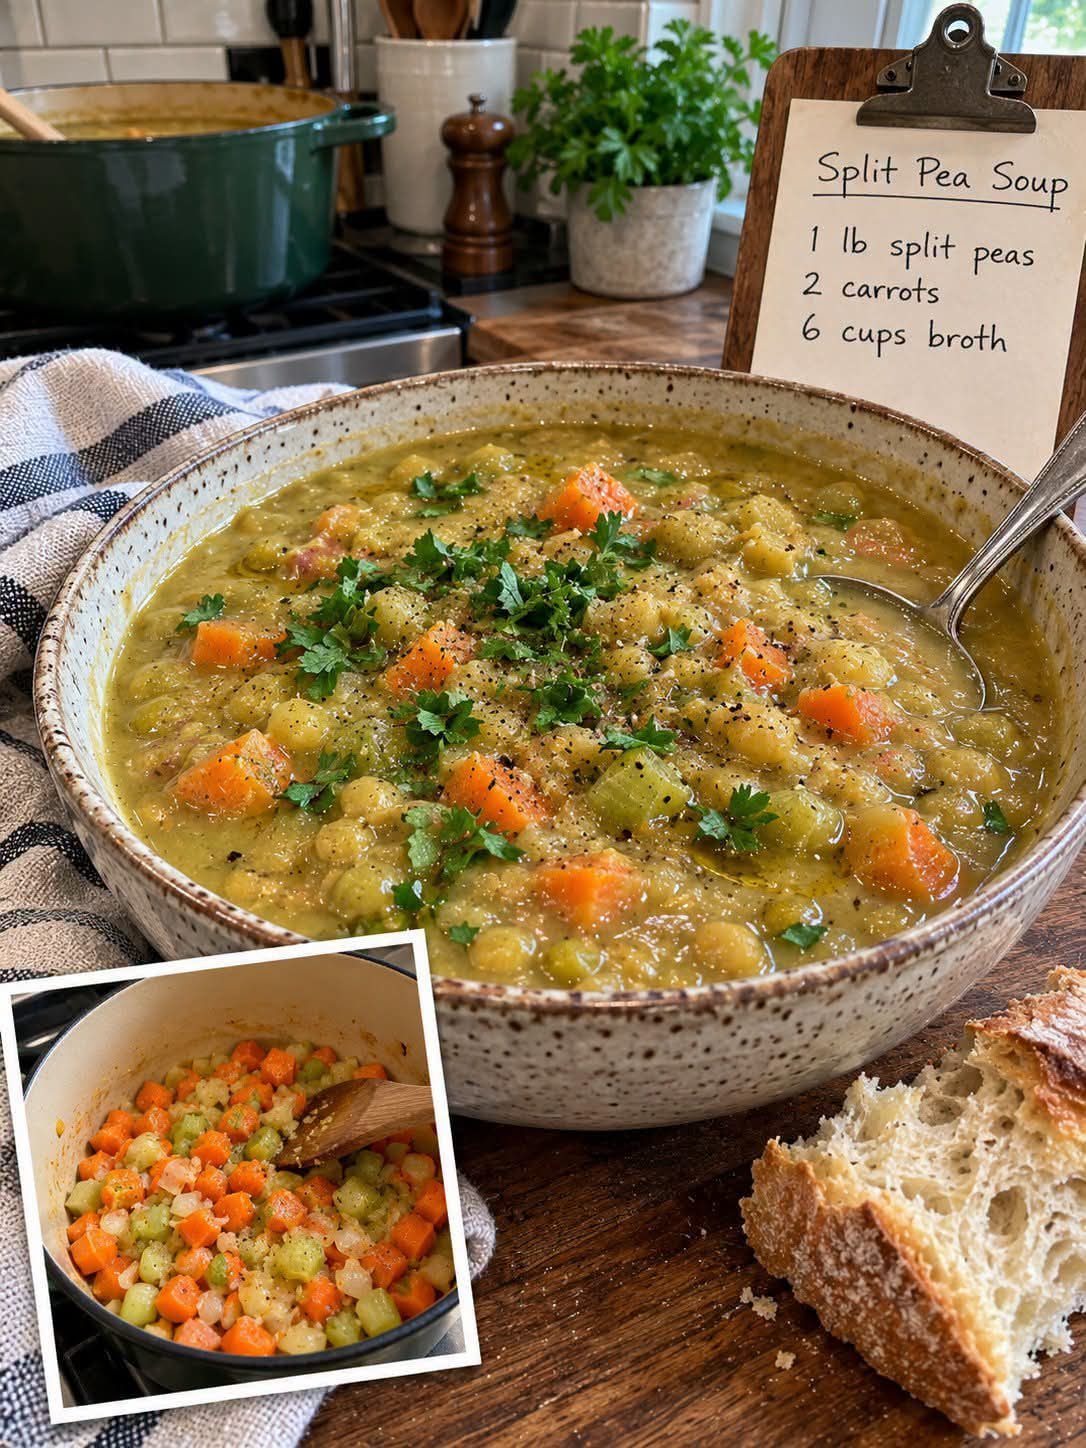
There’s nothing quite like a warm bowl of homemade Split Pea Soup on a chilly day. This hearty, old-fashioned soup is made with dried split peas, tender carrots, celery, onion, and garlic simmered together in a flavorful broth until everything becomes thick, creamy, and delicious.
The best part? You don’t need cream, complicated ingredients, or fancy equipment to get that naturally velvety texture. As the split peas cook, they soften and break down, creating a rich and comforting soup that’s both satisfying and budget-friendly.
This easy one-pot recipe is perfect for busy weeknights, cozy family dinners, or meal prep. It makes six generous servings and tastes even better the next day!
Why You’ll Love This Split Pea Soup
- Simple pantry ingredients: Dried split peas and everyday vegetables create a delicious homemade meal.
- One-pot recipe: Everything cooks together in one large pot, making cleanup easy.
- Naturally creamy: The split peas break down as they simmer, giving the soup a thick texture without adding cream.
- Budget-friendly: Affordable ingredients make a satisfying meal for the whole family.
- Easy to customize: Use chicken broth or vegetable broth, and add your favorite herbs and seasonings.
- Perfect for leftovers: The flavors develop beautifully overnight, making this soup ideal for meal prep.
Ingredients for Hearty Split Pea Soup
- 1 pound dried split peas, rinsed
- 1 tablespoon olive oil
- 1 medium onion, diced
- 2 carrots, sliced
- 2 celery stalks, diced
- 3 cloves garlic, minced
- 6 cups chicken or vegetable broth
- 1 bay leaf
- 1 teaspoon salt
- 1/2 teaspoon black pepper
How to Make Split Pea Soup
Step 1: Prepare the Split Peas
Place the dried split peas in a fine-mesh strainer and rinse them thoroughly under cold running water. Remove any small stones, shriveled peas, or debris.
Set aside. There’s no need to soak split peas before cooking.
Step 2: Sauté the Vegetables
Heat the olive oil in a large soup pot or Dutch oven over medium heat.
Add the diced onion, sliced carrots, and diced celery. Cook for 5–7 minutes, stirring occasionally, until the vegetables begin to soften and the onion becomes translucent.
Step 3: Add the Garlic
Stir in the minced garlic and cook for about 1 minute, just until fragrant.
Avoid letting the garlic brown, as it can develop a bitter flavor.
Step 4: Add the Split Peas and Broth
Add the rinsed split peas to the pot, followed by the chicken or vegetable broth.
Stir in the bay leaf, salt, and black pepper. Mix everything well so the peas are evenly distributed throughout the liquid.
Step 5: Simmer Until Tender
Bring the soup to a boil over medium-high heat. Once boiling, reduce the heat to low and partially cover the pot.
Simmer for 60–75 minutes, stirring occasionally and scraping the bottom of the pot to prevent the peas from sticking.
The soup is ready when the split peas are very tender and begin breaking down, creating a thick and creamy consistency.
Step 6: Adjust the Seasoning
Remove and discard the bay leaf.
Taste the soup and adjust the salt and black pepper as needed. If the soup becomes thicker than you prefer, stir in a little hot broth or water until it reaches your desired consistency.
Step 7: Serve Warm
Ladle the hot split pea soup into bowls and serve immediately.
For extra flavor, garnish with chopped fresh parsley, croutons, or a small drizzle of olive oil. Enjoy with warm bread for a comforting homemade meal!
Tips for the Best Split Pea Soup
Rinse the peas thoroughly. Always rinse dried split peas and check for small stones or debris before cooking.
No soaking required. Unlike some dried beans, split peas generally don’t need to be soaked before cooking.
Stir regularly. Split peas settle at the bottom of the pot as the soup thickens. Stir every 10–15 minutes, especially toward the end of cooking.
Be patient. Some older dried peas may take longer than 75 minutes to soften. Continue simmering and add a little extra liquid if necessary.
Adjust the thickness. For a thinner soup, add more broth or water. For an extra-thick soup, allow it to simmer uncovered for a few additional minutes.
Blend for extra creaminess. Use an immersion blender to blend about one-third of the soup, then stir it back into the pot. This creates a silky texture while keeping some vegetables whole.
Season toward the end. Broths can vary in saltiness, so taste the soup after cooking and adjust the seasoning before serving.
Delicious Variations
Smoky Split Pea Soup
Add 1/2 teaspoon smoked paprika along with the garlic for a deeper, smoky flavor without using meat.
Split Pea Soup with Thyme
Stir in 1/2 teaspoon dried thyme when adding the broth. Thyme pairs beautifully with the peas and vegetables.
Hearty Split Pea and Potato Soup
Add one peeled and diced potato to the pot along with the split peas. It makes the soup even heartier and adds extra creaminess.
Vegetarian Split Pea Soup
Use vegetable broth instead of chicken broth. The vegetables, garlic, and bay leaf provide plenty of flavor for a satisfying meat-free meal.
Yellow Split Pea Soup
Replace the green split peas with yellow split peas. They cook in a similar way and create a slightly milder flavor with a beautiful golden color.
Slow Cooker Split Pea Soup
Sauté the onion, carrots, celery, and garlic in olive oil first. Transfer them to a slow cooker with the rinsed split peas, broth, bay leaf, salt, and pepper. Cover and cook on LOW for 7–8 hours, or until the peas are completely tender.
What to Serve with Split Pea Soup
This hearty soup is filling on its own, but a few simple sides make it even better.
Try serving it with:
- Crusty French bread or sourdough
- Warm homemade biscuits
- Buttery garlic toast
- Cornbread
- A fresh green salad
- Grilled cheese sandwiches
- Homemade croutons
For a cozy dinner, serve a generous bowl of soup with warm buttered bread for dipping.
How to Store and Reheat Split Pea Soup
Refrigerator: Allow the soup to cool before transferring it to an airtight container. Refrigerate for up to 5 days.
Freezer: Divide the cooled soup into freezer-safe containers or individual portions. Freeze for up to 3 months for the best quality.
Thawing: Thaw frozen soup overnight in the refrigerator before reheating.
Reheating: Warm the soup gently in a saucepan over medium-low heat, stirring occasionally. Add a splash of broth or water because split pea soup naturally thickens as it sits.
Frequently Asked Questions
Do I need to soak split peas before making soup?
No. Split peas cook without soaking, so you only need to rinse them thoroughly and remove any debris before adding them to the pot.
Why is my split pea soup not getting soft?
Older dried peas can take longer to cook. Hard water may also slow the softening process. Continue simmering until the peas are tender, adding more liquid if needed.
Can I make split pea soup without ham?
Absolutely! This recipe doesn’t require ham. The onion, carrots, celery, garlic, and bay leaf create plenty of comforting flavor. Vegetable broth also makes it completely vegetarian.
Can I use yellow split peas instead of green?
Yes. Yellow split peas work just as well and have a slightly milder flavor. You can substitute them in the same quantity.
Why is my split pea soup so thick?
Split peas naturally break down during cooking and continue absorbing liquid as the soup cools. Simply stir in warm broth or water until you reach your preferred consistency.
Can I make split pea soup in advance?
Yes! This soup is excellent for making ahead. Prepare it a day in advance, refrigerate it in an airtight container, and gently reheat it before serving. Add extra broth if it has thickened overnight.
Can I freeze homemade split pea soup?
Yes. Let the soup cool completely, divide it into freezer-safe portions, and freeze for up to 3 months for the best quality. Thaw overnight in the refrigerator and reheat gently.
Final Thoughts
This Hearty Split Pea Soup is proof that simple ingredients can create an incredibly comforting meal. With tender split peas, sweet carrots, celery, onion, and garlic simmered in a savory broth, every spoonful is thick, flavorful, and satisfying.
Whether you’re making a cozy family dinner, preparing meals for the week, or looking for an affordable one-pot recipe, this homemade soup is a wonderful choice. Serve it with crusty bread, save the leftovers for tomorrow, and enjoy a warm bowl of comfort whenever you need it!