Vinegar and Baking Soda Shiny Floors: A Sparkle Revolution
Introduction
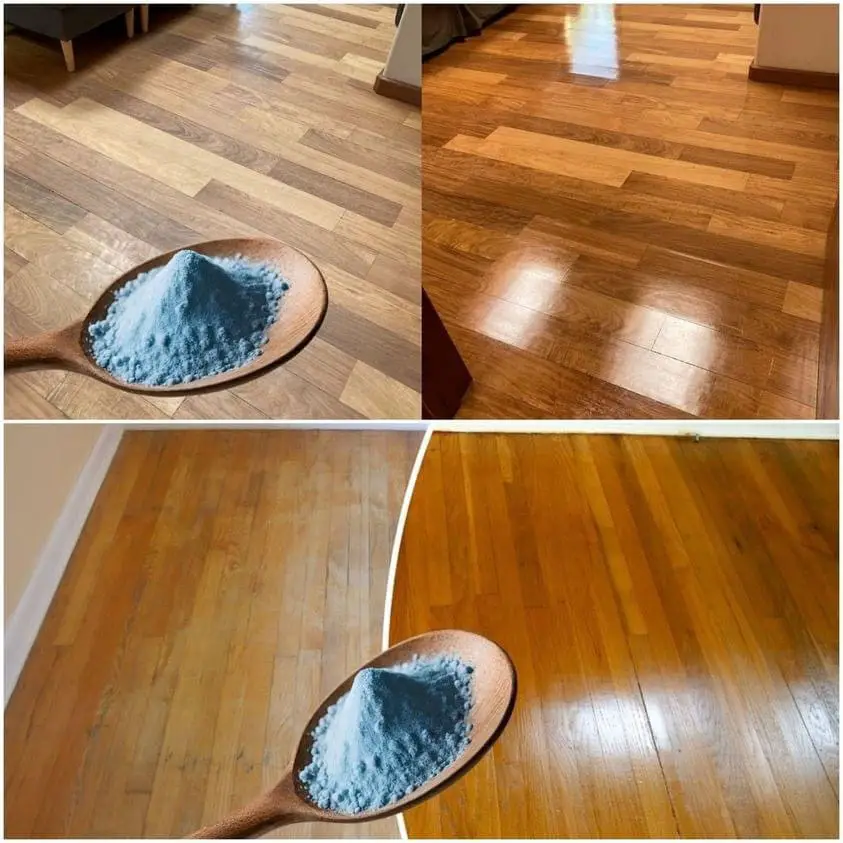
Keeping your floors spotless and gleaming can be a challenging task, especially with the plethora of cleaning products available on the market. Many of these products contain harsh chemicals that can be harmful to both the environment and your health. Thankfully, there is a simple, effective, and eco-friendly solution: vinegar and baking soda. This natural cleaning duo has been used for generations and can transform your floors, leaving them shiny and spotless. Let’s dive into the recipe and process for achieving sparkling floors with these household staples.
Ingredients and Tools
Ingredients:
- 1 cup white vinegar
- 1/2 cup baking soda
- 2 gallons warm water
- 10 drops essential oil (optional, for fragrance)
Tools:
- Mop
- Bucket
- Soft-bristle brush
- Microfiber cloths
Steps to Sparkling Floors
Step 1: Preparing the Solution
- Fill the Bucket: Start by filling your bucket with 2 gallons of warm water. Warm water helps to dissolve dirt and grime more effectively.
- Add Vinegar: Pour 1 cup of white vinegar into the bucket. Vinegar is a natural disinfectant and deodorizer, making it perfect for cleaning floors.
- Add Baking Soda: Slowly add 1/2 cup of baking soda to the bucket. Be cautious as baking soda will react with the vinegar, causing it to fizz and bubble.
- Optional: Add 10 drops of your favorite essential oil to the mixture. This step is optional but can leave your home smelling fresh.
Step 2: Mopping the Floor
- Dip and Wring: Dip your mop into the solution and wring it out well. It should be damp, not soaking wet.
- Start Mopping: Begin mopping the floor, starting from the farthest corner of the room and working your way towards the exit. This ensures you don’t walk over the freshly cleaned floor.
- Scrub Stubborn Spots: For any stubborn spots or stains, use a soft-bristle brush dipped in the solution and gently scrub.
Step 3: Drying the Floor
- Rinse the Mop: Rinse the mop with clean water and wring it out.
- Mop Again: Go over the floor again with the clean, damp mop to remove any residue.
- Dry the Floor: Use a dry microfiber cloth to dry the floor, preventing water spots and ensuring a shiny finish.
Tips for Best Results
Tip 1: Test in a Small Area
Before applying the solution to the entire floor, test it in a small, inconspicuous area. This is especially important for delicate or untreated floors to ensure there is no adverse reaction.
Tip 2: Use Microfiber Cloths
Microfiber cloths are excellent for drying and polishing floors. They are gentle, absorbent, and help achieve a streak-free shine.
Tip 3: Regular Maintenance
Regularly sweeping or vacuuming your floors will prevent dirt and debris from accumulating, making your cleaning routine more effective and efficient.
Tip 4: Avoid Excess Water
Excess water can damage certain types of flooring, such as hardwood. Always ensure your mop is well wrung out