

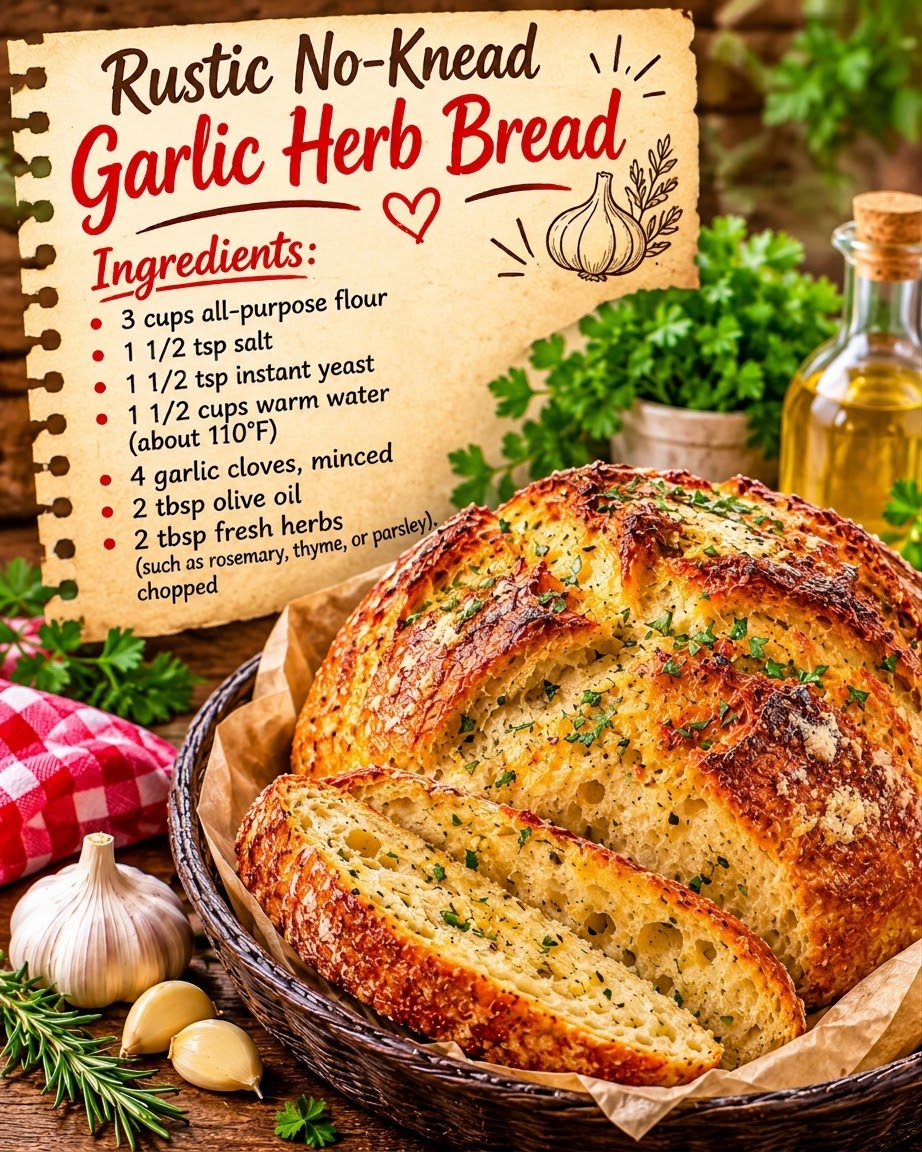
Nothing beats the smell of freshly baked homemade bread filling your kitchen, especially when it’s infused with fragrant garlic, fresh herbs, and a beautifully golden, crispy crust. This Rustic No-Knead Garlic Herb Bread is everything you love about artisan bakery bread, made right at home with simple ingredients and almost no hands-on effort.
With a soft, airy interior, a chewy texture, and a wonderfully crisp crust, this homemade garlic herb bread is incredibly delicious and surprisingly easy to prepare. The combination of minced garlic, olive oil, and fresh rosemary, thyme, or parsley gives every slice a rich, savory flavor that pairs beautifully with almost any meal.
The best part? There’s absolutely no kneading required! Simply mix the ingredients, cover the dough, and let it rise slowly for 12–18 hours. This long fermentation allows the dough to develop its flavor and creates the beautiful texture that makes artisan-style bread so special.
Baked in a preheated Dutch oven, the bread develops a gorgeous golden crust while remaining soft and tender inside. Whether you serve it alongside a warm bowl of soup, a hearty stew, pasta, or simply with butter and olive oil, this Rustic No-Knead Garlic Herb Bread is sure to become a favorite in your kitchen.
Why You’ll Love This Rustic No-Knead Garlic Herb Bread
- No kneading required: Just mix the ingredients and let time do most of the work.
- Incredible homemade flavor: Fresh garlic and aromatic herbs create a delicious savory loaf.
- Crispy artisan-style crust: Baking in a hot Dutch oven creates a beautifully golden, crunchy exterior.
- Soft and airy inside: The long fermentation helps develop a light, chewy texture.
- Simple ingredients: Everything comes together with basic pantry staples and fresh herbs.
- Perfect for any meal: Enjoy it with soups, salads, pasta, stews, or your favorite dipping sauces.
Ingredients You’ll Need
This easy homemade garlic herb bread uses simple ingredients to create a flavorful artisan-style loaf.
For the Bread
- 3 cups all-purpose flour
- 1½ teaspoons salt
- ½ teaspoon instant yeast
- 1½ cups warm water (about 100°F)
- 4 garlic cloves, minced
- 2 tablespoons olive oil
- 2 tablespoons fresh herbs, chopped (such as rosemary, thyme, or parsley)
Optional for Serving
- Softened butter
- Extra virgin olive oil
- Balsamic vinegar
- Garlic butter
- Your favorite homemade dipping sauce
How to Make Rustic No-Knead Garlic Herb Bread
Follow these simple steps to make a beautiful homemade loaf with a crispy crust and a soft, flavorful center.
Step 1: Combine the Dry Ingredients
In a large mixing bowl, add the all-purpose flour, salt, and instant yeast.
Stir everything together with a wooden spoon until the ingredients are evenly distributed.
This simple mixture forms the base of your no-knead bread dough.
Step 2: Add the Garlic and Fresh Herbs
Add the minced garlic and chopped fresh herbs to the flour mixture.
Rosemary and thyme are especially delicious in this recipe because they provide a wonderful earthy aroma. Fresh parsley adds a lighter, fresher flavor.
Stir gently to distribute the garlic and herbs throughout the dry ingredients.
Step 3: Add the Water and Olive Oil
Pour the warm water and olive oil into the bowl.
Using a wooden spoon or sturdy spatula, mix until a sticky, shaggy dough forms.
The dough should look rough and somewhat wet. This is completely normal for no-knead bread.
Don’t worry about making it smooth, and resist the temptation to knead it. The long resting time will allow the gluten to develop naturally.
Step 4: Let the Dough Rise
Cover the bowl tightly with plastic wrap or a clean kitchen towel.
Leave the dough at room temperature for 12–18 hours.
During this time, the dough will slowly ferment, become bubbly, and approximately double in size.
You’ll notice bubbles forming across the surface, which is a good sign that the yeast is working and the dough is developing flavor.
Step 5: Shape the Dough
Once the dough has finished rising, lightly flour a clean work surface.
Gently turn the dough out onto the floured surface.
Using lightly floured hands, fold the edges toward the center a few times to create a loose round shape.
Avoid kneading or pressing out all the air. You want to preserve the bubbles that developed during fermentation.
Step 6: Let the Dough Rest Again
Place the shaped dough onto a piece of parchment paper.
Cover it loosely with a clean kitchen towel and let it rest for 30–45 minutes.
This short resting period allows the dough to relax before baking.
Meanwhile, prepare your Dutch oven.
Step 7: Preheat the Dutch Oven
Place a Dutch oven with its lid inside your oven.
Preheat the oven to 450°F (230°C) for at least 30 minutes.
Preheating the Dutch oven is important because the hot cooking vessel helps create the bread’s beautiful crust.
Be extremely careful when handling the hot Dutch oven, as it will be very hot.
Step 8: Transfer the Dough
Carefully remove the hot Dutch oven from the oven.
Using the parchment paper as a sling, gently lower the dough into the Dutch oven.
Keep the parchment paper underneath the dough to make transferring easier and safer.
Cover immediately with the hot lid.
Step 9: Bake Covered
Place the covered Dutch oven back into the preheated oven.
Bake for 30 minutes with the lid on.
During this stage, the trapped steam helps the bread rise and creates the foundation for its signature crispy artisan-style crust.
Step 10: Finish Baking Uncovered
Carefully remove the lid and continue baking for another 10–15 minutes.
Allow the bread to develop a deep golden-brown crust.
The finished loaf should look beautifully rustic, and it should sound hollow when tapped on the bottom.
Step 11: Cool Before Slicing
Carefully remove the bread from the Dutch oven and transfer it to a wire cooling rack.
Allow it to cool for at least 30 minutes before slicing.
This resting time allows the inside of the bread to finish setting and helps prevent a gummy texture.
Step 12: Slice and Serve
Once cooled, slice the bread using a serrated bread knife.
Serve with softened butter, olive oil, garlic butter, soups, stews, pasta, or your favorite homemade dipping sauce.
Enjoy the wonderful combination of crispy crust, soft interior, and fragrant garlic herb flavor!
Tips for the Best No-Knead Garlic Herb Bread
A few simple tips will help you achieve the best possible results with this homemade artisan bread.
Measure the flour correctly: Too much flour can make the dough dry and heavy. For the most accurate results, use a kitchen scale or gently spoon the flour into your measuring cup before leveling it.
Use warm, not hot, water: Water around 100°F helps activate the yeast without overheating it.
Don’t add extra flour to the dough: The dough is supposed to be sticky and shaggy. Adding too much flour can make the finished bread dense.
Allow enough rising time: The 12–18-hour fermentation is important for developing the flavor and texture of this bread.
Use fresh herbs: Fresh rosemary, thyme, and parsley provide wonderful flavor and aroma.
Preheat the Dutch oven properly: A hot Dutch oven helps create a beautifully crisp exterior.
Don’t skip the cooling time: Cutting into bread too early can affect its texture. Allowing it to cool helps the crumb set properly.
Watch the final baking stage: Every oven is different, so keep an eye on the bread during the last 10–15 minutes to prevent over-browning.
Best Herbs to Use in Garlic Herb Bread
One of the best things about this recipe is how easily you can customize the herbs.
Here are some delicious combinations to try:
- Rosemary: Adds a strong, earthy, woodsy aroma that pairs beautifully with garlic.
- Thyme: Provides a subtle herbal flavor that works wonderfully in savory bread.
- Parsley: Adds freshness and a mild herbal taste.
- Basil: Gives the bread a Mediterranean-inspired flavor.
- Oregano: Adds a classic savory taste that pairs especially well with pasta and pizza.
- Mixed Italian herbs: A convenient option for a balanced combination of aromatic flavors.
You can use one herb or combine several to create your favorite flavor profile.
Delicious Variations
Want to make this rustic garlic herb bread even more special? Try one of these easy variations.
Cheesy Garlic Herb Bread
Add ½ cup of shredded Parmesan or mozzarella cheese to the dough along with the garlic and herbs. The cheese adds a delicious savory flavor throughout the loaf.
Roasted Garlic Bread
Replace the fresh minced garlic with roasted garlic cloves for a sweeter, milder garlic flavor.
Parmesan Rosemary Bread
Add ½ cup of freshly grated Parmesan cheese and 1 tablespoon of chopped fresh rosemary to create a delicious bakery-style variation.
Italian Herb Bread
Use a combination of dried oregano, basil, thyme, and rosemary for a classic Italian-inspired loaf.
Spicy Garlic Herb Bread
Add ½ teaspoon of crushed red pepper flakes to the dry ingredients for a gentle spicy kick.
What to Serve with Rustic No-Knead Garlic Herb Bread
This homemade bread is incredibly versatile and pairs beautifully with many different meals.
Here are some delicious serving ideas:
- Tomato soup: Dip thick slices into warm, creamy tomato soup for a comforting meal.
- Creamy chicken soup: The crispy crust is perfect for soaking up rich soup.
- Pasta dishes: Serve alongside spaghetti, lasagna, Alfredo pasta, or baked ziti.
- Beef stew: Use slices to soak up the flavorful gravy.
- Fresh salads: Add a slice of homemade garlic herb bread to your favorite salad for a satisfying lunch.
- Olive oil and balsamic vinegar: Serve warm slices with a simple dipping mixture.
- Garlic butter: Spread softened garlic butter over freshly sliced bread for an extra-special treat.
It’s also wonderful served as part of a holiday dinner or weekend family gathering.
How to Store Homemade Garlic Herb Bread
Proper storage helps keep your homemade bread fresh and delicious.
Room Temperature: Once completely cooled, store the bread in a paper bag or loosely wrapped in a clean kitchen towel for up to 2 days. Avoid sealing freshly baked bread while it’s still warm, as trapped moisture can soften the crust.
Refrigerator: Refrigeration is generally not recommended because it can make homemade bread stale more quickly.
Freezer: Slice the cooled loaf and place the slices in a freezer-safe bag or airtight container. Freeze for up to 3 months for the best quality.
Reheating: To refresh the crust, place the bread in a preheated 350°F (175°C) oven for approximately 5–10 minutes. Frozen slices can be toasted directly from frozen.
Frequently Asked Questions
Why is my no-knead bread dough so sticky?
Sticky dough is completely normal for this recipe. The relatively high water content helps create the airy interior and chewy texture. Avoid adding too much extra flour, as this can make the bread dense.
Can I use active dry yeast instead of instant yeast?
Yes. Active dry yeast can be used as a substitute. You can dissolve it in the warm water first and allow it to become foamy before mixing it with the remaining ingredients.
Can I use dried herbs instead of fresh herbs?
Absolutely! Dried herbs work well in this recipe. Use approximately 2 teaspoons of dried herbs in place of the 2 tablespoons of fresh herbs. Adjust according to your taste.
Can I make this bread without a Dutch oven?
Yes! You can bake the bread on a preheated baking sheet or in an oven-safe baking dish. To help develop a crispy crust, place an oven-safe pan with hot water on the lower rack during baking. Always use cookware specifically designed for oven use.
Why does the dough need to rise for 12–18 hours?
The long fermentation allows the yeast to slowly develop the dough’s flavor and structure. It also helps create the airy texture and characteristic holes found in artisan-style bread.
Can I prepare the dough overnight?
Yes! Overnight preparation is one of the easiest ways to make this bread. Mix the ingredients in the evening, cover the bowl, and let the dough rise at room temperature overnight.
How do I know when the bread is fully baked?
The bread should have a deep golden-brown crust and sound hollow when tapped on the bottom. If you use a food thermometer, the internal temperature should generally be around 200–210°F (93–99°C).
Can I freeze this garlic herb bread?
Yes! Allow the bread to cool completely, slice it, and freeze it in a sealed freezer-safe bag. You can reheat individual slices in a toaster or warm them in the oven.
Can I add cheese to the dough?
Yes! Parmesan, cheddar, and mozzarella are delicious additions. Add approximately ½ cup of shredded or grated cheese when mixing the garlic and herbs into the dry ingredients.
Rustic No-Knead Garlic Herb Bread Recipe Card
Prep Time: 15 minutes
Rise Time: 12–18 hours
Rest Time: 30–45 minutes
Cook Time: 40–45 minutes
Cooling Time: 30 minutes
Total Time: Approximately 14–20 hours
Servings: 8–10 slices
Course: Bread, Side Dish
Cuisine: American, Rustic Artisan
Cooking Method: Baking
Ingredients
- 3 cups all-purpose flour
- 1½ teaspoons salt
- ½ teaspoon instant yeast
- 1½ cups warm water (about 100°F)
- 4 garlic cloves, minced
- 2 tablespoons olive oil
- 2 tablespoons fresh herbs, chopped (rosemary, thyme, or parsley)
Instructions
- In a large mixing bowl, combine the flour, salt, and instant yeast. Stir until evenly distributed.
- Add the minced garlic and chopped fresh herbs, mixing them into the dry ingredients.
- Pour in the warm water and olive oil. Stir with a wooden spoon until a sticky, shaggy dough forms. No kneading is necessary.
- Cover the bowl tightly with plastic wrap or a clean kitchen towel and let the dough rise at room temperature for 12–18 hours, until bubbly and doubled in size.
- Lightly flour a clean work surface and gently turn out the dough. Fold the edges toward the center a few times to form a loose round loaf without kneading.
- Place the shaped dough onto a sheet of parchment paper, cover loosely, and let it rest for 30–45 minutes.
- Place a Dutch oven with its lid inside the oven and preheat to 450°F (230°C) for at least 30 minutes.
- Carefully remove the hot Dutch oven and lower the dough inside using the parchment paper. Cover with the lid.
- Bake for 30 minutes covered.
- Remove the lid and continue baking for another 10–15 minutes, until the bread develops a deep golden-brown crust and sounds hollow when tapped.
- Carefully transfer the bread to a wire rack and allow it to cool for at least 30 minutes before slicing.
- Slice and serve with butter, olive oil, soups, stews, or your favorite homemade dipping sauce.
Final Thoughts
This Rustic No-Knead Garlic Herb Bread is proof that homemade artisan-style bread doesn’t have to be complicated. With simple ingredients, a little patience, and no kneading required, you can create a beautiful loaf with a crispy golden crust, soft airy center, and irresistible garlic herb flavor.
It’s perfect for cozy family dinners, holiday meals, weekend baking, or simply enjoying a warm slice with butter and olive oil.
Once you experience the wonderful aroma of fresh garlic and herbs baking into a golden loaf, you’ll want to make this easy homemade bread again and again!