

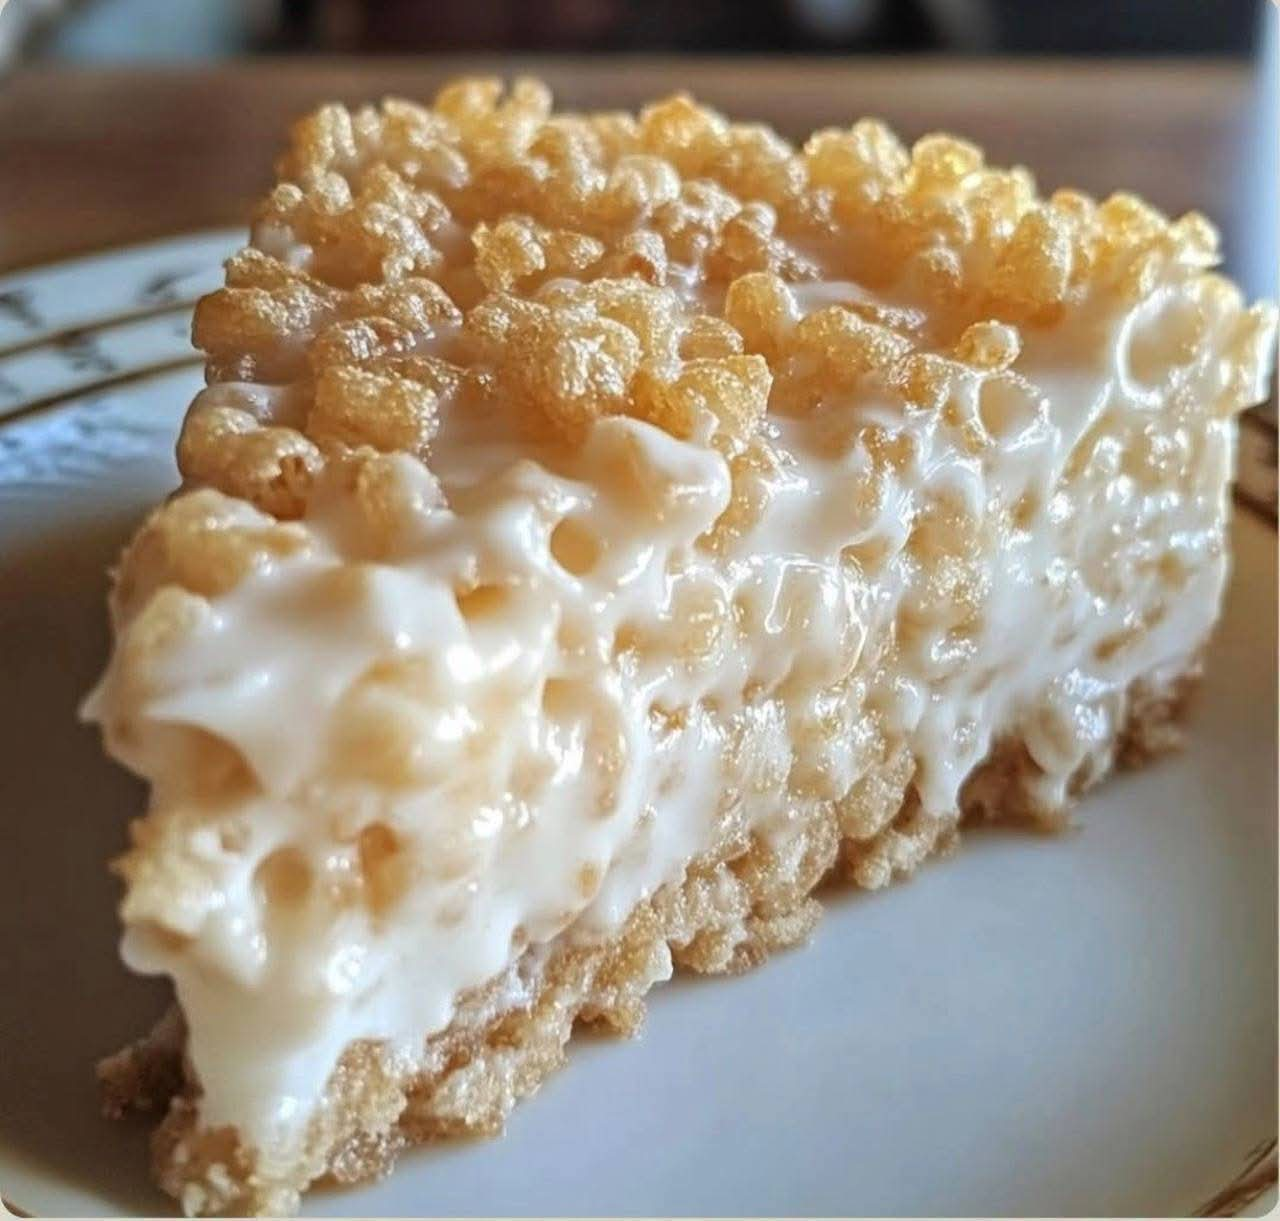
This Rice Krispy Treat No-Bake Cheesecake is the ultimate dessert mashup! Combining a sweet, chewy Rice Krispies and marshmallow crust with a rich, creamy cheesecake filling, this easy no-bake dessert is guaranteed to impress. Every bite offers the perfect combination of crispy, fluffy, and creamy textures. Best of all, there’s no oven required! It’s perfect for family gatherings, birthday parties, potlucks, or whenever you’re craving something sweet and special.
Ingredients
For the Rice Krispy Crust
- 3 tablespoons unsalted butter
- 1 package (10 ounces) mini marshmallows
- 6 cups Rice Krispies cereal
For the Cheesecake Filling
- 2 packages (8 ounces each) cream cheese, softened
- 1/2 cup granulated sugar
- 1 teaspoon vanilla extract
- 1 container (8 ounces) whipped topping (Cool Whip), thawed
Instructions
- Prepare the Pan: Lightly grease a 9-inch springform pan or deep pie dish with butter or nonstick cooking spray. For easier removal, you can also line the bottom with parchment paper.
- Melt the Butter: In a large saucepan, melt the butter over low heat.
- Add the Marshmallows: Add the mini marshmallows to the melted butter. Stir continuously until they are completely melted and the mixture becomes smooth.
- Mix in the Cereal: Remove the saucepan from the heat and immediately stir in the Rice Krispies cereal. Mix until all the cereal is evenly coated with the melted marshmallow mixture.
- Form the Crust: Quickly transfer the mixture to the prepared pan. Using lightly buttered hands or a greased spatula, gently press it evenly across the bottom and slightly up the sides to form a crust. Allow it to cool completely.
- Prepare the Cheesecake Filling: In a large mixing bowl, beat the softened cream cheese with an electric mixer until smooth and creamy.
- Add Sugar and Vanilla: Add the granulated sugar and vanilla extract. Beat until the mixture becomes light, fluffy, and well combined.
- Fold in the Whipped Topping: Gently fold the thawed Cool Whip into the cream cheese mixture using a spatula. Continue folding until the filling is smooth and fluffy.
- Assemble the Cheesecake: Spoon the cheesecake filling over the completely cooled Rice Krispy crust. Spread it evenly with a spatula, smoothing the top.
- Chill Until Set: Cover the cheesecake and refrigerate for at least 4 hours, or preferably overnight, until the filling is firm enough to slice.
- Slice and Serve: Carefully remove the cheesecake from the springform pan, cut into slices, and serve chilled. Enjoy this delicious combination of crispy marshmallow treats and creamy cheesecake!
Preparation Time
- Prep Time: 20 minutes
- Chill Time: 4 hours
- Total Time: 4 hours 20 minutes
- Servings: 8–10 servings
- Course: Dessert
- Cuisine: American
Tips for the Best Rice Krispy Treat No-Bake Cheesecake
- Use Fresh Marshmallows: Fresh mini marshmallows melt more smoothly and create a softer, chewier crust.
- Work Quickly: The melted marshmallow mixture sets quickly, so press the cereal mixture into the pan while it’s still warm.
- Avoid Pressing Too Hard: Gently press the Rice Krispy mixture into the pan. Pressing too firmly can make the crust hard and difficult to cut.
- Cool the Crust Completely: Make sure the crust is completely cool before adding the cheesecake filling to prevent it from becoming too soft.
- Use Room-Temperature Cream Cheese: Softened cream cheese creates a smoother filling without lumps.
- Fold Gently: Carefully fold in the whipped topping to keep the cheesecake filling light and fluffy.
- Chill Overnight: For the best texture and cleaner slices, refrigerate the cheesecake overnight.
Delicious Variations
- Chocolate Rice Krispy Cheesecake: Add mini chocolate chips to the cheesecake filling and drizzle melted chocolate over the top.
- Strawberry Cheesecake: Spread strawberry preserves over the cheesecake layer or add fresh sliced strawberries before serving.
- Peanut Butter Version: Add a few tablespoons of creamy peanut butter to the cheesecake filling for a delicious peanut butter twist.
- Caramel Cheesecake: Drizzle caramel sauce over the finished cheesecake and sprinkle with chopped toasted pecans.
- Oreo Rice Krispy Cheesecake: Add crushed Oreo cookies to the filling or sprinkle them over the top for extra chocolate flavor.
Storage Instructions
Store leftover Rice Krispy Treat No-Bake Cheesecake covered in the refrigerator for up to 5 days. For the best texture, enjoy it within the first 3 days.
To freeze, wrap the cheesecake tightly in plastic wrap and aluminum foil or place individual slices in a freezer-safe container. Freeze for up to 1 month for the best quality.
Thaw overnight in the refrigerator before serving. Keep refrigerated until ready to enjoy.
Frequently Asked Questions
Does Rice Krispy Treat No-Bake Cheesecake need to be baked?
No! This is a completely no-bake dessert. The marshmallow and cereal crust is prepared on the stovetop, while the cheesecake filling sets in the refrigerator.
Can I make this cheesecake ahead of time?
Absolutely! This cheesecake is perfect for preparing ahead. You can make it the day before your event and refrigerate it overnight for the best texture.
Why is my Rice Krispy crust too sticky?
The melted marshmallow mixture can be sticky while warm. Lightly butter your hands or spatula, or dampen them slightly with water, before pressing the mixture into the pan.
How do I keep the cheesecake filling firm?
Make sure the cream cheese is properly beaten, use fully thawed whipped topping, and refrigerate the cheesecake for at least 4 hours. Overnight chilling will give you even better results.
Can I use homemade whipped cream instead of Cool Whip?
Yes! You can substitute homemade whipped cream whipped to stiff peaks. However, the texture may be slightly softer than when using store-bought whipped topping.
Can I add toppings to this cheesecake?
Of course! Fresh berries, chocolate chips, caramel sauce, crushed cookies, or extra whipped cream all make delicious toppings.