

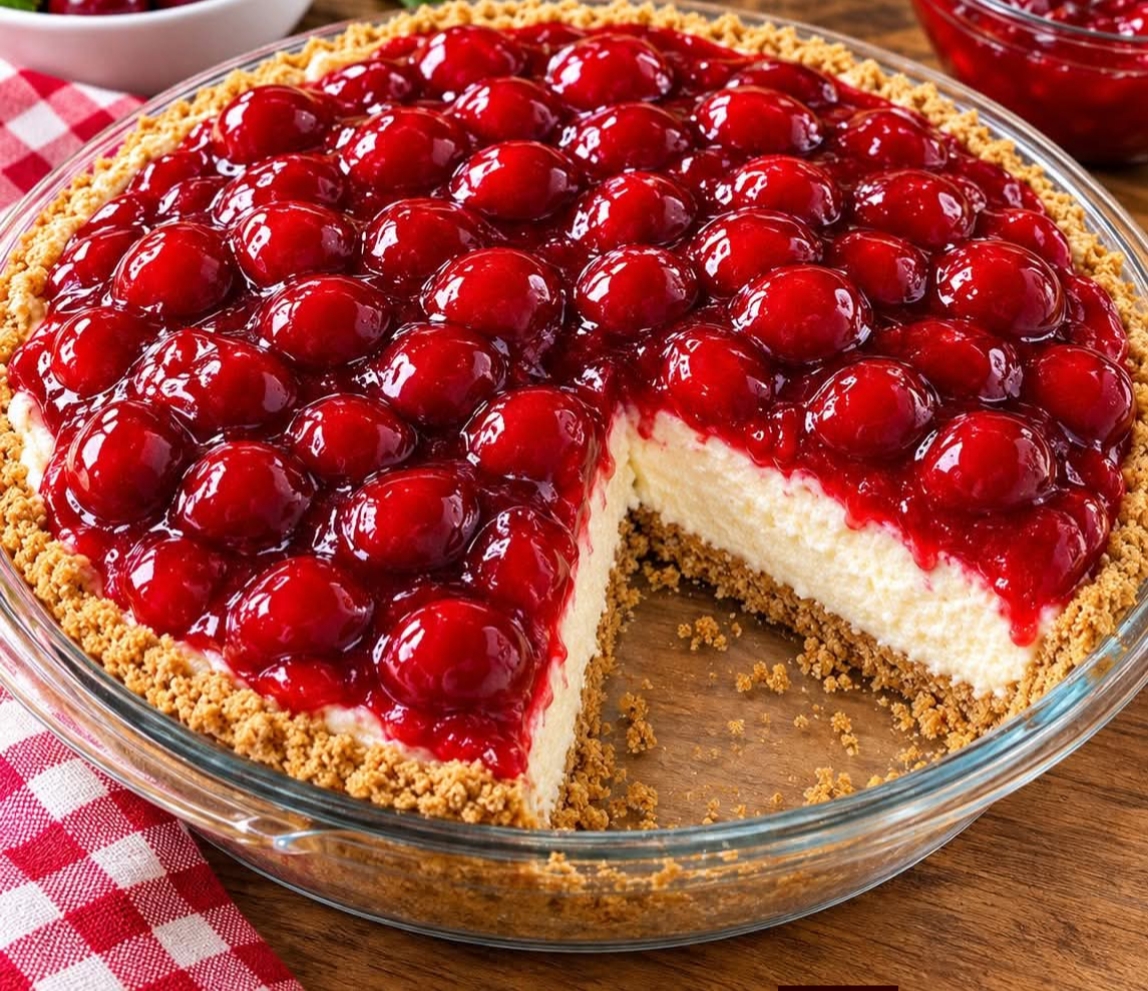
This No-Bake Cherry Cheesecake, also known as Cherries in the Snow, is a beautiful, creamy dessert that combines a buttery graham cracker crust, a fluffy cheesecake filling, and a sweet cherry topping. With its snowy white cream layer and glossy red cherries, this easy dessert looks stunning on any holiday table while requiring no oven and very little preparation.
If you love cheesecake but don’t want to deal with baking, this no-bake cherry cheesecake recipe is perfect for you. The smooth cream cheese filling is lightened with whipped topping, creating a soft, mousse-like texture that pairs wonderfully with the crunchy graham cracker crust. A generous layer of cherry pie filling adds fruity sweetness and a beautiful finishing touch.
Whether you’re preparing dessert for Christmas, Thanksgiving, a summer gathering, or a family dinner, Cherries in the Snow is an easy treat everyone will love. Simply assemble the layers, refrigerate until set, and serve chilled for a refreshing, creamy dessert that tastes as wonderful as it looks.
Why You’ll Love This No-Bake Cherry Cheesecake
- No oven required: This simple dessert comes together without baking, making it perfect when you want an easy homemade treat.
- Creamy and fluffy filling: Cream cheese and whipped topping create a smooth, light texture that melts in your mouth.
- Buttery graham cracker crust: A sweet, crunchy base balances the creamy filling beautifully.
- Beautiful presentation: The bright red cherries against the white cheesecake layer give this dessert its signature snowy appearance.
- Perfect for making ahead: Refrigerate the cheesecake for several hours before serving, making it convenient for parties and holidays.
- Easy to customize: Swap the cherry topping for strawberry, blueberry, or peach pie filling to create different flavors.
Ingredients You’ll Need
Here are the simple ingredients needed to make this delicious no-bake cherry cheesecake.
For the Graham Cracker Crust
- 2 cups graham cracker crumbs: Create a buttery, crunchy base for the cheesecake.
- 6 tablespoons unsalted butter, melted: Binds the crumbs together and adds rich flavor.
- 3 tablespoons granulated sugar: Adds sweetness and complements the buttery crust.
For the Creamy Cheesecake Filling
- 16 ounces cream cheese, softened: The main ingredient that creates the rich, creamy cheesecake layer.
- 1 cup powdered sugar: Sweetens the filling and blends smoothly into the cream cheese.
- 1 teaspoon vanilla extract: Adds warmth and enhances the flavor.
- 1 tablespoon lemon juice: Brightens the filling and balances its sweetness.
- 1 1/2 cups Cool Whip, thawed: Gives the cheesecake filling its light, fluffy texture.
For the Cherry Topping
- 1 can (21 ounces) cherry pie filling: Adds a sweet, fruity topping with beautiful red cherries.
How to Make No-Bake Cherry Cheesecake – Cherries in the Snow
This easy cherry cheesecake comes together in a few simple steps. The most important part is allowing enough time for the dessert to chill and set properly.
Step 1: Prepare the Graham Cracker Crust
In a medium mixing bowl, combine the graham cracker crumbs, melted butter, and granulated sugar. Stir until the crumbs are evenly coated and resemble damp sand.
Transfer the mixture to an 8-by-8-inch baking dish or a 9-inch springform pan. Press the crumbs firmly into an even layer using the back of a spoon or the bottom of a measuring cup.
Place the crust in the refrigerator while you prepare the cheesecake filling. Chilling helps the butter firm up and holds the crust together.
Step 2: Beat the Cream Cheese
Place the softened cream cheese in a large mixing bowl. Using a hand mixer, beat on medium speed for approximately 2 minutes, or until the cream cheese becomes completely smooth and creamy.
Scrape down the sides of the bowl as needed to ensure there are no lumps. Softened cream cheese is essential for achieving the best texture.
Step 3: Add the Sugar, Vanilla, and Lemon Juice
Add the powdered sugar, vanilla extract, and lemon juice to the cream cheese.
Beat again until all the ingredients are fully incorporated and the mixture is smooth. The lemon juice adds a subtle freshness that balances the richness of the cream cheese.
Step 4: Fold in the Whipped Topping
Add the thawed Cool Whip to the cream cheese mixture.
Using a rubber spatula, gently fold the whipped topping into the filling with slow, sweeping motions. Continue until the mixture is evenly combined and fluffy.
Avoid vigorous mixing, as this can deflate the whipped topping and make the filling less airy.
Step 5: Spread the Cheesecake Filling
Remove the chilled crust from the refrigerator. Spoon the cheesecake filling over the crust and spread it evenly from edge to edge.
Use the back of a spoon or an offset spatula to smooth the surface. Try to create an even layer so the cherry topping sits neatly on top.
Step 6: Add the Cherry Pie Filling
Open the can of cherry pie filling and spoon it over the cheesecake layer.
Gently spread the cherries and their glossy sauce across the entire surface, taking care not to press too hard into the creamy filling.
The bright red cherries against the white cheesecake create the beautiful appearance that gives this dessert its name, Cherries in the Snow.
Step 7: Refrigerate Until Set
Cover the dish with plastic wrap or a suitable lid and refrigerate for at least 4 hours.
For the best results, chill the cheesecake overnight. This allows the filling to firm up and makes it easier to cut into neat slices.
Step 8: Slice and Serve
Once the cheesecake has chilled completely, remove it from the refrigerator.
If using a springform pan, carefully release the sides before slicing. Cut into squares or wedges using a sharp knife, wiping the blade between cuts for cleaner slices.
Serve cold and enjoy the delicious combination of buttery crust, fluffy cheesecake filling, and sweet cherry topping.
Tips for the Best No-Bake Cherry Cheesecake
- Soften the cream cheese properly: Let it sit at room temperature for about an hour before mixing. Cold cream cheese can leave lumps in the filling.
- Press the crust firmly: A tightly packed crust is less likely to crumble when you serve the cheesecake.
- Use fully thawed whipped topping: Partially frozen whipped topping can make the filling uneven and difficult to mix.
- Fold gently: Use a spatula rather than vigorously beating the whipped topping into the cream cheese.
- Don’t rush the chilling time: At least 4 hours is important for helping the filling firm up. Overnight chilling is even better.
- Spread the cherry topping carefully: Spoon it gently over the filling to keep the layers distinct and attractive.
- Chill before slicing: A well-chilled cheesecake holds its shape better and produces cleaner portions.
Delicious Variations to Try
No-Bake Strawberry Cheesecake
Replace the cherry pie filling with strawberry pie filling for a sweet, fruity variation. Fresh sliced strawberries can also be added just before serving.
Blueberry Cheesecake
Use blueberry pie filling instead of cherries. The deep purple-blue topping pairs beautifully with the creamy white filling and buttery crust.
Chocolate Cherry Cheesecake
Replace the graham cracker crumbs with crushed chocolate sandwich cookies. The chocolate crust and sweet cherry topping create a delicious combination reminiscent of Black Forest desserts.
Peach Cheesecake
Top the cheesecake with peach pie filling for a summery variation. The sweet peaches complement the creamy filling and buttery crust.
Individual Cherry Cheesecake Cups
Instead of using one large dish, divide the graham cracker crumbs between small dessert cups or jars. Add the cheesecake filling and cherry topping in individual layers, then refrigerate until set.
These individual portions are perfect for parties, potlucks, and gatherings where you want an easy dessert that doesn’t require slicing.
Cherries in the Snow with Angel Food Cake
For a different take on the classic dessert, replace the graham cracker crust with bite-sized pieces of prepared angel food cake. Layer the cake with the creamy filling and cherry topping in a trifle dish for a light, fluffy dessert.
What to Serve with No-Bake Cherry Cheesecake
This creamy cherry cheesecake is delicious on its own, but you can pair it with simple accompaniments for an extra-special dessert.
- Fresh cherries: Add a few fresh cherries on top for a beautiful presentation when they’re in season.
- Whipped cream: A small swirl of whipped cream makes each serving even more indulgent.
- Fresh berries: Strawberries or raspberries add freshness and a slightly tart contrast.
- Coffee: A cup of hot coffee balances the sweetness of the cheesecake.
- Tea: Serve with black tea or a mild herbal tea for an afternoon treat.
- Vanilla ice cream: A small scoop creates an extra-creamy dessert for anyone who loves sweet treats.
Because the cheesecake is rich and creamy, small slices are usually enough to satisfy a sweet craving.
How to Store No-Bake Cherry Cheesecake
Proper storage keeps the cheesecake fresh and helps maintain its creamy texture.
Refrigerator: Cover the cheesecake tightly and refrigerate for up to 4 days. Keep it chilled until you’re ready to serve, and return leftovers to the refrigerator promptly.
Freezer: For best results, freeze the cheesecake without the cherry topping. Wrap it tightly in plastic wrap and then foil, or store it in a freezer-safe container for up to 1 month for best quality. Thaw overnight in the refrigerator and add the cherry topping before serving.
Make-ahead preparation: This dessert is ideal for preparing the day before a gathering. Assemble the crust and filling, add the cherry topping, cover, and refrigerate overnight.
Avoid leaving the cream cheese-based dessert at room temperature for more than 2 hours.
Frequently Asked Questions
Why Is It Called Cherries in the Snow?
The name comes from the contrast between the bright red cherry topping and the snowy white cheesecake filling. It is a popular name for creamy cherry desserts served at family gatherings and holidays.
Does No-Bake Cherry Cheesecake Need to Be Baked?
No. This recipe uses a refrigerated graham cracker crust and a cream cheese filling that firms up in the refrigerator. There is no need to turn on the oven.
How Long Does No-Bake Cherry Cheesecake Take to Set?
Refrigerate the cheesecake for at least 4 hours. For the best texture and easier slicing, let it chill overnight.
Why Is My Cheesecake Filling Too Soft?
A soft filling may result from cream cheese that wasn’t beaten properly, whipped topping that wasn’t fully thawed, or insufficient chilling time. Make sure the cream cheese is smooth before adding the other ingredients and refrigerate the dessert long enough to set.
Can I Use Homemade Whipped Cream Instead of Cool Whip?
Yes. You can substitute homemade whipped cream, provided it is whipped to firm peaks before being gently folded into the cream cheese mixture. The final texture may vary slightly, and the dessert should remain refrigerated until serving.
Can I Use a Store-Bought Graham Cracker Crust?
Yes. You can use a prepared graham cracker crust to save time. Simply prepare the filling, spread it into the crust, add the cherry topping, and refrigerate until set.
Can I Make This Cheesecake the Night Before?
Absolutely! Making it the night before is an excellent option. The extended chilling time helps the filling firm up, makes slicing easier, and gives you one less thing to prepare on the day of your event.
Can I Use Fresh Cherries Instead of Cherry Pie Filling?
Yes, but fresh cherries need to be pitted and prepared with a little sugar and a thickener to create a topping similar to cherry pie filling. Allow the topping to cool completely before spreading it over the cheesecake.
No-Bake Cherry Cheesecake – Cherries in the Snow
This No-Bake Cherry Cheesecake – Cherries in the Snow is an easy, beautiful dessert that combines a buttery graham cracker crust, a light and creamy cheesecake filling, and a sweet cherry topping. With no baking required and simple ingredients, it’s a wonderful choice for busy holidays, family gatherings, potlucks, or whenever you need a delicious make-ahead dessert.
The contrast of the white cheesecake and glossy red cherries makes every slice look special, while the creamy texture and fruity flavor make it hard to resist.
Prepare it ahead, let it chill until perfectly set, and serve it cold for a refreshing dessert everyone will love. Once you try this easy Cherries in the Snow cheesecake, it may become one of your favorite no-bake desserts.