Introduction
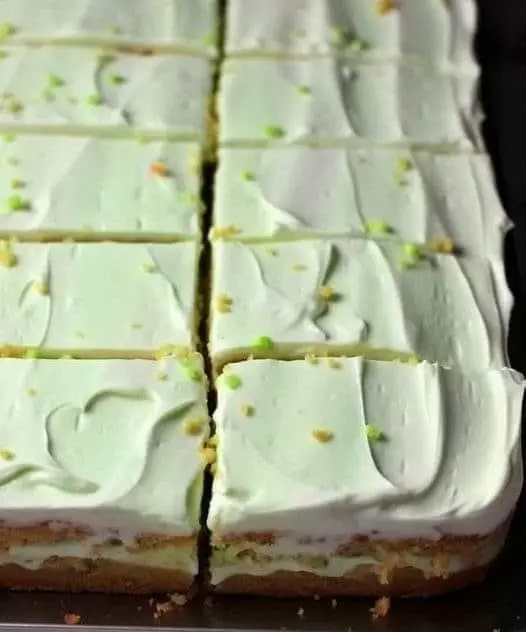
Key Lime Bars are a delightful and refreshing dessert that perfectly balances the tartness of key limes with the sweetness of a creamy filling. These bars are set on a buttery graham cracker crust and topped with a light whipped cream, making them a hit at any gathering. Whether you’re serving them at a summer barbecue or a holiday party, Key Lime Bars offer a zesty twist on a classic dessert that’s sure to impress. This recipe will guide you through each step of making the crust, filling, and topping, so you can enjoy this luscious treat at home.
Ingredients
For the Crust:
-
1 1/2 cups graham cracker crumbs
These form the base of the bars, providing a crunchy and buttery layer. -
1/4 cup granulated sugar
Adds sweetness to the crust. -
1/2 cup unsalted butter, melted
Binds the crumbs together and adds rich flavor.
For the Filling:
-
1 can (14 ounces) sweetened condensed milk
The base of the creamy filling, adding sweetness and richness. -
1/2 cup key lime juice
Freshly squeezed is best for authentic flavor, but bottled can be used in a pinch. -
4 large egg yolks
Adds structure and richness to the filling. -
1 teaspoon lime zest (optional)
Enhances the lime flavor with an extra citrusy kick.
For the Topping:
-
1 cup heavy whipping cream
Whipped to soft peaks for a light, airy topping. -
2 tablespoons powdered sugar
Sweetens the whipped cream. -
Lime zest or chopped nuts (optional)
For garnish, adding a pop of color and extra flavor.
Instructions
Making the Crust
- Preheat the Oven: Preheat your oven to 350°F (175°C). This ensures the oven is ready for the crust to bake evenly.
- Prepare the Crust Mixture: In a medium-sized bowl, combine the graham cracker crumbs, granulated sugar, and melted butter. Stir until the mixture resembles wet sand and the crumbs are fully coated.
- Press the Crust: Pour the crumb mixture into a 9×9-inch baking dish lined with parchment paper or lightly greased. Press the crumbs firmly and evenly into the bottom of the pan using the back of a spoon or the bottom of a measuring cup.
- Bake the Crust: Place the baking dish in the preheated oven and bake for 10 minutes, or until the crust is lightly golden and set. Remove from the oven and let it cool slightly while you prepare the filling.
Preparing the Filling
- Mix the Filling: In a large mixing bowl, whisk together the sweetened condensed milk, key lime juice, egg yolks, and lime zest (if using) until the mixture is smooth and well combined.
- Pour the Filling: Pour the lime mixture over the cooled crust, spreading it evenly with a spatula.
- Bake the Bars: Return the baking dish to the oven and bake for 15-20 minutes, or until the filling is set and the edges are slightly golden. The center should jiggle slightly when shaken but will firm up as it cools.
- Cool and Chill: Remove the bars from the oven and let them cool to room temperature. Once cooled, cover the baking dish and refrigerate for at least 2 hours, or until fully chilled and firm.
Making the Whipped Cream Topping
- Whip the Cream: In a large mixing bowl, whip the heavy whipping cream with an electric mixer on medium-high speed until soft peaks form.
- Add Sugar: Gradually add the powdered sugar and continue whipping until stiff peaks form.
- Spread the Topping: Once the bars are chilled, spread the whipped cream evenly over the top using a spatula. You can also pipe the whipped cream for a more decorative finish.
Garnishing and Serving
- Garnish: If desired, garnish the bars with lime zest or chopped nuts for added texture and flavor.
- Slice and Serve: Use a sharp knife to slice the bars into squares or rectangles. Serve chilled and enjoy the bright, tangy flavor of key lime in every bite.
Tips for Perfect Key Lime Bars
- Use Fresh Key Limes: For the most authentic flavor, use freshly squeezed key lime juice. If key limes are not available, you can substitute with regular limes, but the flavor will be slightly different.
- Chill the Bars Thoroughly: Ensure the bars are fully chilled before adding the whipped cream topping. This helps the bars set properly and makes slicing easier.
- Even Crust: Press the crust mixture firmly and evenly into the pan to ensure it holds together when sliced.
- Whipped Cream: For a stable whipped cream topping, make sure the cream is well-chilled before whipping. Adding powdered sugar helps to stabilize the whipped cream so it holds its shape.
FAQs
Can I use regular limes instead of key limes?
Yes, you can use regular limes if key limes are unavailable. However, key limes have a more intense, tangy flavor that is traditional for this recipe.
How long can I store Key Lime Bars?
Key Lime Bars can be stored in an airtight container in the refrigerator for up to 3 days. They are best served cold.
Can I freeze Key Lime Bars?
Yes, you can freeze the bars without the whipped cream topping. Wrap them tightly in plastic wrap and store in a freezer-safe container for up to 2 months. Thaw in the refrigerator overnight before topping with whipped cream and serving.
What if I don’t have a 9×9-inch baking dish?
You can use an 8×8-inch dish for thicker bars, but you may need to adjust the baking time slightly. Alternatively, a 9×13-inch dish can be used for thinner bars, but the cooking time should be reduced.
Can I make these bars in advance?
Absolutely! Key Lime Bars are a great make-ahead dessert. Prepare the bars up to the chilling stage, then cover and refrigerate. Add the whipped cream topping just before serving.
Can I add other toppings?
Yes, feel free to get creative with your toppings. Some popular options include toasted coconut, crushed graham crackers, or even a drizzle of white chocolate.
These Key Lime Bars are a delicious and refreshing treat that captures the essence of a classic key lime pie in an easy-to-make bar form. Whether for a special occasion or just a sweet indulgence, these bars are sure to be a hit!