How to Make an Easy Dairy-Free, Gelatin-Free Dessert: A Delicious and Healthy Banana Ice Cream Recipe
Craving a dessert that’s creamy, indulgent, and healthy but without any dairy or gelatin? Look no further! In this article, I’ll guide you through a simple, 2-ingredient banana dessert that’s not only delicious but also suitable for vegan, dairy-free, and gluten-free diets. With the natural sweetness of bananas and the creamy texture you’d expect from ice cream, this dessert is perfect for anyone who wants a guilt-free treat.
Bananas are the star of the show in this recipe, and the process couldn’t be simpler. Whether you’re a pro in the kitchen or just starting out, you’ll find this dessert incredibly easy to make, with no special equipment or hard-to-find ingredients required.
Let’s dive in!
Why Choose a Dairy-Free and Gelatin-Free Dessert?
Desserts that are free of dairy and gelatin are perfect for people with dietary restrictions or those simply looking to eat healthier. This banana-based treat fits the bill perfectly—it’s naturally sweet, vegan-friendly, and uses no added sugar or artificial ingredients. Plus, bananas are a great source of potassium, fiber, and vitamins B6 and C, making this dessert both tasty and nutritious.
Ingredients You’ll Need
This recipe requires only two ingredients, but you can customize it to your taste with a variety of optional toppings. Here’s the list:
- 15 ripe bananas
- Ground cinnamon (optional) or other toppings like cocoa powder, crushed nuts, or coconut flakes
Step-by-Step Instructions for Making Banana Ice Cream
1. Prepare the Bananas
Start by selecting ripe bananas. The riper the bananas, the sweeter your dessert will be, as bananas naturally become sweeter as they ripen.
Peel 5 bananas and slice them into smaller chunks. Cutting the bananas into smaller pieces will help them freeze faster and blend more easily later. Place these banana slices into a ziplock bag or airtight container, and freeze until they’re completely solid—this typically takes about 2-3 hours.
2. Freeze in Batches
Given that we’re using 15 bananas in total, it’s best to freeze them in batches to ensure they freeze evenly. Repeat the process for the remaining bananas, cutting them into pieces and freezing them in separate batches.
Once all your bananas are frozen solid, you’re ready for the next step.
3. Blend the Bananas
Now it’s time to turn those frozen bananas into creamy, delicious “ice cream.” Remove the first batch of frozen bananas from the freezer and add them to a high-powered blender or food processor. Blend on low to medium speed, scraping down the sides as needed.
At first, the bananas will break into small, crumbly pieces. Keep blending, and after a few minutes, the bananas will turn into a smooth and creamy mixture, resembling soft-serve ice cream.
4. Repeat the Blending Process
Once the first batch of bananas is fully blended, transfer the creamy banana mixture to a container and place it in the freezer to keep it chilled. Now, take out the next batch of frozen bananas, blend them until creamy, and add them to the same container.
Repeat this process for all the batches of bananas until you’ve blended all 15 bananas into a smooth, creamy dessert.
5. Add Toppings and Serve
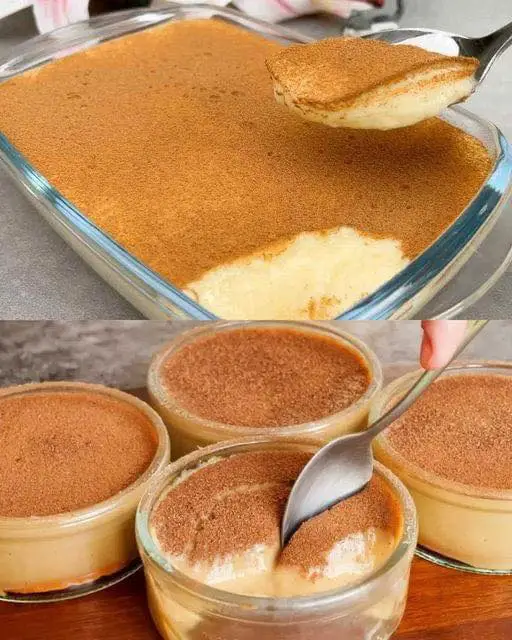
Your banana ice cream is now ready to be served! You can enjoy it as is, or get creative with toppings. Ground cinnamon is a great addition if you want a hint of spice. You could also sprinkle some cocoa powder, drizzle some nut butter, or top it with chopped nuts, shredded coconut, or fresh berries for extra texture and flavor.
If you prefer a firmer texture, you can freeze the banana mixture for an additional 30 minutes to 1 hour before serving. Otherwise, scoop it straight from the blender and enjoy!
Tips for Making the Best Dairy-Free Banana Dessert
1. Use Ripe Bananas
The ripeness of the bananas is key to achieving the best flavor. Ripe bananas are naturally sweeter and make the dessert taste more like traditional ice cream without the need for added sugars.
2. Freeze in Small Batches
Freezing the bananas in small chunks and batches makes the blending process easier and prevents your blender from getting overloaded. It also ensures that the bananas blend smoothly into a creamy texture.
3. Experiment with Flavors
Bananas serve as a great base for this dessert, but feel free to experiment with other flavors. You can add a teaspoon of vanilla extract to enhance the flavor or mix in frozen berries, mangoes, or even cocoa powder to create different variations.
4. Don’t Rush the Blending
It might take a few minutes for the bananas to fully break down and reach that creamy consistency, but be patient. If your blender is struggling, add a tiny splash of plant-based milk (like almond or oat milk) to help things along.
5. Store Properly
If you’re making this dessert ahead of time or have leftovers, transfer the banana ice cream into an airtight container and store it in the freezer. When you’re ready to eat, allow it to soften for about 10-15 minutes at room temperature before serving.
Frequently Asked Questions (FAQs)
1. Can I use overripe bananas for this recipe?
Yes, overripe bananas are perfect for this recipe! The riper the bananas, the sweeter and creamier your dessert will be. Just make sure they’re not too mushy, as that could affect the texture.
2. What if I don’t have a high-powered blender?
A regular blender or food processor can work, but it may take longer to blend the bananas into a creamy consistency. You can also let the frozen bananas sit at room temperature for a few minutes to soften slightly before blending, which will make the process easier.
3. Can I add sweeteners to this dessert?
If you prefer your dessert a little sweeter, you can add natural sweeteners like maple syrup, honey, or agave nectar. However, if your bananas are ripe, you probably won’t need any added sugar as the bananas themselves provide plenty of sweetness.
4. How long does this banana ice cream last in the freezer?
Banana ice cream can last for up to a week in the freezer if stored in an airtight container. Keep in mind that it may become quite firm after prolonged freezing, so let it soften for a few minutes before scooping.
5. Can I make other flavors with this base?
Absolutely! Banana ice cream is incredibly versatile. You can blend in frozen strawberries, blueberries, or even mango to create a fruity twist. For a chocolate version, try adding a tablespoon of cocoa powder or melted dark chocolate.
6. Is this dessert suitable for kids?
Yes, kids love this banana ice cream, and it’s a great way to sneak in some fruit! Plus, since it’s free from added sugars and artificial ingredients, it’s a healthy treat that parents can feel good about serving.
Final Thoughts
This easy, dairy-free, and gelatin-free banana dessert is the perfect solution when you’re craving something sweet but want to keep things healthy. With just two simple ingredients—bananas and your choice of toppings—you can create a naturally sweet and creamy treat that’s as satisfying as traditional ice cream, without the guilt.
Whether you enjoy it on its own or get creative with toppings, this banana “nice cream” is sure to become a favorite in your household. The next time you have ripe bananas on hand, don’t hesitate to give this recipe a try!