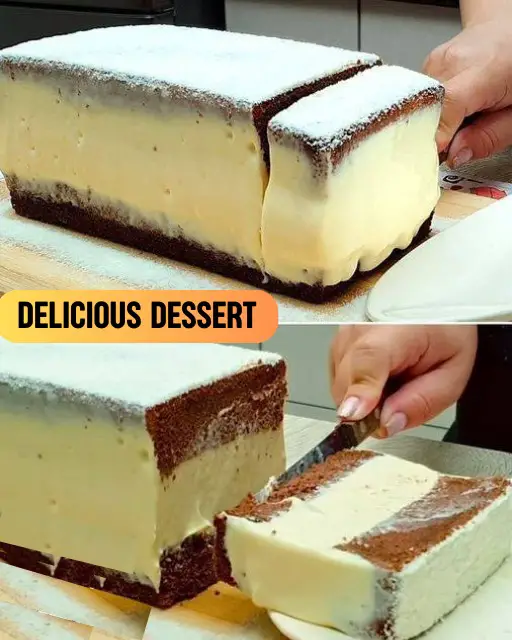
How to Make a Delicious Iced Cake
This 5-minute iced cake is the ultimate quick-fix dessert for when you’re craving something sweet and decadent but don’t have much time. With a moist cocoa cake base and a rich white chocolate filling, this treat is perfect for any occasion!
Why You’ll Love This Recipe
- Quick and Easy: Ready in just 5 minutes of preparation time and a bit of chilling, it’s ideal for last-minute dessert needs.
- Delicious Layers: The combination of a fluffy cocoa cake with creamy white chocolate filling creates an irresistible texture.
- Perfect for Parties: This dessert looks impressive but is surprisingly simple to put together.
Recipe Ingredients
For the Cake:
- 4 eggs
- 1 ½ cups all-purpose flour
- 1 cup sugar
- 1 tablespoon baking powder
- ½ cup oil
- ½ cup cocoa powder (50% cocoa for a rich chocolate flavor)
- 1 cup warm milk
- Vanilla extract, to taste
For the Filling:
- 2 cups hot heavy cream
- 1 cup powdered milk
- 1 tablespoon butter
- 21 ounces white chocolate (about 3 ½ cups of chocolate chips or chopped white chocolate)
For Dusting:
- Powdered milk, to taste
Step-by-Step Instructions
Step 1: Prepare the Cake Batter
- Liquid Mixture Preparation: In a blender, add the oil, eggs, vanilla extract, sugar, and warm milk. Blend for about 1 minute until the mixture is smooth and fully combined.
- Dry Ingredients Preparation: In a separate bowl, sift together the all-purpose flour, cocoa powder, and baking powder. This will help remove any lumps and ensure a lighter cake.
- Combining the Ingredients: Gradually pour the blended liquid mixture into the bowl with the dry ingredients. Stir gently until everything is well-mixed, but avoid overmixing to maintain the cake’s fluffiness.
Step 2: Bake the Cake
- Prepare the Pan: Grease a loaf pan and line it with parchment paper to prevent the cake from sticking.
- Baking: Transfer the batter to the prepared loaf pan. Bake in a preheated oven at 350°F (180°C) for about 40 minutes, or until a toothpick inserted into the center comes out clean.
- Cooling: Once baked, remove the cake from the oven and allow it to cool slightly before removing it from the pan.
Step 3: Prepare the White Chocolate Filling
- Filling Preparation: In a blender, add the chopped white chocolate and hot heavy cream. Blend until the chocolate melts completely, forming a smooth and creamy mixture.
- Finishing the Filling: With the blender running, add the butter and powdered milk. Continue blending until the filling becomes silky and well-combined.
Step 4: Assemble the Cake
- Cutting the Cake: Once the cake has cooled, carefully slice it in half horizontally to create two layers.
- Preparation for Assembly: Line the same loaf pan used for baking with plastic wrap, leaving enough overhang on the sides to help with easy removal later.
- Assembling the Cake: Place the bottom layer of the cake into the lined pan. Spread the prepared white chocolate filling evenly over the cake layer. Place the top layer of cake over the filling.
- Freezing: Wrap the cake tightly with the overhanging plastic wrap and place it in the freezer for at least 4 hours, allowing it to firm up.
Step 5: Finishing Touches
- Unwrapping: After freezing, carefully remove the cake from the freezer and unwrap it.
- Dusting: Before serving, dust the cake generously with powdered milk to add an extra layer of sweetness and visual appeal.
Serving and Storage Tips
- Serving: This cake is best served chilled straight from the freezer for a firm, creamy texture. Slice into neat portions using a sharp knife for clean cuts.
- Storage: Store any leftovers in the refrigerator for up to 3 days. If you’d like to keep it longer, wrap the cake tightly and freeze for up to 1 month.
Variations
- Chocolate Ganache Iced Cake: Instead of white chocolate filling, try using a rich chocolate ganache made with dark or milk chocolate for a different twist.
- Fruit-Filled Iced Cake: Add fresh berries like strawberries or raspberries between the cake layers for a fruity surprise.
- Nutty Iced Cake: Sprinkle chopped nuts like almonds or hazelnuts between the layers for a bit of crunch.
FAQs
Can I use dark chocolate instead of white chocolate for the filling?
Absolutely! You can substitute dark or milk chocolate for the white chocolate to create a richer, more decadent filling.
How do I know when the cake is fully baked?
Insert a toothpick or skewer into the center of the cake. If it comes out clean or with a few crumbs, the cake is done.
Can I make this cake ahead of time?
Yes! This iced cake is perfect for making ahead. Assemble it and freeze it, then thaw slightly before serving.
What can I use if I don’t have powdered milk for dusting?
You can dust the cake with cocoa powder, powdered sugar, or finely grated white chocolate for a different finishing touch.
Conclusion
This 5-minute Iced Cake recipe is a fast and simple way to impress with a delicious dessert. The combination of a fluffy cocoa cake with creamy white chocolate filling is irresistible. Whether you’re serving it for a special occasion or as a sweet treat for family and friends, it’s sure to be a hit. Enjoy your delightful iced cake!

