

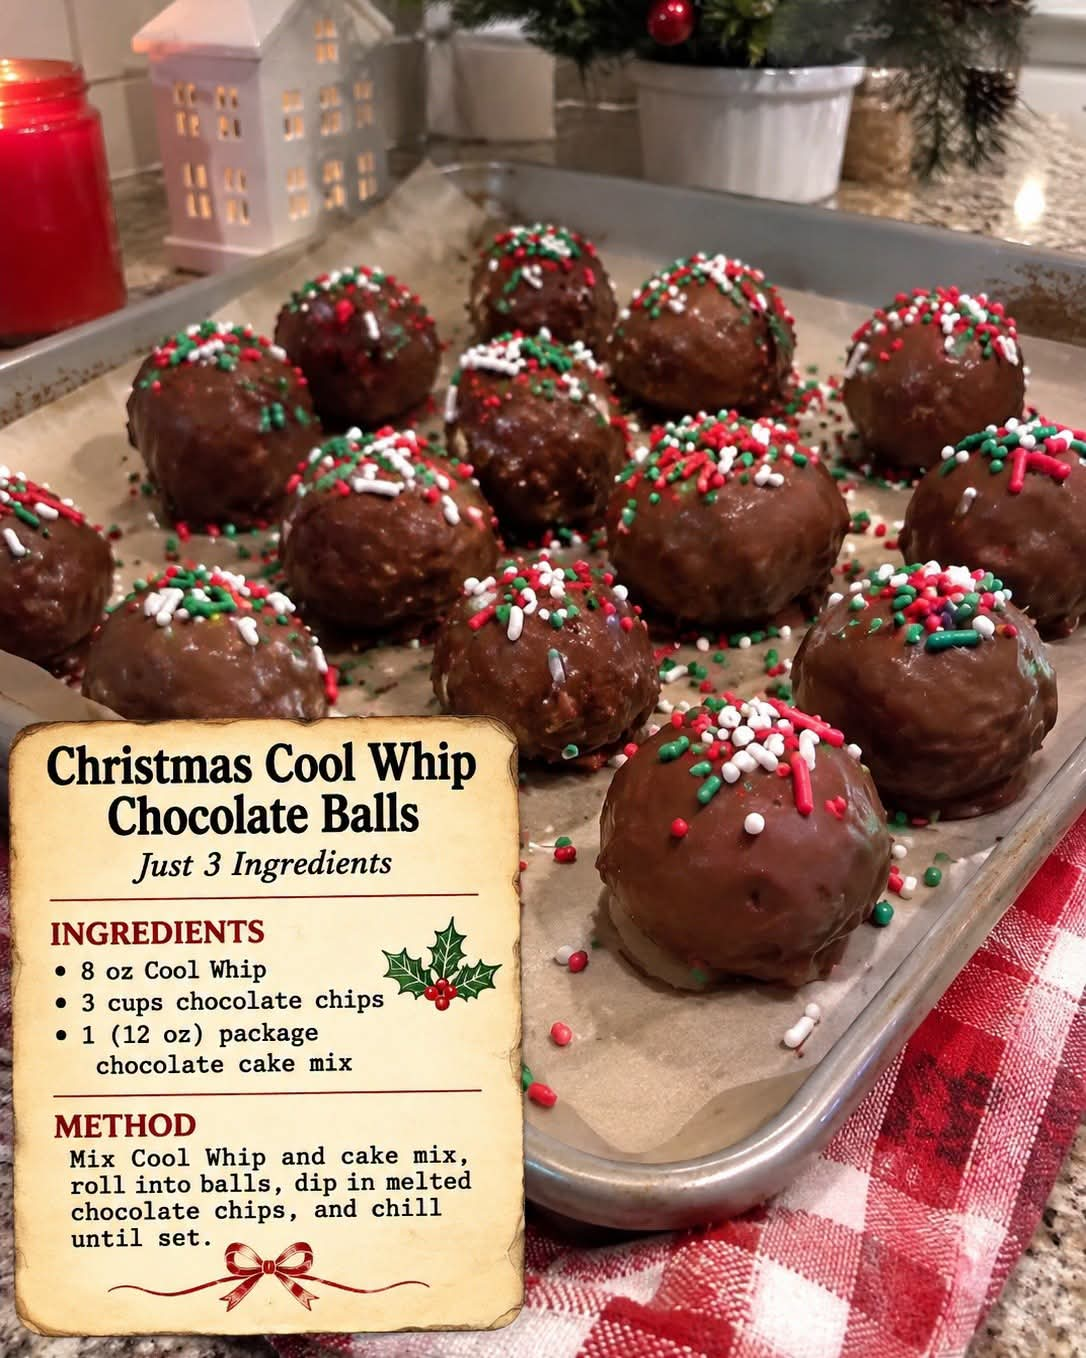
Make your holiday dessert table extra special with these delicious Christmas Cool Whip Chocolate Balls! These easy no-bake treats combine fluffy Cool Whip, rich chocolate cake mix, and a smooth chocolate coating to create irresistible bite-sized desserts. Finished with festive red, green, and white sprinkles, they look just as wonderful as they taste.
Perfect for Christmas parties, cookie exchanges, holiday gatherings, or homemade edible gifts, these chocolate balls are simple to prepare and require no oven. With only a handful of ingredients and a little chilling time, you can make a batch of festive chocolate treats that everyone will love.
Why You’ll Love These Christmas Chocolate Balls
- No baking required: A simple recipe that doesn’t need an oven.
- Only a few ingredients: Easy-to-find ingredients make preparation simple.
- Rich chocolate flavor: Chocolate cake mix and melted chocolate create a double-chocolate treat.
- Festive appearance: Christmas sprinkles add beautiful holiday colors.
- Perfect for sharing: Great for parties, dessert trays, and edible gifts.
- Make-ahead friendly: Prepare them in advance and keep them chilled until serving.
Ingredients for Christmas Cool Whip Chocolate Balls
- 8 oz Cool Whip, thawed
- 3 cups semi-sweet chocolate chips
- 1 package (12 oz) chocolate cake mix, commercially heat-treated and labeled safe to eat without baking
- Red, green, and white Christmas sprinkles (optional)
How to Make Christmas Cool Whip Chocolate Balls
Step 1: Prepare the Baking Sheet
Line a large baking sheet with parchment paper. This will prevent the chocolate balls from sticking and make cleanup easier.
Step 2: Mix the Chocolate Dough
In a large mixing bowl, combine the thawed Cool Whip and ready-to-eat chocolate cake mix.
Stir until everything is fully incorporated and a thick, smooth chocolate dough forms.
Step 3: Chill the Mixture
Cover the bowl and refrigerate the mixture for 30–45 minutes, or until it becomes firm enough to handle. Chilling makes rolling the balls much easier.
Step 4: Shape the Chocolate Balls
Scoop tablespoon-sized portions of the chilled mixture and roll them between your hands to form smooth balls.
Place each ball onto the prepared baking sheet, leaving a little space between them.
Step 5: Freeze Until Firm
Transfer the baking sheet to the freezer for 20–30 minutes. This helps the chocolate balls hold their shape when dipped in melted chocolate.
Step 6: Melt the Chocolate
Place the semi-sweet chocolate chips in a microwave-safe bowl.
Microwave in 20-second intervals, stirring well after each interval, until the chocolate is completely melted and smooth. Avoid overheating the chocolate.
Step 7: Coat the Chocolate Balls
Remove the chilled balls from the freezer. Dip each one into the melted chocolate, turning gently until evenly coated.
Lift each ball with a fork and allow the excess chocolate to drip back into the bowl.
Place the coated balls back onto the parchment-lined baking sheet.
Step 8: Add the Christmas Sprinkles
While the chocolate coating is still wet, immediately decorate each ball with red, green, and white Christmas sprinkles.
Work in small batches so the coating doesn’t set before you finish decorating.
Step 9: Refrigerate Until Set
Place the baking sheet in the refrigerator for 20–30 minutes, or until the chocolate coating is completely firm.
Step 10: Serve and Enjoy
Once set, transfer the chocolate balls to festive candy liners or arrange them on a holiday dessert platter.
Serve chilled and enjoy these sweet, creamy, chocolatey Christmas treats!
Tips for the Best Chocolate Balls
Use properly prepared cake mix. Since this is a no-bake recipe, the cake mix must be commercially heat-treated and specifically labeled safe to eat without baking. Ordinary raw cake mix should not be used.
Chill before rolling. Refrigerating the mixture helps it become firm and less sticky, making it easier to shape.
Keep the balls cold. Freeze them before dipping so they hold their shape in the warm melted chocolate.
Melt chocolate slowly. Use short microwave intervals and stir frequently to prevent the chocolate from burning.
Use a fork for dipping. A fork or dipping tool makes it easier to coat the balls evenly and remove excess chocolate.
Decorate immediately. Add the sprinkles while the coating is still wet so they stick properly.
Work in batches. Keep the remaining chocolate balls chilled while dipping a few at a time.
Fun Variations to Try
White Chocolate Christmas Balls
Replace the semi-sweet chocolate coating with melted white chocolate for a beautiful snowy finish. Add red and green sprinkles for a festive look.
Peppermint Chocolate Balls
Add a little finely crushed peppermint candy to the melted chocolate coating or sprinkle it over the top before the chocolate sets.
Chocolate Coconut Balls
Roll the finished chocolate balls in shredded coconut before the coating sets, or add a little coconut to the filling for extra texture.
Double Chocolate Holiday Treats
Use dark chocolate chips for the coating to create an even richer chocolate flavor.
Colorful Christmas Dessert Balls
Use different combinations of red, green, white, and gold sprinkles to create a beautiful assortment for your holiday dessert table.
How to Serve Christmas Cool Whip Chocolate Balls
These festive chocolate treats are perfect for almost any holiday occasion. Here are a few fun ways to serve them:
- Arrange them in mini red and green candy liners.
- Add them to a Christmas cookie and candy platter.
- Place them in decorative gift boxes for friends and family.
- Serve them alongside Christmas cookies and brownies.
- Add them to a dessert table with hot chocolate and holiday drinks.
They also make a lovely addition to Christmas Eve parties, holiday potlucks, and winter celebrations.
How to Store Christmas Chocolate Balls
In the refrigerator: Store the chocolate balls in an airtight container in the refrigerator. Because they contain Cool Whip, keep them refrigerated and avoid leaving them at room temperature for extended periods.
In the freezer: Arrange the fully set chocolate balls in a freezer-safe airtight container, separating layers with parchment paper. Freeze for up to 1 month for best quality.
To serve from frozen: Thaw them in the refrigerator before serving. Keeping them chilled helps preserve their texture and chocolate coating.
Frequently Asked Questions
Do I need to bake these Christmas chocolate balls?
No! This is a no-bake recipe. The filling is made with Cool Whip and commercially heat-treated cake mix, then coated in melted chocolate.
Can I use regular cake mix?
No. Because the cake mix isn’t baked in this recipe, use only commercially heat-treated cake mix specifically labeled safe to eat without baking. Regular raw cake mix is not suitable for this no-bake preparation.
Why does the mixture need to be refrigerated before rolling?
The Cool Whip makes the mixture soft. Chilling it for 30–45 minutes helps firm it up so you can roll neat, evenly shaped balls.
Can I use white chocolate instead of semi-sweet chocolate?
Absolutely! White chocolate makes a delicious alternative and gives the treats a festive snowy appearance.
Can I make these chocolate balls ahead of time?
Yes! These are excellent make-ahead holiday treats. Prepare them, let the chocolate coating set completely, and store them in an airtight container in the refrigerator until ready to serve.
How many chocolate balls does this recipe make?
This recipe makes approximately 20–24 chocolate balls, depending on the size of each portion.
Do these treats need to stay refrigerated?
Yes. Since the filling contains Cool Whip, store the finished chocolate balls in the refrigerator and serve them chilled.
Final Thoughts
These Christmas Cool Whip Chocolate Balls are an easy, festive, and delicious addition to your holiday baking list. With a creamy chocolate filling, a smooth chocolate shell, and colorful Christmas sprinkles, they’re guaranteed to bring a little extra sweetness to your celebrations.
Whether you’re preparing treats for a Christmas party, filling holiday gift boxes, or making something special with your family, this simple no-bake recipe is a wonderful choice. Make a batch, keep them chilled, and enjoy these irresistible little chocolate bites all season long!