

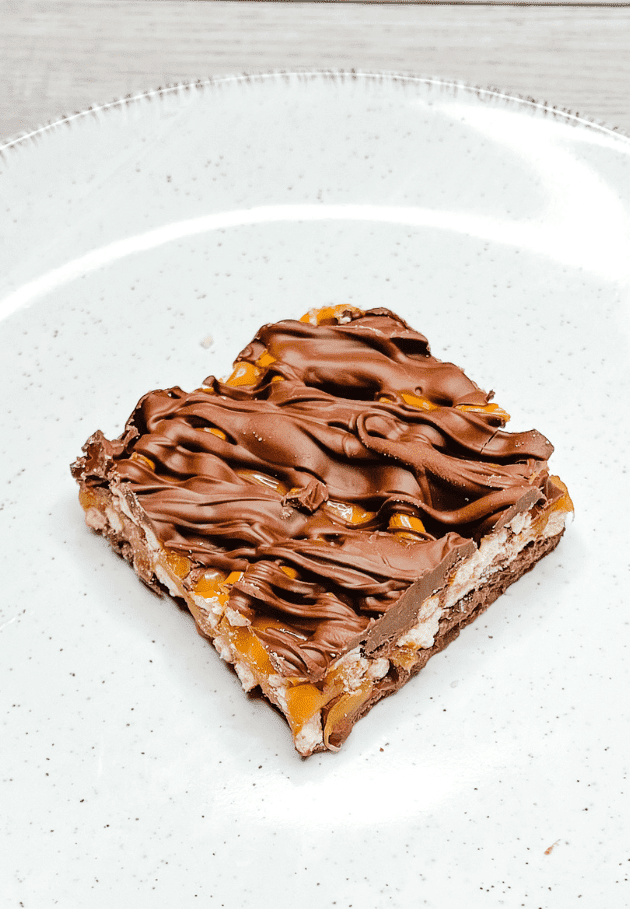
If you’re searching for a quick dessert that looks impressive but requires very little effort, these Chocolate Caramel Pretzel Bars are the answer. Made with just four simple ingredients, these decadent bars combine crunchy pretzels, rich caramel, smooth chocolate, and buttery goodness into one irresistible treat.
Perfect for holidays, bake sales, family gatherings, potlucks, or whenever you’re craving a sweet-and-salty dessert, these bars are easy enough for beginners yet delicious enough to impress everyone. The crunchy pretzel base provides the perfect contrast to the gooey caramel center, while the smooth chocolate topping creates a bakery-style finish.
Best of all, this recipe doesn’t require fancy baking skills or special equipment. If you can crush pretzels, melt chocolate, and bake for a few minutes, you can make these crowd-pleasing dessert bars.
Why You’ll Love These Chocolate Caramel Pretzel Bars
There are countless reasons why this recipe deserves a place in your dessert collection.
- Made with only four simple ingredients
- Ready with minimal preparation
- Perfect balance of sweet and salty flavors
- Great for parties and holiday cookie trays
- Easy to prepare ahead of time
- Stores well in the refrigerator
- Beginner-friendly recipe
- No candy thermometer required
Every bite delivers crunchy pretzels, buttery caramel, and creamy chocolate for the ultimate dessert experience.
What Makes These Bars So Delicious?
The secret is the combination of contrasting textures and flavors.
The buttery pretzel crust provides a crunchy, slightly salty foundation. A layer of thick caramel bakes into the crust, creating a chewy center that stays soft without becoming runny. Finally, melted chocolate forms a smooth topping that hardens just enough to create a satisfying snap when you bite into it.
This simple combination transforms ordinary pantry ingredients into a dessert that tastes like it came from a specialty bakery.
Ingredients You’ll Need
One of the best things about this recipe is its simplicity.
Pretzels
Crushed pretzels form the crunchy base.
Use traditional pretzel twists, sticks, or rods. Crush them into coarse crumbs rather than fine powder so the crust keeps its texture.
Unsalted Butter
Melted butter binds the crushed pretzels together while adding rich flavor.
Unsalted butter lets you control the saltiness of the finished dessert.
Thick Caramel Sauce
Choose a thick caramel sauce instead of a thin ice cream topping.
A rich caramel creates the chewy center that makes these bars so irresistible.
Semi-Sweet Chocolate Chips
Semi-sweet chocolate balances the sweetness of the caramel.
You can also substitute dark chocolate if you prefer a richer flavor.
Kitchen Equipment
You’ll need:
- 8×8-inch baking pan
- Mixing bowl
- Measuring cups
- Rubber spatula
- Parchment paper
- Food processor or rolling pin (for crushing pretzels)
How to Make Chocolate Caramel Pretzel Bars
Prepare the Baking Pan
Preheat your oven to 350°F (175°C).
Line an 8-inch square baking pan with parchment paper, leaving extra paper hanging over the sides for easy removal.
Lightly grease the parchment.
Make the Pretzel Crust
Place the pretzels in a food processor and pulse until they resemble coarse crumbs.
If you don’t have a food processor, place the pretzels in a zip-top bag and crush them using a rolling pin.
Mix the crushed pretzels with the melted butter until evenly coated.
Press the mixture firmly into the prepared pan using the bottom of a measuring cup.
The tighter you press, the better your bars will hold together.
Bake the Crust
Bake the crust for about 8–10 minutes until lightly toasted.
Remove it from the oven but keep the oven on.
Add the Caramel Layer
Carefully spread the thick caramel sauce over the warm crust.
Use a spatula to create an even layer without disturbing the pretzel base.
Return the pan to the oven for another 8–10 minutes.
This second bake allows the caramel to thicken and bond with the crust, preventing messy slices later.
Add the Chocolate
Remove the pan from the oven.
Immediately sprinkle the chocolate chips evenly over the hot caramel.
Allow them to sit for about five minutes.
The residual heat melts the chocolate naturally without overcooking it.
Spread the melted chocolate into a smooth, even layer.
Chill Until Firm
Place the pan in the refrigerator for at least 2 hours, or until completely firm.
This step is important for clean slices.
Slice and Serve
Remove the bars using the parchment paper.
Allow them to sit at room temperature for about 10–15 minutes before cutting.
Use a sharp knife to cut into squares or rectangles.
Serve chilled or slightly softened.
Why the Second Bake Is Important
Many caramel desserts become messy because the caramel stays too soft.
The second bake thickens the caramel while allowing it to partially absorb into the pretzel crust.
This creates clean layers that hold together beautifully.
Skipping this step often results in bars that fall apart when sliced.
Delicious Variations
This recipe is easy to customize.
Dark Chocolate
Replace semi-sweet chocolate chips with dark chocolate for a deeper cocoa flavor.
Milk Chocolate
For a sweeter dessert, use milk chocolate chips.
Peanut Butter
Swirl melted peanut butter into the chocolate layer before chilling.
Sea Salt
Sprinkle flaky sea salt over the melted chocolate before it sets.
The extra salt perfectly balances the sweetness.
Nuts
Add chopped pecans, almonds, or peanuts between the caramel and chocolate layers.
Toffee
Sprinkle crushed toffee bits over the chocolate for additional crunch.
Serving Ideas
These bars are perfect for nearly any occasion.
Serve them with:
- Coffee
- Hot chocolate
- Vanilla ice cream
- Whipped cream
- Fresh berries
- Holiday dessert trays
They’re also excellent additions to cookie exchanges, bake sales, birthday parties, and holiday gift boxes.
Expert Tips for Success
- Crush the pretzels into coarse crumbs, not powder.
- Press the crust firmly into the pan.
- Use thick caramel sauce instead of thin syrup.
- Let the caramel bake completely before adding chocolate.
- Allow the chocolate to melt naturally from the residual heat.
- Chill thoroughly before slicing.
- Let the bars rest at room temperature for 15 minutes before cutting.
- Wipe your knife clean between slices for professional-looking bars.
Storage Instructions
Store the bars in an airtight container in the refrigerator for up to 7 days.
Separate layers with parchment paper to prevent sticking.
For longer storage, freeze the bars for up to 2 months.
Thaw overnight in the refrigerator before serving.
Frequently Asked Questions
Can I use pretzel sticks instead of pretzel twists?
Yes. Pretzel sticks, rods, or twists all work well as long as they’re crushed into coarse crumbs.
Why did my crust fall apart?
Usually because the pretzels weren’t crushed enough or the crust wasn’t pressed firmly into the pan.
Can I use homemade caramel?
Absolutely. Thick homemade caramel works wonderfully.
Do these bars need refrigeration?
Yes. Refrigeration keeps the caramel firm and prevents the chocolate from becoming too soft.
Can I freeze them?
Yes. Wrap individual bars tightly and freeze for up to two months.
Can I make these ahead of time?
Definitely. They’re actually better after chilling overnight, making them ideal for parties.
What chocolate works best?
Semi-sweet chocolate offers the perfect balance, but dark or milk chocolate also work well depending on your preference.
Final Thoughts
Chocolate Caramel Pretzel Bars are proof that you don’t need complicated recipes to create an unforgettable dessert. With only a handful of everyday ingredients, you can make a rich, chewy, crunchy treat that’s perfect for every occasion.
The combination of buttery pretzels, thick caramel, and smooth chocolate creates a dessert that’s impossible to resist. Whether you’re preparing a holiday dessert tray, hosting friends, or simply satisfying a sweet craving, these bars deliver bakery-quality flavor with minimal effort.
Once you make this recipe, it’s sure to become one of your favorite go-to desserts for celebrations, potlucks, and family gatherings.