Unlocking the Mystery of the Fourth Side of the Cheese Grater: A Step-by-Step Guide
The cheese grater is a staple in any kitchen, offering versatility beyond simple cheese shredding. Whether it’s turning a block of Parmesan into fine shreds or creating delicate chocolate curls, this tool is an unsung hero of culinary creativity. Yet, one side of the grater remains a mystery to many: the fourth side. What is its purpose? Let’s unravel this culinary enigma and explore how to use it effectively.
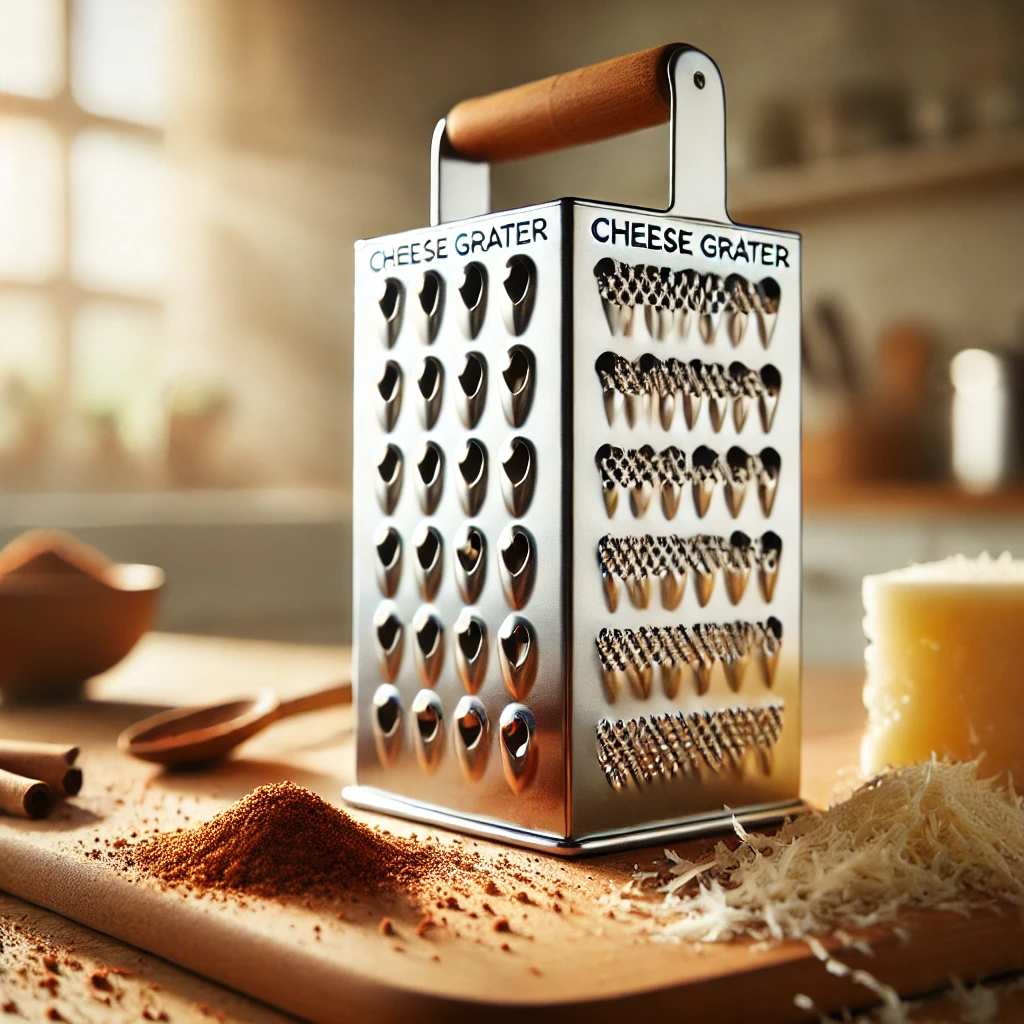
Understanding the Cheese Grater’s Sides
Before we dive into the fourth side, let’s break down the other three:
• Side 1 – Large Holes (Shredding Side): Ideal for grating cheese, zucchini, or potatoes for hash browns.
• Side 2 – Medium Holes (Coarse Grating): Best for semi-hard cheeses, carrots, or thicker shreds.
• Side 3 – Small Holes (Fine Grating): Perfect for Parmesan, citrus zest, garlic, or nutmeg.
• Side 4 – The Mystery Side (Slicer or Ridged Perforations): Often overlooked, this side features small, sharp, raised perforations. It’s designed to create fine powder-like textures or transform solid foods into delicate crumbles.
How to Use the Fourth Side Effectively
Step 1: Choose Your Ingredient
The fourth side is best suited for firm foods, such as:
• Hard cheeses (Parmesan, Pecorino)
• Chocolate bars
• Stale bread (for homemade breadcrumbs)
• Hard spices (nutmeg, cinnamon sticks)
Step 2: Prep Your Workspace
• Place the grater over a clean cutting board or plate.
• Hold the grater firmly with one hand for stability. If it slips, place a damp cloth underneath.
Step 3: Grip and Grate
• Securely hold your chosen ingredient.
• Apply light pressure while moving it down the fourth side in a consistent motion.
• Rotate the ingredient occasionally for even grating.
Step 4: Collect the Results
• Fine crumbs or powder will collect on the surface below.
• Scrape the inside of the grater to gather any residue—these fine particles are culinary gold!
Step 5: Put It to Use
Now comes the fun part—using your newly grated ingredient:
• Dust desserts with chocolate or cinnamon.
• Garnish pasta or soups with ultra-fine Parmesan.
• Create homemade breadcrumbs or spice blends.
Step 6: Clean with Care
• Rinse immediately under warm water to prevent residue from drying.
• Use a soft brush or toothbrush to remove stubborn particles.
• Dry completely before storing to prevent rust.
Conclusion: The Secret No More
The fourth side of the cheese grater is no longer a mystery. Whether you’re enhancing a cheesecake with chocolate dust or adding a hint of nutmeg to your latte, this underappreciated side brings finesse to everyday dishes. Next time you reach for your grater, remember—it has more to offer than meets the eye!