How to Make Homemade Strawberry Yogurt: A Creamy and Delicious Treat
Strawberry yogurt is a classic and refreshing treat, perfect for breakfast, a snack, or even as a dessert. With its creamy texture and delightful sweetness, it’s a favorite for both kids and adults alike. Instead of buying store-bought versions that often come loaded with preservatives and added sugars, you can easily make your own at home. The great thing about homemade yogurt is that it requires only three simple ingredients, and you have full control over the flavor, texture, and sweetness level.
This homemade strawberry yogurt recipe is straightforward and doesn’t require any fancy equipment. Whether you’re a yogurt lover looking for a healthier option or just want to experiment with making your own, this recipe is perfect for you.
Ingredients You’ll Need
To make this delicious strawberry yogurt, you only need three basic ingredients that are likely already in your kitchen:
- 2 packets of strawberry-flavored drink mix (such as Kool-Aid or Nesquik)
- 2 liters of whole milk (you can substitute with low-fat or skim milk, but whole milk creates the creamiest texture)
- 160 grams (5.6 oz) of plain yogurt (preferably with live active cultures, as this will act as your yogurt starter)
Step-by-Step Instructions
Step 1: Heat the Milk
Begin by pouring half of the milk (1 liter) into a medium-sized pot and place it over medium heat. Allow the milk to warm up and start to boil, which should take about 5-7 minutes. Once it reaches a boil, immediately turn off the heat.
Tip: Be careful not to let the milk boil over. Once it starts to foam at the top, it’s ready to be removed from heat.
Step 2: Mix with Remaining Milk and Yogurt
Transfer the boiled milk into a large mixing bowl. Add the remaining milk (1 liter) and the plain yogurt to the bowl. Stir the mixture well using a whisk or spoon for about 3 minutes until everything is thoroughly combined and smooth.
Tip: The plain yogurt you add should contain live active cultures, as these are the bacteria responsible for turning milk into yogurt.
Step 3: Let the Yogurt Rest
Cover the bowl with plastic wrap, making sure the entire surface is sealed to prevent any air from entering. Then, place a towel over the wrapped bowl to insulate the mixture. This helps to maintain the warm temperature, which is crucial for the fermentation process. Allow the yogurt mixture to rest in a warm area for about 12 hours.
Tip: The longer you leave it to rest, the thicker and tangier the yogurt will become. For a mild flavor, 8-10 hours is sufficient; for a thicker consistency, allow it to rest for 12-14 hours.
Step 4: Blend with Strawberry Drink Mix
Once the resting period is over, the yogurt base should be set. Now, transfer the yogurt into a blender and add the strawberry-flavored drink mix. Blend for about 2 minutes until the yogurt and the strawberry flavoring are completely smooth and incorporated.
Tip: If you want a more natural strawberry flavor, you can substitute the drink mix with 1-2 cups of fresh or frozen strawberries blended with a tablespoon of honey.
Step 5: Refrigerate and Serve
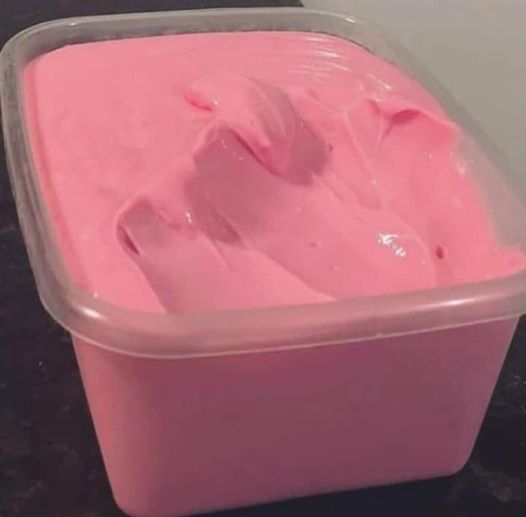
Once blended, pour the strawberry yogurt into containers of your choice. Cover and place them in the refrigerator for at least 2 hours to chill before serving. The cooling process helps to thicken the yogurt even further, making it the perfect creamy consistency.
Tips for Making the Best Homemade Strawberry Yogurt
While this recipe is simple, here are a few additional tips to ensure that your homemade yogurt comes out perfect every time:
1. Use Whole Milk for Creaminess
While you can use any type of milk, whole milk results in the creamiest and richest yogurt. If you prefer a lighter version, feel free to use low-fat or skim milk, but keep in mind that the yogurt may be slightly less thick.
2. Sterilize Your Equipment
To avoid any unwanted bacteria from interfering with the yogurt-making process, ensure that all bowls, pots, and utensils are clean and sterilized. A quick rinse with boiling water will do the trick.
3. Adjust the Sweetness to Your Liking
If you prefer a sweeter yogurt, you can add a sweetener like honey or sugar to the mixture before blending. Taste the yogurt after blending in the strawberry mix, and if needed, blend again with a bit of sweetener.
4. Ferment in a Warm Environment
Yogurt needs a warm environment to ferment properly. If your kitchen is cold, you can place the bowl inside an oven (turned off) with just the oven light on or wrap it in a blanket to retain heat.
5. Customize with Mix-Ins
Feel free to customize your homemade yogurt with mix-ins like fresh fruits, nuts, or granola. These add-ins will make your yogurt even more satisfying and delicious.
Frequently Asked Questions (FAQs)
1. How Long Can I Store Homemade Yogurt?
Homemade strawberry yogurt can be stored in the refrigerator for up to 7 days. Be sure to keep it in an airtight container to maintain freshness.
2. Can I Use Flavored Yogurt Instead of Plain Yogurt as a Starter?
It’s best to use plain yogurt with live active cultures as your starter. While you can technically use flavored yogurt, the added sugars and flavors may interfere with the fermentation process.
3. What if My Yogurt Didn’t Set Properly?
If your yogurt didn’t set properly after 12 hours, it could be due to a couple of reasons. The milk may not have been warm enough when you mixed in the yogurt, or the fermentation environment may have been too cold. You can try letting it sit for an additional few hours or placing it in a warmer spot.
4. Can I Make This Recipe with Non-Dairy Milk?
Yes, you can make non-dairy yogurt using almond milk, coconut milk, or soy milk. However, you’ll need to ensure that the yogurt starter is compatible with non-dairy milks, and the texture might not be as thick as yogurt made with dairy milk.
5. Can I Make My Yogurt Thicker?
If you prefer thicker yogurt, you can strain it through a cheesecloth after it has fermented. This will remove excess liquid (whey), leaving you with a thicker, Greek yogurt-like consistency.
6. Is It Necessary to Add the Strawberry Drink Mix?
No, the strawberry drink mix is optional and used primarily for flavoring. You can leave it out and enjoy a plain yogurt or add natural strawberries and other fruits for a healthier alternative.
7. Can I Make a Larger Batch of Yogurt?
Yes, you can double or triple the recipe to make a larger batch. Just make sure to adjust the container sizes accordingly and give the yogurt plenty of time to ferment.
8. Can I Use Other Flavors of Drink Mix?
Absolutely! This recipe is versatile, so feel free to experiment with different flavors of drink mix, like chocolate, vanilla, or other fruit flavors. The process remains the same, and you’ll have a variety of yogurt flavors to enjoy.
9. Can I Eat This Yogurt Immediately After Fermenting?
The yogurt is ready to eat after fermenting, but it will taste better after being refrigerated for a couple of hours. Chilling it also helps to thicken the yogurt, making it creamier.
Conclusion
Making homemade strawberry yogurt is a fun and easy way to enjoy a delicious and healthy snack. With only three simple ingredients, you can have fresh, flavorful yogurt that’s free of artificial additives and preservatives. Whether you prefer to enjoy it on its own, with fruit, or as part of a parfait, this homemade strawberry yogurt is a versatile and nutritious option.