Indulge your sweet tooth with these homemade Six Minute Caramels, a recipe so simple you’ll wonder why you ever bought candy from a store. With just a handful of pantry staples and a few minutes of stirring, you can create rich, buttery caramels that melt in your mouth. Perfect for gifting, sharing, or treating yourself, these caramels are a timeless classic that’s ready faster than you think.
Six Minute Caramels are a wonderful project for beginners and experienced candy makers alike. No candy thermometer needed, no complicated steps—just sweet, buttery goodness ready in under an hour from start to finish.
Why You’ll Love These Six Minute Caramels
- Quick and Easy: Only six minutes of cooking required!
- Rich and Buttery: Smooth, velvety caramels with deep flavor.
- Customizable: Add toppings or mix-ins to suit your cravings.
- Perfect for Gifting: Wrap them up for a homemade present that everyone will love.
- No Special Equipment Needed: No candy thermometer, no stress.
Ingredients
- 1 cup (2 sticks) unsalted butter
- 1 cup granulated sugar
- 1 cup light corn syrup
- 1 (14 oz) can sweetened condensed milk
- 1 teaspoon pure vanilla extract
- Optional: flaky sea salt for topping
How to Make Six Minute Caramels
Prepare the Pan
Line an 8×8-inch baking pan with parchment paper, leaving extra paper hanging over the sides. This overhang will make it much easier to lift the caramel out later. Lightly grease the parchment paper with a little butter or nonstick cooking spray to prevent sticking.
Make the Caramel
In a large, heavy-bottomed saucepan, combine the butter, sugar, and corn syrup over medium heat. Stir constantly using a wooden spoon or heat-resistant silicone spatula. Keep stirring until the butter melts completely and the sugar dissolves into the mixture.
When the mixture starts to bubble gently, lower the heat to prevent scorching. Carefully stir in the sweetened condensed milk. Continue stirring non-stop for 6 minutes. This continuous movement is essential—it keeps the sugars from burning and ensures your caramel turns out silky and lump-free.
After six minutes, remove the pan from the heat and quickly stir in the vanilla extract. Be cautious—the caramel may bubble up slightly when the vanilla hits the hot mixture, so stir it in gently.
Pour and Cool
Immediately pour the hot caramel into the prepared baking pan. Use a spatula to spread the caramel evenly and smooth the top.
If you love a sweet-and-salty combo, sprinkle flaky sea salt over the warm caramel. It enhances the flavor and adds a pleasant crunch.
Let the caramel cool at room temperature for about 1–2 hours. Afterward, transfer it to the refrigerator and chill for another 1–2 hours until it’s fully firm and easy to cut.
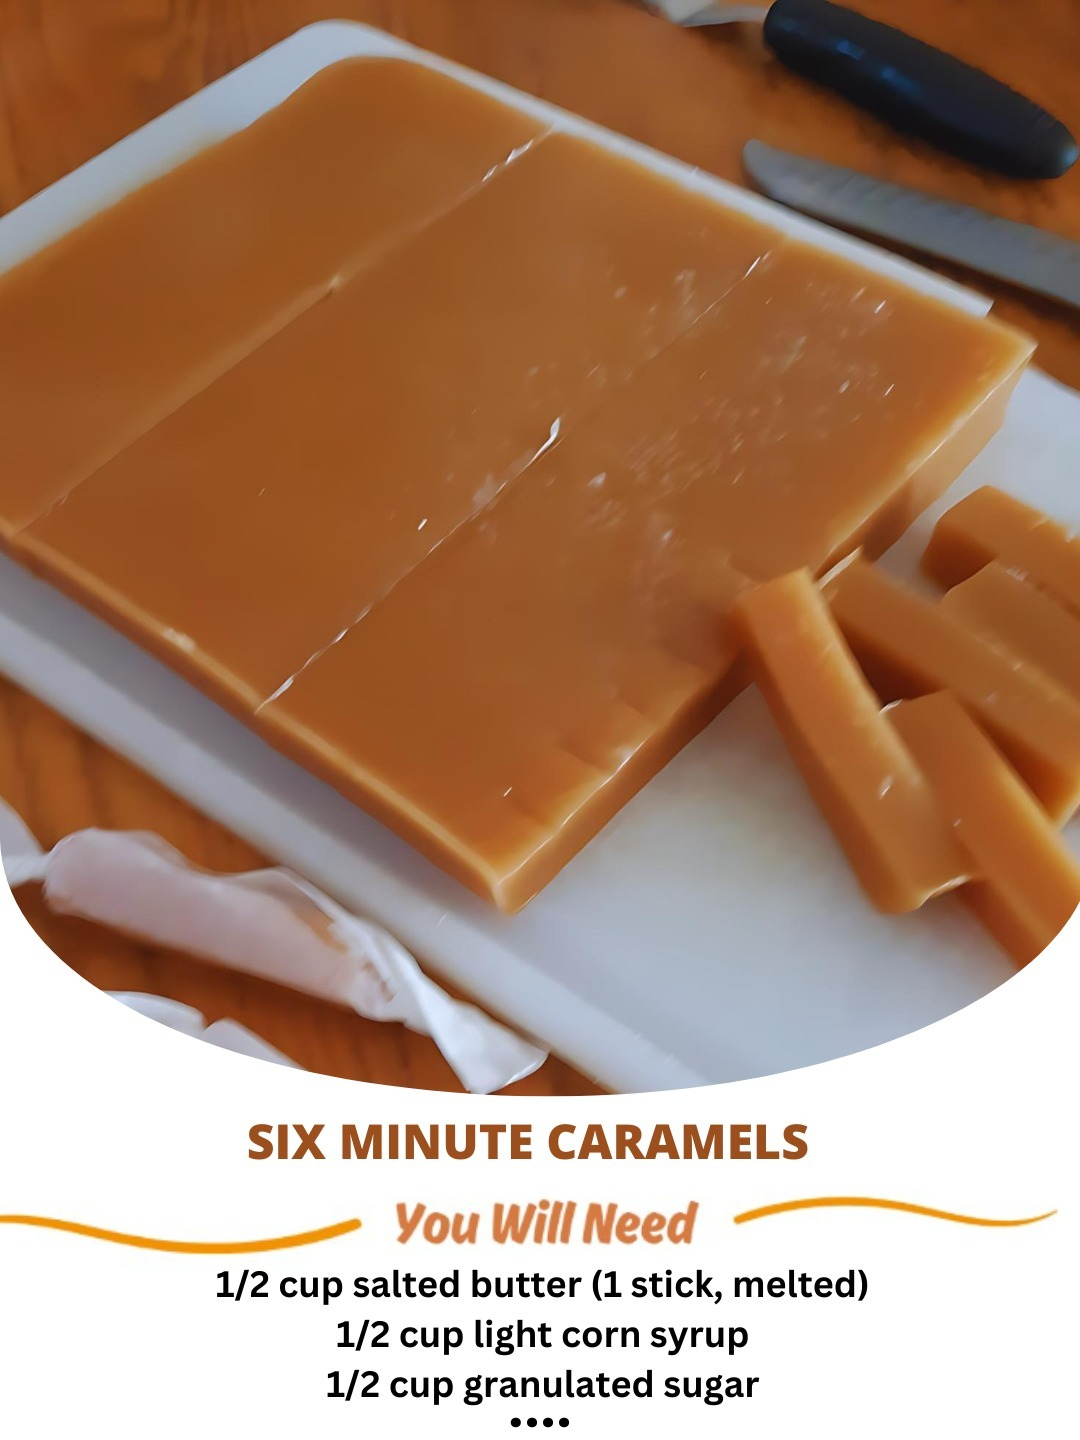
Cut and Wrap
Once the caramel has firmed up, lift it out of the pan using the parchment paper overhang and place it onto a cutting board.
Use a sharp knife or a pizza cutter to slice the caramel into small squares or rectangles. If the knife sticks, lightly grease it with butter.
For a professional touch, wrap each piece individually in wax paper, parchment squares, or candy wrappers. This not only looks great but also keeps the caramels from sticking together.
Tips for the Best Caramels
- Constant Stirring is Key: Don’t walk away while the caramel cooks! Stirring ensures even heating and prevents burning.
- Use a Heavy-Bottomed Pan: Thin pans can cause hot spots, leading to uneven cooking and burnt caramel.
- Don’t Rush Cooling: Let the caramels cool and firm up properly before cutting. If you rush, they may not hold their shape.
- For Softer Caramels: If you prefer extra-soft caramels, cook for just 5 minutes instead of 6, but note they’ll be more delicate.
- Salted Butter Option: You can substitute salted butter if that’s all you have—just reduce or skip the added flaky salt on top.
Delicious Variations
Add Flavor Enhancements
- Stir in a teaspoon of espresso powder for a bold, coffee-flavored caramel.
- Swap the vanilla extract for almond extract for a nutty twist.
- Add a pinch of cinnamon or nutmeg to warm up the flavor for fall or winter treats.
Dip in Chocolate
- Melt high-quality dark, milk, or white chocolate.
- Dip half of each caramel piece into the chocolate and let them harden on parchment paper.
- Sprinkle a little sea salt or crushed nuts on top before the chocolate sets.
Make It Nut-Free
This caramel recipe is naturally nut-free, making it perfect for parties, schools, and anyone with nut allergies. If you want to incorporate nuts, fold in toasted pecans, almonds, or walnuts after removing the caramel from the heat.
Storage and Shelf Life
- Room Temperature: Store wrapped caramels in an airtight container at room temperature for up to 1 week.
- Refrigerated: For slightly firmer caramels, keep them in the fridge for up to 2 weeks.
- Freezer: Freeze wrapped caramels for up to 3 months. Thaw at room temperature before enjoying.
Creative Gift Ideas
Homemade Six Minute Caramels make fantastic gifts! Here are a few ideas:
- Package them in small mason jars tied with ribbon.
- Place wrapped caramels in decorative tins.
- Create themed gift baskets with caramels, cocoa mix, and cookies for a cozy treat box.
- Include them in holiday care packages for friends and family.
Serving Suggestions
These buttery caramels can be enjoyed all on their own, but you can also:
- Pair with Coffee: A square of caramel with a hot cup of espresso is heavenly.
- Use as a Topping: Chop and sprinkle them over ice cream, brownies, or cupcakes.
- Mix into Treats: Stir chopped caramel pieces into cookie dough before baking for gooey, melty cookies.
FAQs About Six Minute Caramels
How do I know when the caramel is ready?
In this recipe, timing is crucial. After stirring for six minutes over low heat following the addition of the condensed milk, the caramel is ready to be removed from the heat. It should be smooth, thickened, and slightly darkened in color.
Can I use a candy thermometer for more precision?
While a candy thermometer isn’t required for this recipe, if you prefer using one, the caramel mixture should reach around 235°F to 240°F (soft-ball stage).
Why did my caramel turn grainy?
Grainy caramel often results from sugar crystals forming. To prevent this, make sure the sugar is fully dissolved before adding the condensed milk and stir continuously during cooking.
Can I double the recipe?
Yes! You can double the ingredients and pour the mixture into a 9×13-inch pan instead. Just be sure to stir well and extend the stirring time by about 2 extra minutes.
What’s the best way to cut caramels cleanly?
Use a very sharp knife or pizza cutter. Lightly butter the blade to prevent sticking. You can also chill the caramels well before cutting for cleaner edges.
Can I make these caramels dairy-free?
This particular recipe relies heavily on butter and condensed milk for its flavor and texture. You would need to modify it significantly with dairy-free substitutes like coconut condensed milk and plant-based butter, but results may vary.
What are the signs that the caramel is overcooked?
If the caramel smells burnt, is overly dark, or hardens into a brittle texture instead of a chewy one, it was cooked too long or at too high a heat. Stick to low heat and constant stirring for best results.
Final Thoughts
Six Minute Caramels are a buttery, sweet delight that proves candy-making doesn’t have to be complicated or intimidating. With just six minutes of stirring and a handful of simple ingredients, you can create luscious, melt-in-your-mouth caramels that rival any gourmet candy shop’s. Whether you keep them for yourself or share them with friends, these little bites of happiness are sure to brighten your day.