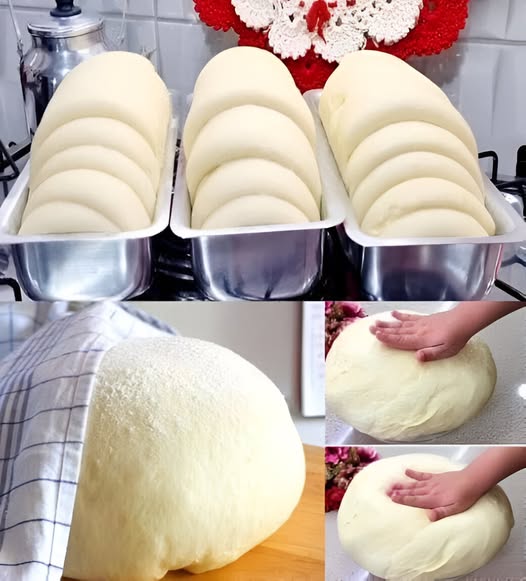
How to Make Fluffy Homemade Bread
There’s something deeply comforting about the aroma of freshly baked bread filling your kitchen. This homemade vinegar and honey bread recipe is an excellent choice for both beginners and seasoned bakers alike. The vinegar works wonders in making the bread light and fluffy, while the honey lends a natural sweetness that elevates its flavor. Whether you’re serving it with butter, jam, or simply enjoying it plain, this bread will quickly become a household favorite.
In this article, you’ll find a detailed recipe, expert tips for baking success, and answers to common questions to help you master this delicious homemade bread.
Why Vinegar and Honey?
The Role of Vinegar
Vinegar may seem like an unusual addition to bread dough, but it plays a critical role. It helps strengthen the gluten structure, resulting in a lighter, airier loaf. Additionally, it acts as a natural preservative, extending the bread’s shelf life.
The Sweetness of Honey
Honey adds a subtle sweetness that balances the flavor of the bread. It also helps create a moist crumb and enhances the golden color of the crust when baked.
Ingredients for Vinegar and Honey Bread
To make this fluffy homemade bread, you’ll need:
- 4 cups of all-purpose flour (500 g)
- 2 teaspoons of salt (10 g)
- 1 tablespoon of sugar
- 2 ¼ teaspoons of active dry yeast (7 g)
- 1 ¼ cups of warm water (300 ml)
- 3 tablespoons of honey
- 2 tablespoons of apple cider vinegar
Step-by-Step Instructions
1. Preparing the Dough
- Combine dry ingredients: In a large mixing bowl, whisk together the flour and salt.
- Activate the yeast: In a separate bowl, dissolve the sugar and yeast in warm water. Allow it to sit for 5–10 minutes until the mixture becomes frothy.
2. Adding Liquid Ingredients
- Mix liquids: Stir the honey and apple cider vinegar into the activated yeast mixture until well combined.
- Form the dough: Gradually pour the liquid ingredients into the flour mixture. Stir with a wooden spoon or spatula until a shaggy dough forms.
3. Kneading the Dough
- Knead by hand: Transfer the dough onto a lightly floured surface. Knead for about 8–10 minutes until it becomes soft, smooth, and elastic. If the dough is sticky, add a little more flour, one tablespoon at a time.
4. First Rise
- Let it rest: Place the dough in a lightly greased bowl. Cover it with a damp cloth or plastic wrap and let it rise in a warm, draft-free spot for about 1 hour or until it doubles in size.
5. Shaping and Baking
- Shape the dough: After the dough has risen, punch it down gently to release the air. Shape it into a loaf or your desired shape and place it on a floured baking sheet.
- Prepare the oven: Preheat your oven to 392°F (200°C).
- Bake the bread: Bake for 30–40 minutes. The bread is ready when the crust is golden brown and it sounds hollow when tapped on the bottom.
Tips for Perfect Homemade Bread
1. Control the Dough Consistency
If your dough feels too sticky, sprinkle in additional flour sparingly. However, avoid adding too much, as it can make the bread dense.
2. Create a Steamy Oven
Place a small pan of water in the oven while baking. The steam will help create a beautifully crisp crust.
3. Enhance the Flavor
For extra texture and flavor, mix in a handful of nuts, seeds, or dried fruit like raisins into the dough.
4. Brush for Shine
Before baking, brush the loaf with a mixture of honey and water for a glossy finish.
5. Store Properly
To keep your bread soft and fresh, store it in an airtight plastic bag or wrap it tightly in plastic wrap.
Frequently Asked Questions
1. Can I use a different type of vinegar?
Yes, you can substitute apple cider vinegar with white vinegar or even lemon juice. The acidity is what’s important for the bread’s texture.
2. Can I make this bread gluten-free?
You can experiment with gluten-free flour blends, but the texture and rise may vary. Gluten-free bread often requires additional ingredients like xanthan gum to mimic gluten’s elasticity.
3. What if I don’t have active dry yeast?
You can use instant yeast instead. If using instant yeast, skip the activation step and mix it directly with the dry ingredients.
4. How do I know the bread is fully baked?
Tap the bottom of the bread—if it sounds hollow, it’s done. You can also use a thermometer; the internal temperature should be around 190°F (88°C).
5. Can I freeze this bread?
Yes! Once the bread has cooled completely, wrap it tightly in plastic wrap and place it in a freezer-safe bag. It can be frozen for up to 3 months. To use, thaw at room temperature or warm it in the oven.
6. Why is my bread dense?
Dense bread often results from insufficient kneading, not enough rising time, or using too much flour. Ensure you follow the instructions carefully and measure your ingredients accurately.
Final Thoughts
This fluffy homemade bread, with its subtle sweetness and light texture, is a joy to bake and even better to eat. Whether you enjoy it fresh out of the oven or toasted with butter, it’s sure to become a staple in your kitchen. The combination of vinegar and honey creates a unique loaf that’s perfect for any occasion.
Try this recipe today and experience the magic of baking your own bread!

