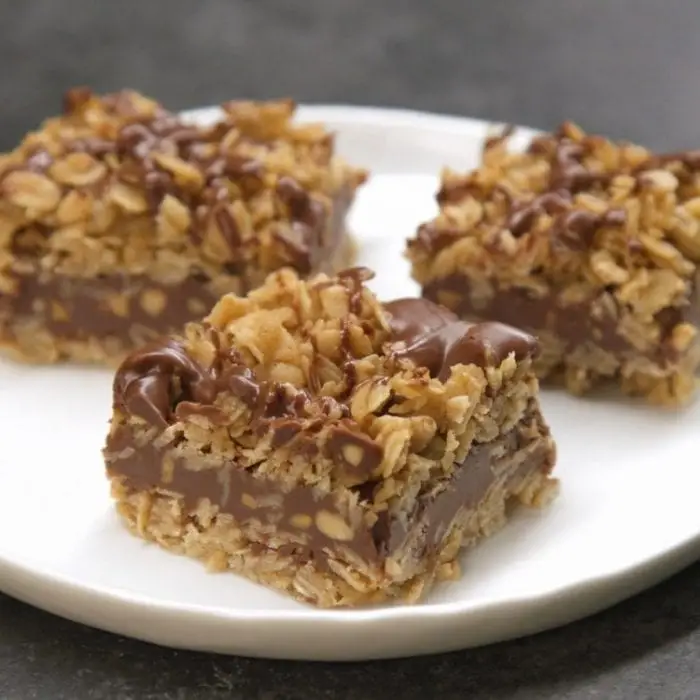
When the craving for something sweet hits but you don’t want to turn on the oven, No Bake Chocolate Oat Bars come to the rescue. This recipe combines the rich, creamy taste of chocolate and peanut butter with the hearty crunch of oats. The best part? It requires no baking, making it a quick and easy treat that’s perfect for busy days, summer afternoons, or late-night dessert fixes.
These bars have just the right balance of chewy and crunchy textures, with a chocolate-peanut butter filling sandwiched between layers of buttery oats. They’re a family favorite, and once you try them, you’ll understand why they disappear so fast from the fridge
Why You’ll Love This Recipe
- No baking required – Perfect for hot days when you don’t want to heat the kitchen.
- Simple ingredients – Uses pantry staples you probably already have.
- Quick prep time – Ready to chill in under 20 minutes.
- Crowd-pleaser – Loved by kids and adults alike.
- Customizable – Easy to adapt with different flavors or toppings.
Ingredients Needed
For this recipe, you only need six basic ingredients, yet the result is rich and indulgent.
Base and Topping
- 1 cup butter
- 1/2 cup packed brown sugar
- 1 teaspoon vanilla extract
- 3 cups quick cooking oats
Chocolate Filling
- 1 cup semisweet chocolate chips
- 1/2 cup peanut butter
Step-by-Step Instructions
Step 1: Prepare the Pan
Grease a 9×9-inch square baking pan. This prevents the bars from sticking and makes slicing easier later. You can also line the pan with parchment paper for quicker cleanup.
Step 2: Make the Oat Mixture
- Melt the butter in a large saucepan over medium heat.
- Stir in the brown sugar and vanilla until dissolved.
- Add the oats and cook over low heat for 2–3 minutes, stirring frequently, until the mixture is well combined and slightly toasted.
- Press half of this mixture firmly into the bottom of the prepared pan. Set aside the other half for the topping.
Step 3: Prepare the Chocolate Layer
- In a small, heavy saucepan, melt the chocolate chips and peanut butter over low heat.
- Stir continuously until the mixture is smooth and glossy.
- Pour the chocolate mixture over the oat crust in the pan. Spread evenly with a spatula, knife, or the back of a spoon.
Step 4: Add the Final Layer
Crumble the remaining oat mixture evenly over the chocolate layer. Press it gently so it adheres without sinking into the chocolate.
Step 5: Chill and Set
Cover the pan and refrigerate for 2–3 hours or overnight until the bars are firm. Before serving, let them sit at room temperature for about 10 minutes, then cut into squares or bars.
Serving Suggestions
- Classic style – Serve chilled for a firm, chewy bite.
- With coffee or tea – These bars pair wonderfully with a hot beverage.
- Dessert platter – Slice into bite-sized squares and serve with other no-bake treats.
- Frozen treat – Store bars in the freezer for a cool, crunchy snack on hot days.
Variations to Try
- Nut-Free Option – Replace peanut butter with sunflower seed butter or cookie butter.
- White Chocolate Twist – Use white chocolate chips instead of semisweet for a sweeter version.
- Extra Crunch – Stir in chopped nuts or crisp rice cereal to the oat mixture.
- Fruit Add-In – Layer dried cranberries, raisins, or chopped dates between the chocolate and oats.
- Coconut Flavor – Mix shredded coconut into the oat base for a tropical touch.
- Salted Caramel – Drizzle caramel sauce over the chocolate layer and sprinkle with sea salt before adding the topping.
Tips for Success
- Use quick oats – Rolled oats won’t set as firmly and may make the bars too crumbly.
- Don’t skip refrigeration – This step is crucial for the bars to hold their shape.
- Press the base firmly – The bottom oat layer should be compact to support the filling.
- Use a sharp knife – For clean slices, run the knife under hot water, dry it, and then cut.
- Store properly – Keep bars in an airtight container in the fridge for up to a week.
Storage and Freezing
- Refrigerator: Store bars in a sealed container for 5–7 days.
- Freezer: Place cut bars in a freezer-safe container with parchment paper between layers. Freeze for up to 2 months. Thaw in the fridge before serving.
Frequently Asked Questions
Can I use rolled oats instead of quick oats?
Rolled oats will make the bars chunkier and less cohesive. Quick oats are best for a smoother, firmer texture.
What if I don’t like peanut butter?
You can substitute almond butter, cashew butter, or sunflower seed butter. Each will slightly change the flavor but still taste delicious.
Can I use dark chocolate instead of semisweet?
Yes! Dark chocolate will make the bars richer and slightly less sweet, perfect if you prefer a more intense chocolate flavor.
How long should I refrigerate before cutting?
At least 2–3 hours, but overnight chilling gives the cleanest cuts and firmest texture.
Are these bars gluten-free?
They can be if you use certified gluten-free oats. Always double-check packaging to ensure no cross-contamination.
Can I make them vegan?
Yes. Use dairy-free butter, vegan chocolate chips, and plant-based peanut butter.
Final Thoughts
No Bake Chocolate Oat Bars are proof that dessert doesn’t have to be complicated. With just a few pantry staples and minimal effort, you can create a decadent treat that satisfies chocolate cravings and adds a comforting homemade touch. Whether you’re making them for a party, packing them into lunchboxes, or enjoying one with a cup of coffee, these bars are guaranteed to please.