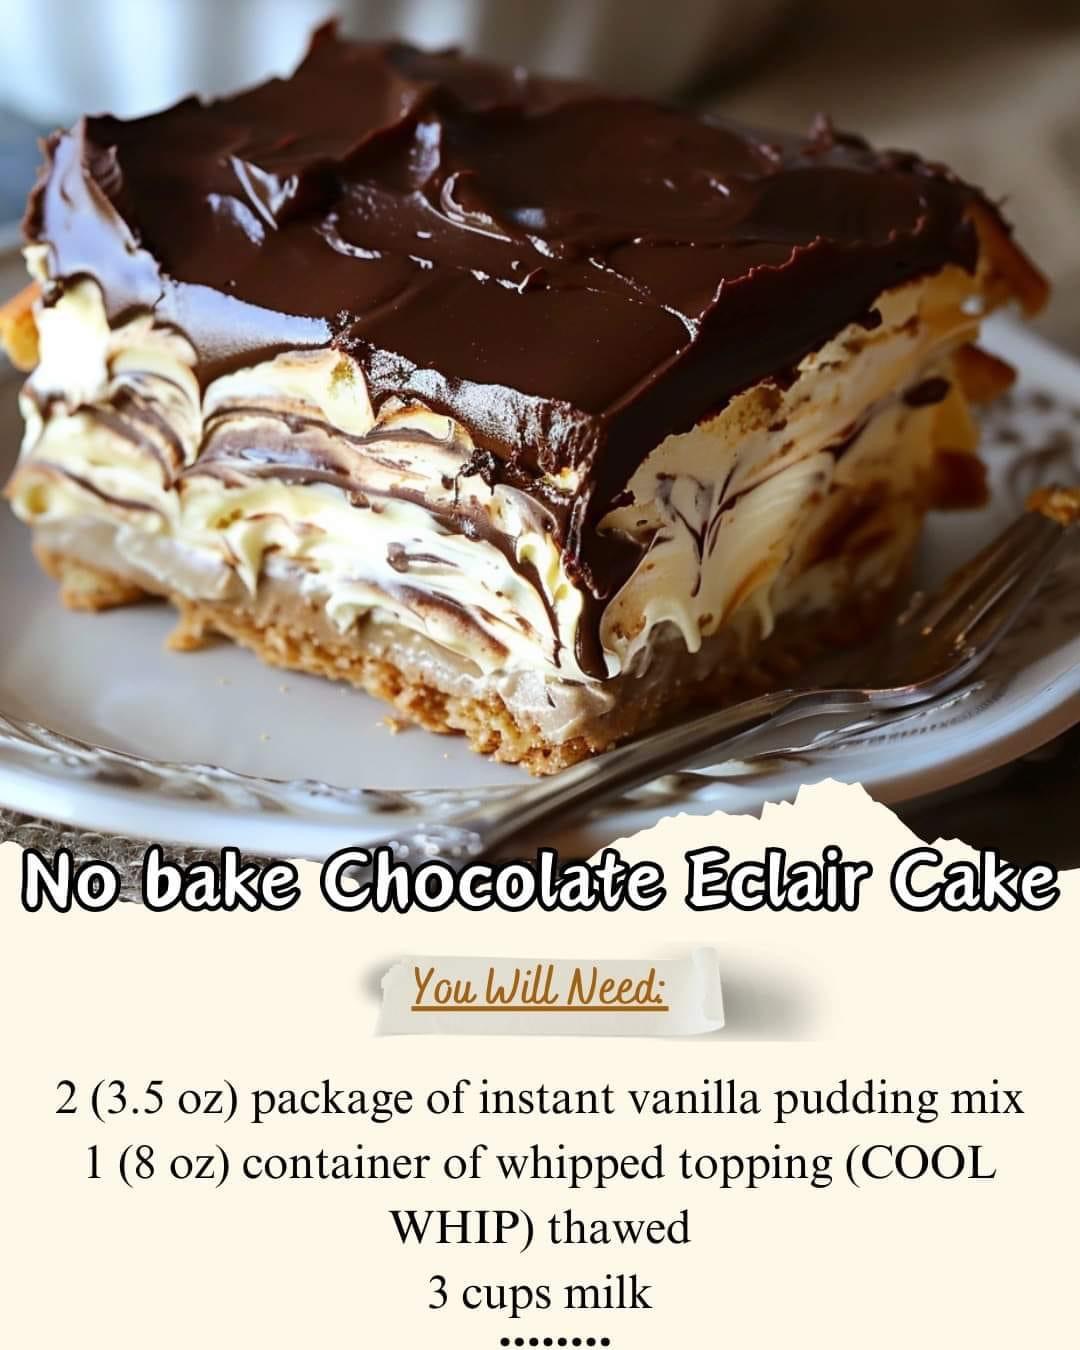
No-Bake Chocolate Éclair Cake: A Delightful and Easy Dessert
If you’re looking for a quick, no-fuss dessert that’s bound to be a crowd-pleaser, look no further than the No-Bake Chocolate Éclair Cake. This dessert combines the classic flavors of an éclair—vanilla cream filling, graham crackers, and chocolate—without the need for any baking. The layers of graham crackers soften as they sit in the creamy pudding mixture, creating a dessert that resembles a decadent éclair in every bite.
Perfect for potlucks, family gatherings, or simply indulging your sweet tooth, this No-Bake Chocolate Éclair Cake is a dessert that gets better the longer it sits. So, let’s dive into how you can create this simple yet delicious treat!
Ingredients
To make this scrumptious dessert, you will need:
- 2 (3.5 oz) packages of instant vanilla pudding mix – The base of the creamy filling that mimics the vanilla custard in a traditional éclair.
- 1 (8 oz) container of whipped topping (Cool Whip), thawed – Adds a light, fluffy texture to the pudding mixture.
- 3 cups milk – Helps the pudding mix set into a creamy consistency.
- 2 sleeves graham cracker squares – Acts as the “pastry” layers in this no-bake version.
- 1 (16 oz) tub of chocolate frosting – The rich, chocolatey topping that completes the dessert.
Step-by-Step Directions
Step 1: Prepare the Pudding Mixture
In a medium mixing bowl, combine the vanilla pudding mix, milk, and thawed Cool Whip. Whisk the ingredients together until they are fully combined and the mixture is smooth and creamy. Set aside for later use.
Tip: Make sure the Cool Whip is fully thawed before combining it with the pudding mix to ensure a smooth, creamy texture without lumps.
Step 2: Create the First Layer
In a 9×13-inch baking dish, arrange a single layer of graham cracker squares on the bottom. You may need to break a few crackers into smaller pieces to ensure that the entire bottom of the dish is covered.
Tip: Don’t worry if the graham crackers overlap slightly or if there are small gaps between them. As the dessert chills, the crackers will soften and meld into the creamy layers.
Step 3: Add the First Layer of Pudding Mixture
Spread half of the pudding mixture over the graham cracker layer, using a spatula to smooth it out evenly. Make sure the pudding mixture fully covers the graham crackers, reaching the edges of the dish.
Step 4: Create the Second Layer of Crackers and Pudding
Place another layer of graham crackers on top of the pudding mixture, repeating the process to ensure full coverage. Then, spread the remaining half of the pudding mixture over this second layer of crackers.
Tip: Gently press the crackers down after each layer to help them absorb the pudding mixture and soften as the dessert sets.
Step 5: Final Layer of Graham Crackers
Add one final layer of graham crackers on top of the pudding mixture. This will be the top layer of the cake, so take care to arrange the crackers neatly for a smooth, even finish.
Step 6: Let the Dessert Set
Cover the dish with plastic wrap and place it in the refrigerator for at least 30 minutes to 1 hour. This allows the pudding mixture to firm up slightly and the flavors to meld.
Step 7: Soften the Chocolate Frosting
Once the dessert has chilled for an hour, it’s time to add the chocolate frosting. Remove the lid and aluminum foil from the tub of frosting, and place it in the microwave for about 15 seconds to soften it. Stir the frosting until it becomes smooth and easy to spread.
Tip: Don’t microwave the frosting for too long, as you want it to be spreadable but not too runny.
Step 8: Add the Chocolate Layer
Remove the plastic wrap from the dessert, and evenly spread the softened chocolate frosting over the top layer of graham crackers. Use a spatula to smooth it out, covering the entire surface.
Step 9: Chill Overnight
Cover the dish again with plastic wrap and return it to the refrigerator. It’s best to let the dessert chill overnight, as this allows the graham crackers to soften completely and the flavors to fully develop.
Tip: The longer the dessert sits in the fridge, the softer and more delicious it becomes. This is one of those desserts that tastes even better the next day!
Step 10: Serve and Enjoy!
When ready to serve, simply slice the No-Bake Chocolate Éclair Cake into squares and enjoy. The layers of creamy vanilla pudding, softened graham crackers, and rich chocolate frosting will create a dessert that everyone will love.
Tips for Making the Best No-Bake Chocolate Éclair Cake
- Chill Time Is Key: Don’t rush the chilling process. For the best results, let the cake sit in the fridge overnight. This gives the graham crackers plenty of time to soften and absorb the flavors.
- Substitute for Chocolate Frosting: If you prefer a homemade touch, you can make your own chocolate ganache by melting chocolate chips with a little heavy cream. This will give the cake an extra rich, chocolatey flavor.
- Add a Flavor Twist: To give your éclair cake a unique twist, try adding a layer of sliced bananas or strawberries between the pudding layers. This will add a fresh, fruity flavor to the dessert.
- Make It Ahead: This dessert is perfect for making in advance, as it gets better the longer it chills. You can easily make it the night before a party or gathering.
- Cutting the Cake: To get clean slices, use a sharp knife and wipe it off with a paper towel between each cut. This will prevent the layers from smearing together.
Frequently Asked Questions
Can I use homemade whipped cream instead of Cool Whip?
Yes, you can substitute homemade whipped cream for Cool Whip if you prefer. Simply whip about 1 1/2 cups of heavy cream with a few tablespoons of sugar until soft peaks form, and use it in place of the Cool Whip.
Can I use a different flavor of pudding mix?
Absolutely! While vanilla pudding is traditional for this dessert, you can experiment with other flavors like chocolate, banana, or even butterscotch pudding for a different twist on the classic recipe.
**How long can I store the No-Bake Chocolate Éclair Cake in the fridge?**
You can store this dessert in the refrigerator for up to 4-5 days. In fact, the cake often tastes better after sitting for a day or two, as the graham crackers continue to soften and absorb the pudding mixture. Just be sure to cover it tightly with plastic wrap or aluminum foil to keep it fresh.
Can I freeze the No-Bake Chocolate Éclair Cake?
Yes, you can freeze this dessert if you’d like to make it ahead of time or save leftovers. To freeze, wrap the cake tightly with plastic wrap and then cover it with aluminum foil. It can be stored in the freezer for up to 2 months. To serve, thaw in the refrigerator for a few hours before slicing.
Can I use gluten-free graham crackers?
Yes, if you’re gluten-sensitive or preparing this dessert for someone who is, you can use gluten-free graham crackers. The texture and flavor will still be delicious, and it’s a great option for making this dessert more inclusive.
Can I add other toppings?
Certainly! You can customize this cake by adding toppings such as crushed nuts, shaved chocolate, or even sprinkles on top of the chocolate frosting. This adds an extra layer of flavor and texture.
Final Thoughts
The No-Bake Chocolate Éclair Cake is a wonderful, fuss-free dessert that’s perfect for any occasion. With its simple layers of graham crackers, creamy pudding, and rich chocolate frosting, it captures the essence of a classic éclair without any of the hassle of baking. Whether you’re whipping it up for a family gathering, potluck, or just to satisfy a sweet tooth, this dessert is sure to be a hit. The best part? It only gets better with time, making it a great make-ahead option that you can prepare the night before and enjoy later.
So go ahead and give this easy, no-bake treat a try!