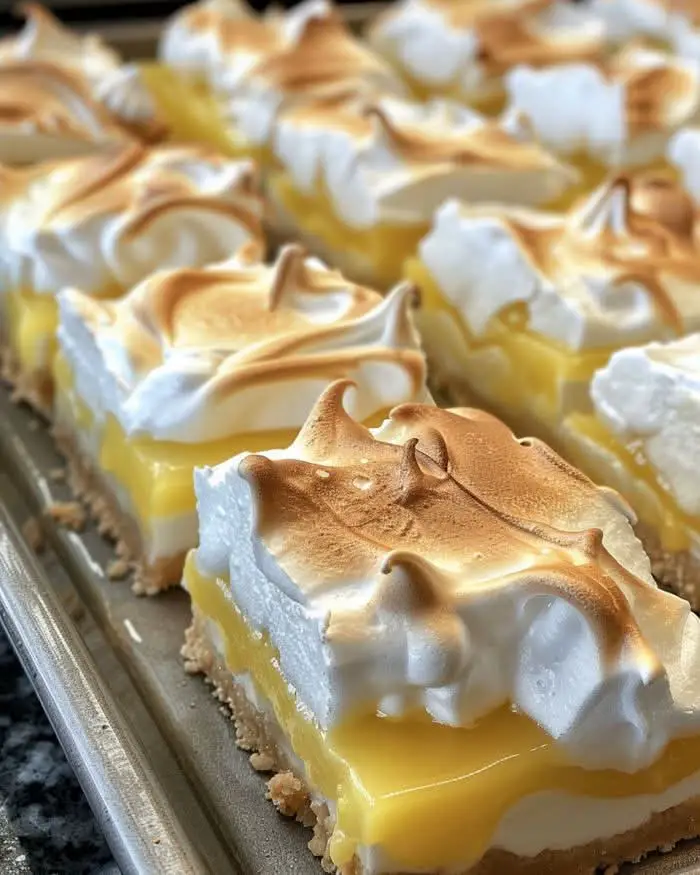
These Lemon Meringue Pie Bars bring together a buttery shortbread crust, a luscious lemon filling, and a cloud of toasted marshmallow meringue. They deliver all the flavors of a traditional lemon meringue pie in a simpler, bar-style dessert that’s easy to make, slice, and serve. Perfect for holidays, parties, or anytime you crave a bright, citrusy treat.
Ingredients
Shortbread Base
- 2¼ cups shortbread cookie crumbs (about 8 oz / 225g cookies)
- 3 tablespoons unsalted butter, melted
Lemon Layer
- 1½ cups granulated sugar
- Small pinch of salt
- ½ cup freshly squeezed lemon juice (from about 3–4 lemons)
- Zest of 1 medium lemon
- 4 large eggs, at room temperature
Marshmallow Topping
- 4 large egg whites, at room temperature
- ¾ cup granulated sugar
- Pinch of cream of tartar (optional, for stability)
Instructions
For the Crust
- Preheat the oven to 350°F (175°C). Line a 9-inch square baking pan with aluminum foil, leaving an overhang on all sides. Lightly coat with cooking spray.
- In a medium bowl, combine the shortbread cookie crumbs and melted butter. Mix until evenly moistened.
- Press the mixture firmly into the bottom of the prepared pan.
- Bake the crust for 14 minutes, until it just begins to turn golden at the edges.
For the Lemon Layer
- While the crust bakes, prepare the lemon filling. In a medium bowl, whisk together the sugar, salt, and lemon zest.
- Add the lemon juice and whisk until combined.
- Add the eggs and whisk until the mixture is smooth and uniform.
- When the crust comes out of the oven, give the lemon mixture one final whisk, then carefully pour it over the hot crust.
- Return the pan to the oven and bake for 18–22 minutes, or until the filling is set around the edges but still slightly jiggly in the center.
- Allow the bars to cool completely on a wire rack, then cover and refrigerate until thoroughly chilled—at least 3 hours or overnight.
For the Marshmallow Meringue
- When ready to serve, fill a medium saucepan with about 2 inches of water and bring it to a simmer.
- In a heatproof bowl that fits over the saucepan without touching the water, combine the egg whites and sugar.
- Place the bowl over the simmering water and whisk constantly for 5–7 minutes, until the mixture reaches approximately 140°F (60°C) and the sugar completely dissolves (you can check by rubbing a small amount between your fingers—there should be no graininess).
- Transfer the mixture to the bowl of a stand mixer fitted with the whisk attachment. Beat on medium-high speed for 5–7 minutes, until the meringue is thick, glossy, and forms stiff peaks.
Assembly
- Using the foil overhang, lift the chilled bars from the pan and place them on a serving platter or baking sheet.
- Spread the marshmallow meringue evenly over the top of the bars, creating decorative peaks and swirls with a spatula.
- Use a kitchen torch to lightly toast the meringue until golden brown. Alternatively, place the bars under a broiler for 1–2 minutes, watching carefully to prevent burning.
- For neat slices, use a clean, sharp knife dipped in hot water and wiped dry between cuts.
- Serve immediately or within a few hours for the best meringue texture.
Tips for Success
- Use fresh lemon juice for the best flavor. Bottled juice won’t provide the same brightness.
- Chill thoroughly before adding the meringue. The cool filling contrasts beautifully with the fluffy topping.
- Torch, don’t bake the meringue once it’s on the bars if possible—it gives more control over browning and prevents overcooking the filling.
- Store the bars in the refrigerator, uncovered or lightly covered, for up to one day. The meringue may soften slightly over time but will still taste delicious.
Serving Suggestions
- Serve with a dusting of lemon zest for extra color and fragrance.
- Add a few fresh berries on the side for a complementary touch.
- Pair with black tea, iced tea, or coffee for a perfectly balanced dessert experience.
Frequently Asked Questions
1. Can I make these ahead of time?
Yes. You can prepare the crust and lemon layer up to a day in advance and refrigerate. Add and toast the meringue right before serving for the best texture.
2. Can I use a different crust?
Absolutely. Graham cracker, vanilla wafer, or digestive biscuit crusts also work well.
3. What if I don’t have a kitchen torch?
You can use your oven’s broiler. Place the bars on the top rack and broil for 1–2 minutes, keeping a close eye on them to prevent burning.
4. How do I store leftovers?
Refrigerate in an airtight container for up to 2 days. Note that the meringue may weep slightly after refrigeration, but the bars will still taste great.
5. Can I freeze these bars?
It’s not recommended to freeze bars with meringue, as the topping can lose its texture when thawed. However, you can freeze the lemon layer (without meringue) for up to 2 months and add the meringue later.
6. Why is my meringue grainy?
The sugar likely wasn’t fully dissolved during the heating stage. Make sure to whisk constantly over simmering water until the mixture feels completely smooth before whipping.
7. How do I get clean cuts?
Use a sharp knife dipped in hot water and wiped dry between slices. This helps cut through the meringue and lemon layer cleanly without dragging.
Conclusion
These Lemon Meringue Pie Bars transform a classic dessert into a simple yet stunning treat. With a buttery shortbread base, bright citrus filling, and soft, toasted meringue topping, every bite is a perfect balance of sweet and tart. Whether you’re hosting a dinner party, bringing dessert to a potluck, or treating yourself to a weekend bake, this recipe delivers both elegance and flavor with minimal fuss.