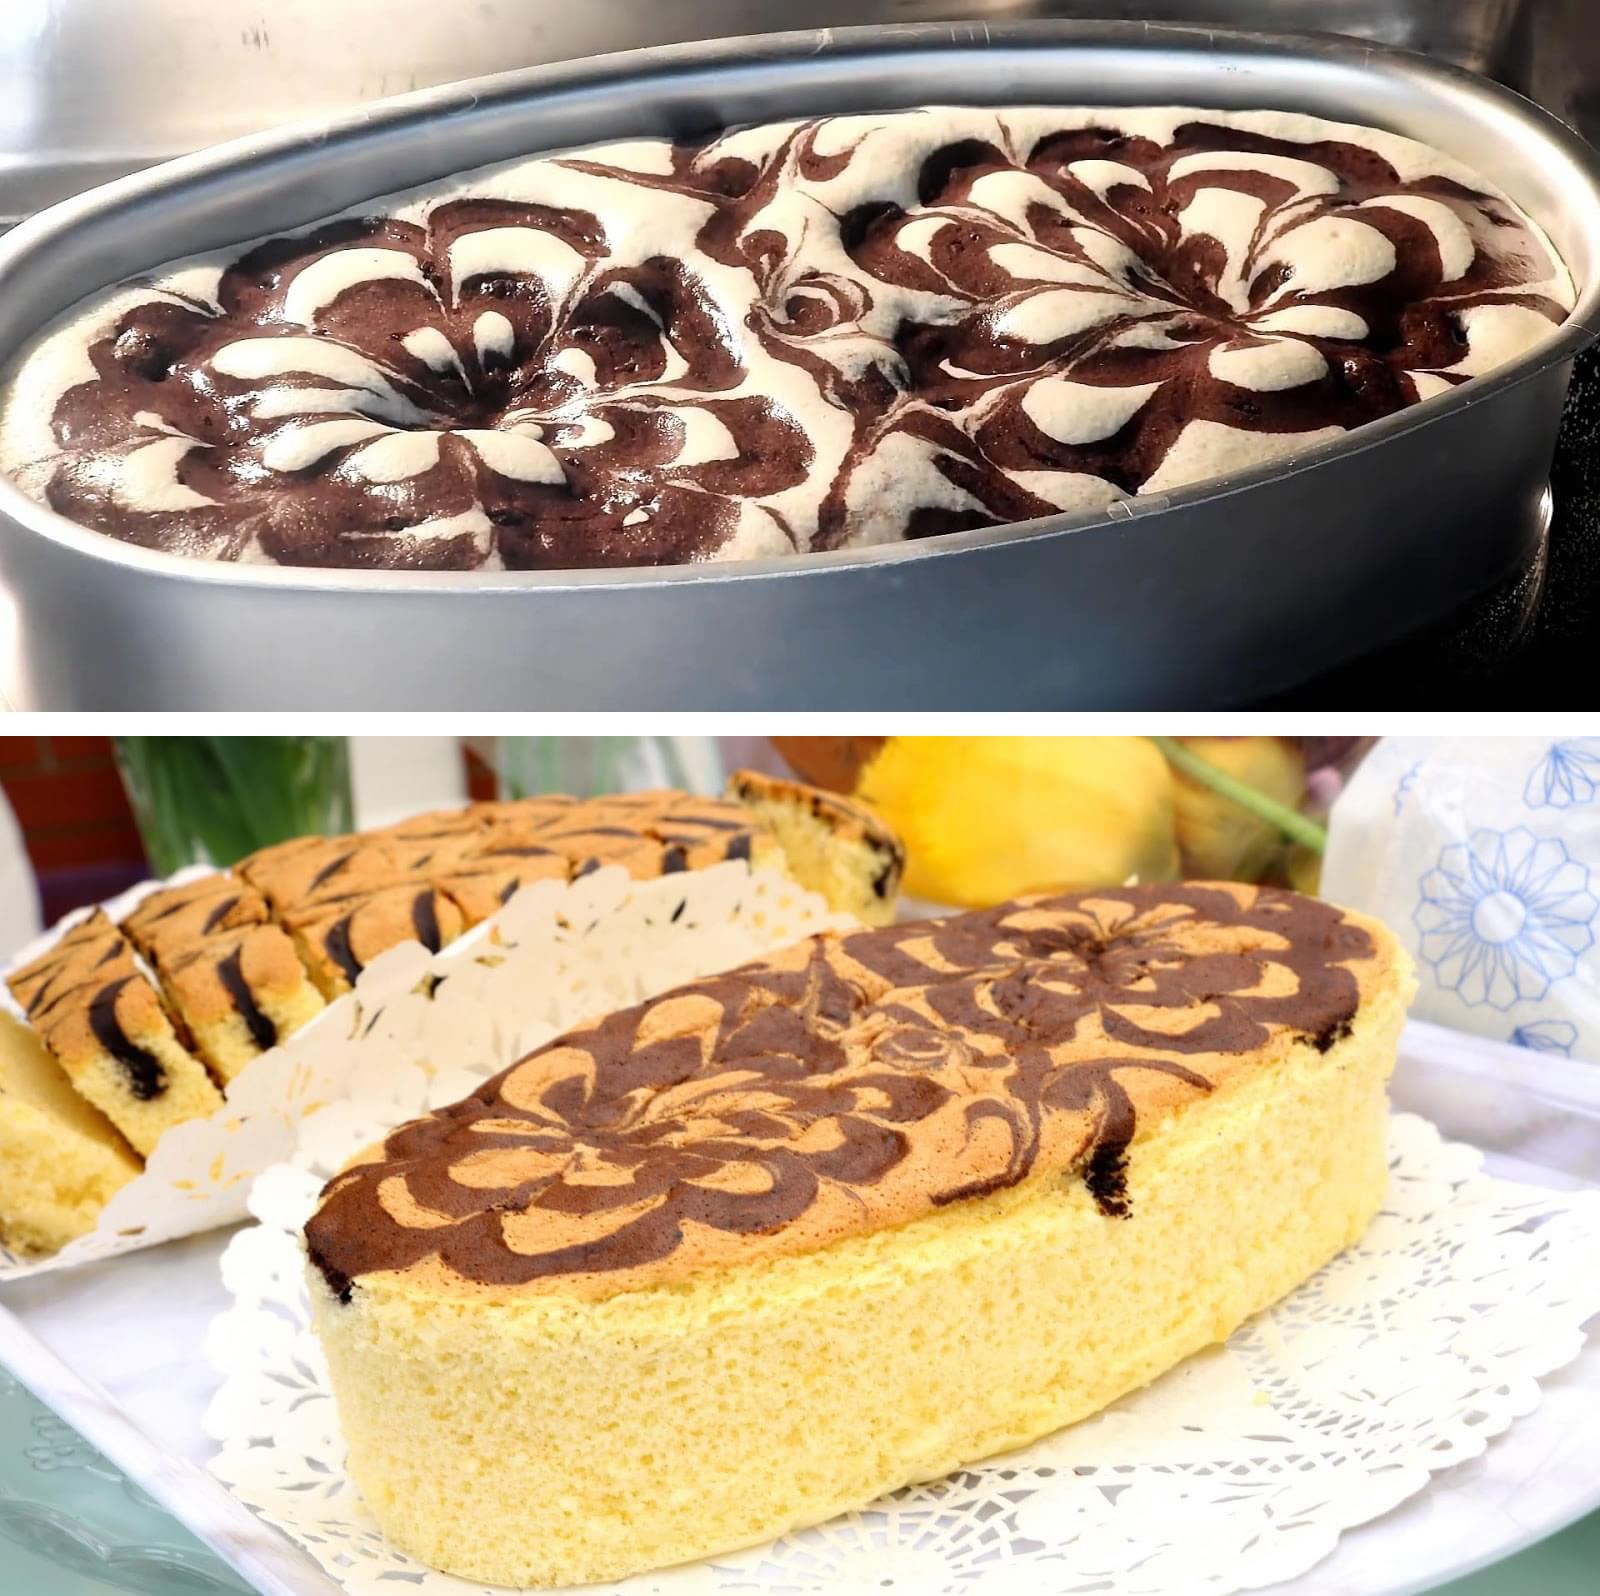
Japanese Soufflé Cheesecake, often called “Cotton Cheesecake,” is a delightful dessert known for its airy texture, rich flavor, and perfect balance between sweetness and tanginess. Unlike traditional cheesecake, it combines the richness of cream cheese with the lightness of a soufflé, creating a melt-in-your-mouth experience. This guide provides detailed instructions, helpful tips, and answers to common questions to help you achieve a perfect Japanese Soufflé Cheesecake at home.
Ingredients
For the Cheesecake Batter:
- Cream cheese: 180 g (softened)
- Whole milk: 70 g
- Egg yolks: 3 small or 2 large
- Plain flour: 55 g
- Cornflour: 15 g
For the Meringue:
- Egg whites: 4 small or 3 large
- Sugar: 70 g (optional for sweetness)
Optional Decoration:
- Dark cocoa powder: 1 tsp (for creating patterns on the surface)
Instructions (Step-by-Step)
Step 1: Prepare the Meringue
- Whisk the egg whites: Begin by ensuring your bowl and beaters are clean and grease-free. This is crucial for achieving stiff peaks. Add the egg whites to the bowl and whisk until foamy.
- Add sugar gradually: Slowly add sugar, one tablespoon at a time, while whisking. Continue until stiff peaks form. This should take about 5 minutes. To test, lift the whisk—if the peak holds its shape, it’s ready.
Step 2: Make the Cheesecake Batter
- Combine cream cheese and milk: In a mixing bowl, combine softened cream cheese and milk. Whisk until smooth and lump-free. The mixture should be creamy and uniform.
- Incorporate egg yolks: Gradually add the egg yolks to the cream cheese mixture, whisking continuously to ensure they are fully combined.
- Sift dry ingredients: Sift plain flour and cornflour into the wet mixture. Fold gently with a spatula until the batter is smooth and no lumps remain.
Step 3: Fold and Combine
- Incorporate the meringue: Gently fold the meringue into the cheesecake batter in three additions. Use a spatula to fold in a circular motion, being careful not to deflate the mixture. The goal is to maintain the airiness provided by the meringue.
- Prepare optional cocoa batter: If you’d like to decorate your cake, reserve a small portion of the batter. Mix it with dark cocoa powder until fully combined.
Step 4: Prepare and Bake
- Prepare the pan: Line an oval cake pan (21.5 cm x 10 cm, 6 cm deep) with parchment paper. Grease the sides lightly with butter or oil. Pour the batter into the prepared pan.
- Decorate: For a decorative touch, transfer the cocoa batter to a piping bag. Snip the tip and pipe patterns on the cake surface. Use a chopstick or skewer to swirl the designs for an elegant finish.
- Set up a water bath: Place the cake pan inside a larger baking pan. Fill the larger pan with cold water until it reaches halfway up the sides of the cake pan. The water bath prevents cracking and ensures even baking.
- Bake: Place the pans into a cold oven (do not preheat). Set the oven to 150°C and bake for 45 minutes. Once the baking time is complete, turn off the oven and let the cake sit inside for 15 minutes to cool gradually.
Step 5: Cool and Serve
- Prevent shrinkage: Remove the cake from the oven and gently drop the pan from a height of about 6 inches. This minimizes shrinking during cooling.
- Cool completely: Allow the cake to cool to room temperature, around 55°C.
- Slice and serve: Use a sharp, heated knife for clean slices. Serve immediately or refrigerate overnight for a firmer texture.
Helpful Tips
Cooking Tips
- Room temperature ingredients: Ensure cream cheese and eggs are at room temperature for easier mixing and a smoother batter.
- Gentle folding: Fold the meringue into the batter delicately to maintain its airiness. Overmixing can deflate the mixture.
- Monitor the water bath: Check the water level during baking to ensure it doesn’t evaporate completely. Add more water if needed.
Storage Tips
- Refrigeration: Store leftovers in an airtight container in the refrigerator for up to 3 days.
- Freezing: Wrap individual slices tightly in plastic wrap, then foil. Freeze for up to 1 month. Thaw in the refrigerator before serving.
Substitutions and Variations
- Gluten-free: Replace plain flour with a gluten-free baking mix.
- Dairy-free: Substitute cream cheese and milk with plant-based alternatives like almond cream cheese and oat milk.
- Flavored cheesecake: Add lemon zest, matcha powder, or vanilla extract to the batter for additional flavors.
- Fruit topping: Top the cake with fresh fruits like berries or mango slices for added sweetness and visual appeal.
Frequently Asked Questions
1. Why did my cheesecake crack?
Cracking can result from sudden temperature changes or overmixing the batter. Ensure a gradual cooling process and use a water bath to maintain even temperatures.
2. Can I use a round cake pan instead?
Yes, you can use a round pan. Adjust the baking time depending on the size of the pan.
3. How do I ensure the meringue is properly whipped?
Ensure your bowl and whisk are completely clean and dry. Gradually add sugar to the egg whites and whisk until stiff peaks form. Avoid overwhipping, as this can make the meringue dry and difficult to fold into the batter.
Conclusion
Japanese Soufflé Cheesecake is a sophisticated dessert that combines simplicity and elegance. Its light texture and rich flavor make it a crowd-pleaser for any occasion. By following this guide and using the tips provided, you’ll be able to create a perfect cheesecake every time. Whether enjoyed plain or adorned with fruit and patterns, this Japanese classic will leave everyone asking for seconds.
Take the time to try this recipe today and discover the magic of Japanese Soufflé Cheesecake!

