Introduction: A Budget-Friendly Way to Make Lemon Bar Soap at Home
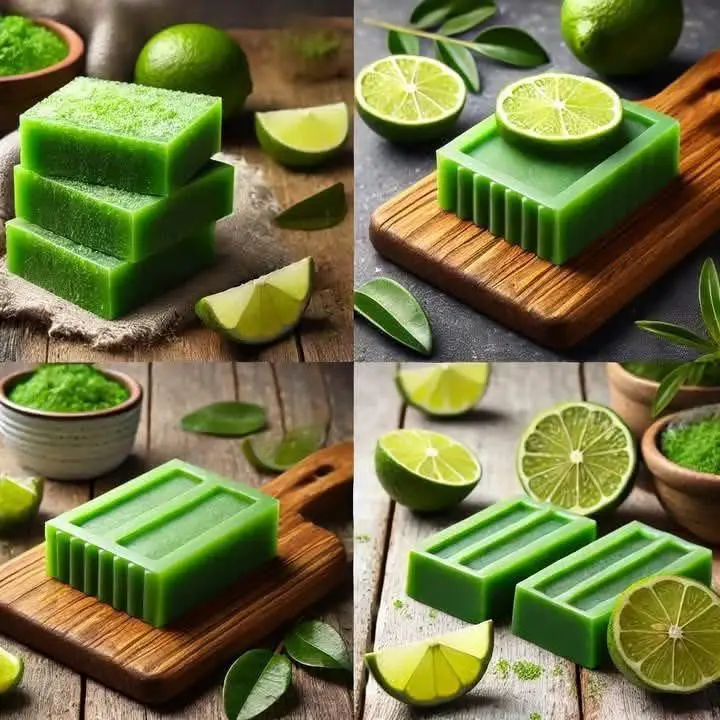
With times being tough and many of us looking for ways to save money, making your own soap at home can be a practical and rewarding solution. This homemade lemon soap recipe is simple, affordable, and uses minimal ingredients, including lemon juice for a fresh, citrusy scent. Using lemon glycerin soap as a base, this recipe is perfect for beginners and yields a refreshing bar soap that’s gentle on the skin. Let’s dive into how you can make your own lemon bar soap with just a lemon and a few other items!
Benefits of Homemade Lemon Bar Soap
Before we get into the recipe, here’s why this lemon soap is worth trying:
•   Cost-Effective: Uses affordable ingredients, saving you money compared to store-bought soaps.
•   Refreshing Scent: Lemon juice and lemon glycerin soap give the bars a zesty, uplifting fragrance.
•   Gentle on Skin: Glycerin soap is known for being moisturizing and mild, making it suitable for most skin types.
•   Customizable: You can adjust the recipe to your liking by adding essential oils or herbs (optional).
Homemade Lemon Soap Recipe
Here’s how to make lemon bar soap at home with minimal ingredients.
Ingredients:
•   500 ml of water
•   500 g of sugar
•   70 ml of fresh lemon juice (about 1-2 lemons, depending on size)
•   500 ml of alcohol (rubbing alcohol or ethanol, commonly used in soap-making for its antibacterial properties)
•   2 bars (200 g each) of lemon glycerin soap (total 400 g)
Equipment:
•   Frying pan or double boiler (for melting the soap)
•   Heat-safe bowl (if using a double boiler setup)
•   Grater (to grate the soap bars)
•   Spoon or spatula (for mixing)
•   Plastic jars, molds, or containers (to shape and dry the soap)
Instructions:
1.  Melt the Soap:
•   Grate the 2 bars of lemon glycerin soap (400 g total) using a grater to create small shavings for easier melting.
•   Place the grated soap into a frying pan. Set the pan in a larger pot filled with water to create a double boiler (this prevents the soap from burning). Alternatively, if you’re careful, you can melt it directly in the pan over very low heat.
•   Stir occasionally until the soap fully melts into a smooth consistency.
2.  Add the Wet Ingredients and Sugar:
•   Once the soap has melted, add 500 ml of water, 70 ml of fresh lemon juice, and 500 g of sugar to the pan.
•   Mix well to combine all the ingredients. Let the mixture simmer on low heat for about 2 minutes, stirring constantly to ensure the sugar dissolves and everything blends evenly.
3.  Incorporate the Alcohol:
•   Turn off the heat to avoid any risk of ignition, as alcohol is flammable.
•   Slowly add 500 ml of alcohol to the mixture, stirring carefully to incorporate it. The alcohol helps with preservation and gives the soap antibacterial properties.
4.  Pour and Set:
•   Transfer the mixture into plastic jars, soap molds, or any container you’d like to use to shape your soap bars.
•   Let the mixture sit for about 6 hours (or overnight) to cool, harden, and fully set into solid bars.
5.  Unmold and Use:
•   Once the soap has hardened, remove it from the molds. If it’s too soft, let it air-dry for another day or two.
•   Your homemade lemon bar soap is now ready to use! Store unused bars in a cool, dry place.
How Does This Recipe Work?
•   Lemon Glycerin Soap: Acts as the base, providing a moisturizing and gentle cleansing effect with a light lemon scent.
•   Lemon Juice: Adds a natural citrus fragrance and astringent properties that can help cleanse the skin.
•   Sugar: Helps create a thicker consistency and can contribute to a smoother texture in the final soap bar.
•   Alcohol: Acts as a preservative and adds antibacterial qualities, extending the shelf life of the soap.
•   Water: Helps dissolve the sugar and blend the ingredients into a pourable mixture.
Note: This recipe doesn’t involve lye (a common ingredient in traditional soap-making), making it safer and easier for beginners. However, the alcohol should be handled with care due to its flammability.
Safety Tips for Making Lemon Bar Soap
•   Handle Alcohol Carefully: Alcohol is flammable, so always turn off the heat before adding it to the mixture. Work in a well-ventilated area.
•   Use Low Heat: Melting soap directly in a pan can cause it to burn, so a double boiler is safer. If you don’t have one, keep the heat very low and stir frequently.
•   Test for Sensitivity: Before using the soap on your body, do a patch test on a small area of skin to ensure you’re not sensitive to any ingredients, especially the alcohol or lemon juice.
•   Avoid Contact with Eyes: Lemon juice can sting if it gets into your eyes, so be cautious when using the soap on your face.
Who Can Benefit from This Homemade Lemon Soap?
This DIY lemon bar soap is perfect for:
•   People looking to save money by making their own soap at home.
•   Those who love the fresh scent of lemon in their skincare products.
•   Individuals with normal to oily skin, as lemon has natural astringent properties.
•   Anyone interested in sustainable living by reducing reliance on store-bought products.
Note: If you have very dry or sensitive skin, the alcohol and lemon juice might be drying. Consider adding a teaspoon of olive oil or coconut oil to the mixture for extra moisture.
Extra Tips for Best Results
•   Customize Your Soap: Add a few drops of lemon essential oil for a stronger scent, or mix in dried herbs like chamomile or lavender for a decorative touch.
•   Shape It Your Way: Use silicone molds in fun shapes (like hearts or stars) to make your soap bars more appealing.
•   Extend Shelf Life: Store the soap in an airtight container to prevent it from absorbing moisture and softening over time.
•   Gift Idea: Wrap the bars in parchment paper with a ribbon—they make great homemade gifts for friends and family!
Combining This Soap with Your Wellness Routine
You can pair this homemade lemon soap with the natural remedies we discussed earlier for a holistic approach to health and self-care:
•   Morning Routine: Start your day with the carrot and tomato vitality drink to support your liver and gut health.
•   Evening Routine: Sip garlic milk before bed to boost immunity and promote restful sleep.
•   Shower Time: Use your homemade lemon bar soap to cleanse and refresh your skin, enjoying its zesty scent as part of your self-care ritual.
This combination supports both internal wellness and external care, helping you feel your best inside and out.
Conclusion: A Simple, Affordable Way to Make Soap at Home
Making your own lemon bar soap at home is an easy, budget-friendly way to take control of your self-care routine. With just a lemon, some glycerin soap, and a few pantry staples, you can create refreshing, gentle soap bars that leave your skin feeling clean and invigorated. Plus, it’s a great way to save money during tough times while enjoying the satisfaction of a DIY project.
Ready to try this homemade lemon soap recipe? Give it a go and let us know how it turns out in the comments! For more DIY and wellness tips, subscribe to our newsletter.
FAQs
- Can I use a different type of soap instead of lemon glycerin soap?Yes, you can use any glycerin soap base, but the lemon variety adds to the citrusy scent. Plain glycerin soap works fine if you add more lemon juice or essential oil.
- Why is alcohol added to the recipe?Alcohol acts as a preservative and gives the soap antibacterial properties, helping it last longer and stay hygienic.
- How long do these soap bars last?If stored in a cool, dry place, the bars can last for several months. The alcohol helps prevent bacterial growth, extending shelf life.
- Can I skip the sugar in the recipe?Sugar helps with the texture and consistency of the soap, but you can reduce or omit it. The soap might be softer without it, so adjust drying time accordingly.