How to Make Homemade Skillet Bread
Homemade skillet bread is a simple yet delightful recipe that makes for a perfect breakfast or a satisfying afternoon snack. Imagine biting into warm, fluffy bread that you made in just a few minutes! This versatile bread can be enjoyed on its own, with butter, or as a side to your favorite soups and salads. In this guide, we’ll walk you through a straightforward recipe that requires minimal ingredients and effort, making it ideal for both novice and experienced cooks.
Why You’ll Love Skillet Bread
- Quick and Easy: With just a few ingredients and about 10 minutes of cooking time, you can whip up this delicious bread in no time.
- Versatile: Enjoy it plain, or customize it with herbs, cheese, or spices to suit your taste.
- Minimal Equipment: All you need is a bowl, a whisk, and a skillet—no fancy kitchen gadgets required!
- Healthy Option: This bread is made with simple ingredients, allowing you to control what goes into it.
Ingredients Overview
Here’s what you’ll need to make your homemade skillet bread:
- 1 egg: This acts as a binder, giving the bread its structure.
- 1 teaspoon of baking powder: Helps the bread rise and become fluffy.
- 1 tablespoon of plain yogurt: Adds moisture and a subtle tanginess.
- 3 tablespoons of cornstarch: This ingredient provides a light texture and is a great gluten-free option.
- 1 teaspoon of salt: Enhances the overall flavor of the bread.
Optional Additions
- Herbs or Spices: Incorporate dried herbs like oregano, thyme, or spices like garlic powder for added flavor.
- Cheese: A handful of shredded cheese can elevate your bread, making it extra rich and flavorful.
- Chopped Vegetables: Add finely chopped onions, peppers, or spinach for a nutritious twist.
Step-by-Step Directions
Making your homemade skillet bread is a breeze! Follow these simple steps:
Step 1: Prepare the Egg Mixture
In a medium-sized bowl, crack the egg and lightly beat it using a whisk or fork. Then, add 1 tablespoon of plain yogurt and 1 teaspoon of salt to the bowl. Mix well until fully combined.
Step 2: Combine the Dry Ingredients
Next, gradually add 3 tablespoons of cornstarch and 1 teaspoon of baking powder to the egg mixture. Stir until you achieve a smooth, homogeneous batter. Ensure there are no lumps; this will help create a light and airy bread.
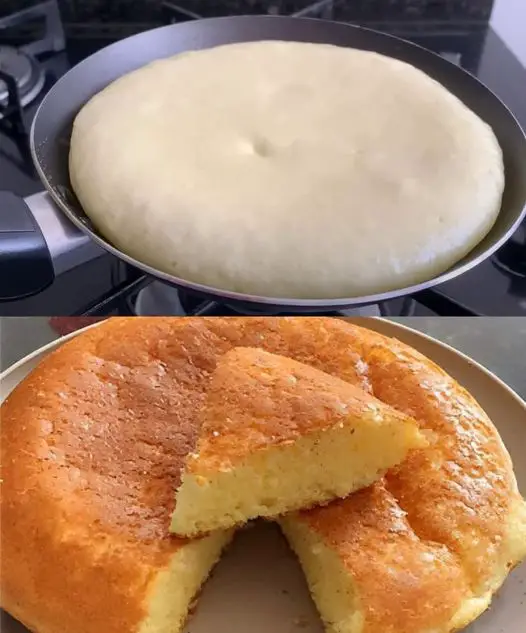
Step 3: Cook the Bread
Heat a skillet over low heat and lightly grease it with oil or butter to prevent sticking. Pour the batter into the skillet and cover it with a lid. Allow it to cook for about 4 to 5 minutes or until the bottom turns golden brown.
Step 4: Flip and Finish Cooking
Once the bottom is golden, carefully flip the bread using a spatula. Cook the other side for another 4 to 5 minutes, until it also becomes golden brown.
Step 5: Serve
Remove the bread from the skillet and let it cool for a minute before slicing. Serve warm, and enjoy with your favorite spreads, dips, or toppings!
Tips for Perfect Skillet Bread
- Don’t Rush the Cooking: Cooking over low heat is crucial to prevent burning while ensuring that the inside cooks thoroughly.
- Experiment with Flavors: Feel free to customize your bread with different herbs, spices, or cheese to match your taste preferences.
- Keep It Covered: Using a lid while cooking helps trap steam, which makes the bread rise and cook evenly.
- Monitor the Heat: If you notice that the bread is browning too quickly, reduce the heat further to allow it to cook through without burning.
How to Store Homemade Skillet Bread
If you have leftovers (which is unlikely!), here’s how to store them:
- At Room Temperature: Wrap the bread in foil or plastic wrap and store it in a cool, dry place for up to 2 days.
- In the Refrigerator: For longer storage, you can keep the bread in an airtight container in the fridge for up to 5 days. Just reheat it in the skillet or microwave before serving.
- Freezing: You can freeze the cooked bread by wrapping it tightly in plastic wrap and then in foil. It will keep well for up to 3 months. Thaw it in the fridge overnight before reheating.
Food Pairings
This homemade skillet bread pairs wonderfully with:
- Soups and Stews: Enjoy it alongside your favorite soup or stew for a comforting meal.
- Salads: Serve it as a side to fresh salads for added texture.
- Dips: Use it as a base for dips like hummus, guacamole, or yogurt-based spreads.
FAQs
Can I use a different type of flour instead of cornstarch?
While cornstarch is a key ingredient for a gluten-free version, you can experiment with all-purpose flour. However, you may need to adjust the quantity and add gluten to achieve the desired texture.
Can I make this bread ahead of time?
Yes! You can prepare the batter in advance and store it in the fridge. Just make sure to mix it again before cooking, as it may settle.
What can I add for more flavor?
Try adding fresh herbs like basil or parsley, spices like cumin or paprika, or cheese for a savory twist.
Can I cook this bread in the oven?
Yes! If you prefer, you can pour the batter into a greased oven-safe dish and bake it at 350°F (175°C) for about 15-20 minutes, or until golden brown and cooked through.
How can I tell when the bread is done?
The bread should be golden brown on both sides and should spring back when lightly pressed. You can also insert a toothpick into the center; if it comes out clean, the bread is done.
Conclusion
Homemade skillet bread is a quick and delightful recipe that can easily become a staple in your kitchen. Whether enjoyed plain or dressed up with your favorite toppings, this bread is versatile, delicious, and perfect for any occasion. With minimal ingredients and a straightforward cooking process, you can create a warm and satisfying bread that’s ready in just minutes. So, grab your skillet and give this recipe a try—you won’t be disappointed!