If you’re craving a decadent chocolate ice cream but want to skip the condensed milk, this recipe is for you. With only three wholesome ingredients—bananas, heavy cream, and cocoa powder—you can whip up a smooth, creamy treat that tastes indulgent without added sugar or preservatives. It’s vegan-optional, dairy-light, and freezer-friendly. Best of all, no ice cream maker is needed.
Simple Ingredients for Chocolate Ice Cream Bliss
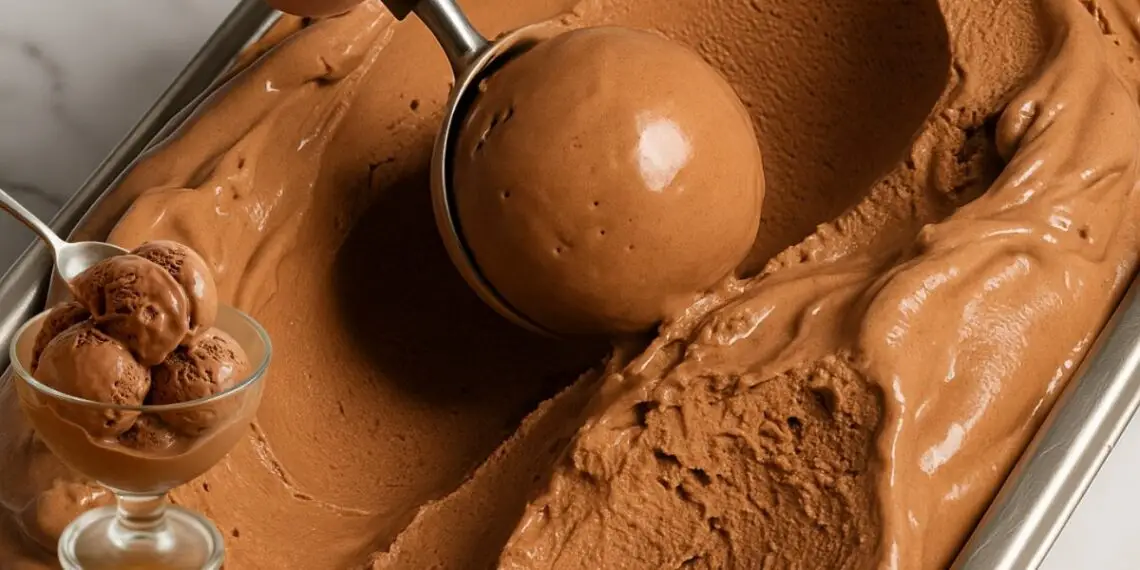
This recipe uses basic, everyday ingredients that come together in the most magical way. Bananas provide natural sweetness and creaminess, while cocoa powder offers that deep chocolate flavor. The whipped cream adds lightness and texture, making this a dessert you’ll want to make again and again.
Ingredients You’ll Need
Base:
- 4 ripe bananas, peeled and sliced
- 200 grams (7 oz) heavy cream (or coconut cream for a vegan version)
- 3 tablespoons unsweetened cocoa powder (50% cocoa or higher)
Tip: Ripe bananas with brown speckles are best for this recipe—they’re naturally sweeter and give the ice cream a silkier consistency.
Step-by-Step Method for Perfect Homemade Chocolate Ice Cream
Freeze the Bananas
Slice your bananas into thin rounds. Spread them out on a parchment-lined tray or plate in a single layer to prevent sticking. Place in the freezer for at least 2–3 hours or until solid.
Freezing tip: If you’re short on time, slice the bananas thinner to speed up the freezing process. You can also freeze them overnight for convenience.
Whip the Heavy Cream
Chill your heavy cream in the refrigerator until it’s cold enough to whip. Using a hand mixer or stand mixer, beat the cream on medium speed until it doubles in volume and forms soft peaks. This step introduces air into the mix, making the ice cream fluffier.
Vegan option: Substitute with chilled, full-fat coconut cream. Whip only the solid part, discarding the liquid.
Blend the Bananas
Transfer the frozen banana slices to a high-speed blender or food processor. Blend until smooth and creamy. You may need to scrape down the sides a few times.
Texture note: Blended bananas have a surprisingly creamy, custard-like consistency that mimics traditional ice cream.
Combine and Mix
Gently fold the banana puree into the whipped cream using a spatula or mix it slowly in the blender on low speed. Then, sift in the cocoa powder and mix until completely incorporated. The mixture should be smooth, rich, and chocolatey.
Cocoa tip: For a more intense chocolate flavor, use Dutch-processed cocoa powder or add a teaspoon of instant espresso powder.
Freeze the Mixture
Pour the chocolate banana mixture into a freezer-safe glass dish or loaf pan. Smooth the top with a spatula and cover tightly with cling film or a lid. Freeze for at least 3 hours until firm.
Storage tip: For best texture, let the ice cream sit at room temperature for 5–10 minutes before scooping.
Serving Suggestions for Your Homemade Chocolate Ice Cream
- Classic style: Scoop into bowls and top with shaved dark chocolate or chopped nuts.
- Fruit-forward: Add sliced strawberries or a drizzle of raspberry puree.
- Grown-up twist: Sprinkle a pinch of flaky sea salt or add a dash of cinnamon or chili powder.
- Crunchy layer: Top with granola or crushed cookies for texture contrast.
Tips for Creamier, Tastier Chocolate Ice Cream
- Use ripe bananas – This enhances both sweetness and texture.
- Blend thoroughly – Make sure the banana puree is velvety to avoid lumps in your ice cream.
- Whip the cream cold – Cold cream whips faster and holds better.
- Taste before freezing – Want it sweeter? Add a teaspoon of honey or maple syrup.
- Go nutty – Stir in chopped almonds or hazelnuts before freezing.
- Layer flavors – Swirl in peanut butter or melted dark chocolate before setting in the freezer.
Nutrition and Benefits
This ice cream is not just delicious—it’s relatively healthy too:
- No refined sugar – Sweetness comes purely from bananas.
- No condensed milk – Ideal for those avoiding processed dairy.
- Customizable – Vegan, gluten-free, and paleo-friendly when adjusted.
- Banana boost – Adds potassium, fiber, and natural creaminess.
- Kid-approved – A fun, healthy treat for all ages.
Frequently Asked Questions
Can I make this without heavy cream?
Yes, you can use full-fat coconut cream or thick Greek yogurt for a similar texture.
Can I make it fully vegan?
Absolutely. Replace heavy cream with coconut cream and ensure your cocoa powder is dairy-free.
How long does it keep in the freezer?
This ice cream lasts up to 2 weeks in an airtight container. It may become firmer over time, so let it sit out before scooping.
Can I add sweeteners?
Yes. While ripe bananas usually provide enough sweetness, feel free to add a teaspoon of maple syrup or honey if desired.
What kind of cocoa powder should I use?
Use unsweetened cocoa powder. Dutch-processed will give a darker, richer flavor, while natural cocoa is lighter and more acidic.
Why does the texture change over time?
Homemade ice cream tends to freeze harder due to lack of stabilizers. Allow it to thaw slightly before serving for the best scoopable texture.
Can I add other flavors?
Definitely. Vanilla extract, almond extract, or a hint of espresso powder can elevate the flavor. You can also swirl in peanut butter or chocolate chips.
Conclusion
This homemade chocolate ice cream without condensed milk is as satisfying as it is simple. It’s a healthy, delicious, and budget-friendly dessert that takes minimal prep and delivers maximum flavor. Whether you’re dairy-free, sugar-conscious, or simply out of condensed milk, this recipe ensures you can still enjoy a luscious chocolate treat—any day of the week. Try it once, and it may become your new go-to frozen dessert.