If you’re looking for a sweet, melt-in-your-mouth treat that’s perfect for parties, holidays, or simply indulging in a homemade candy, Homemade Butter Mints are here to become your new favorite. These delicate, creamy candies are made with just a few simple ingredients and can be customized with your favorite colors and flavors. Whether you’re gifting them, serving them at a wedding or baby shower, or enjoying them as an after-dinner mint, these butter mints are as delightful to make as they are to eat.
In this article, we’ll guide you through everything you need to know to make these irresistible candies—from selecting the best ingredients to step-by-step instructions. Plus, we’ll share tips for customizing the recipe and ensuring your mints turn out perfectly every time. Let’s get started!
Why You’ll Love This Recipe
There’s so much to adore about Homemade Butter Mints. Here’s why they’re a must-try:
Melt-in-Your-Mouth Texture
The combination of butter and powdered sugar creates a smooth, creamy candy that literally melts on your tongue, giving you a delightful texture that’s hard to resist.
Customizable
Add food coloring and flavor extracts to match any occasion or personal preference. You can make them as festive or simple as you like.
Easy to Make
With just a few ingredients and minimal equipment, you can whip up these candies in no time. This makes them a great last-minute treat for any occasion.
Perfect for Gifting
Homemade Butter Mints make excellent gifts, especially when packaged in decorative tins or bags. They’re thoughtful, beautiful, and delicious.
Kid-Friendly
Even little ones will love helping shape and decorate these colorful treats. It’s a great activity to do together, and they’ll have fun eating the results!
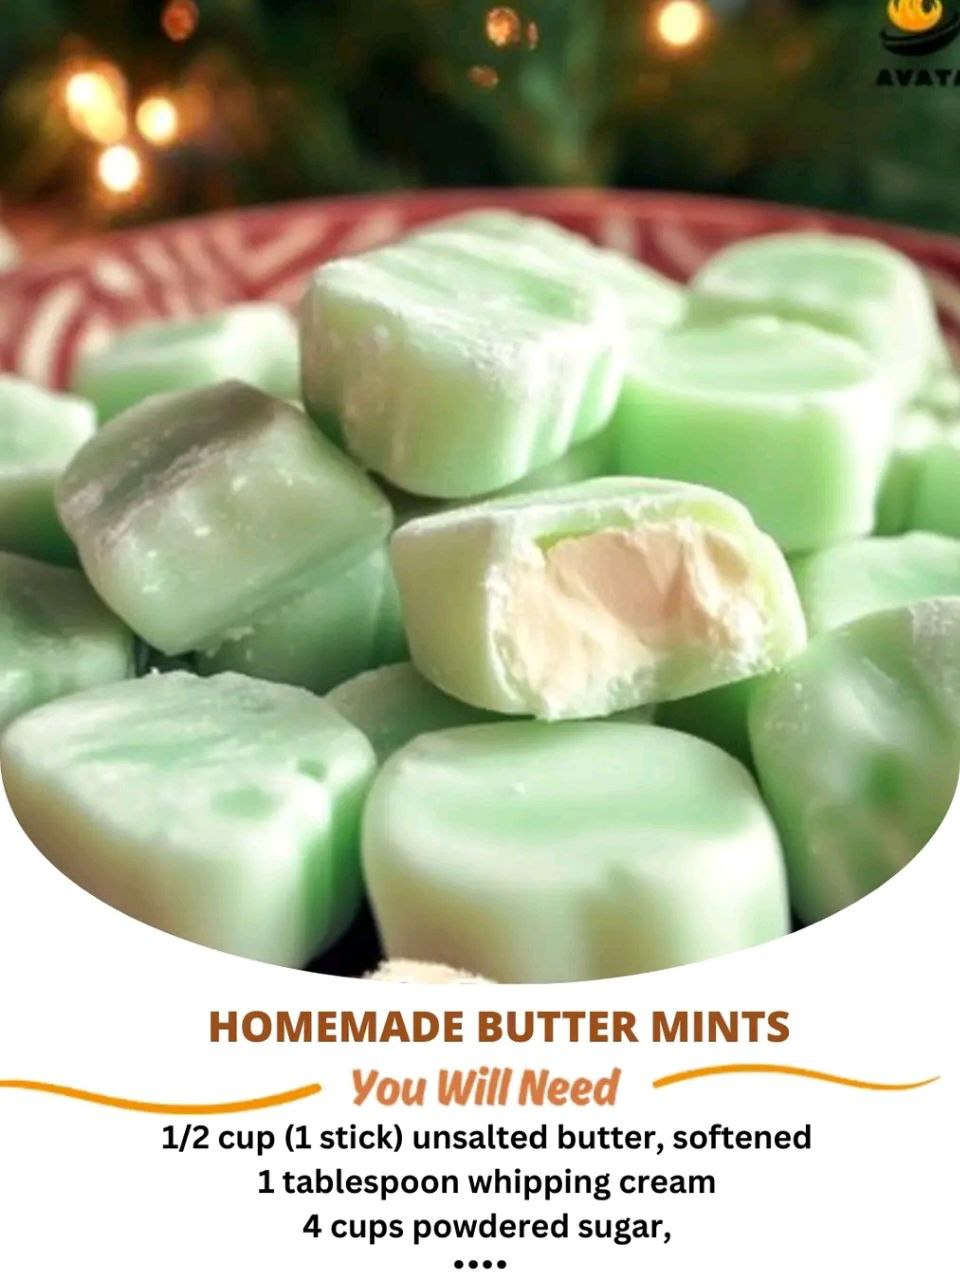
Ingredients You’ll Need
The secret to these butter mints lies in their simple yet indulgent combination of ingredients. Here’s what you’ll need:
For the Mints:
- ½ cup unsalted butter (softened to room temperature)
- 4 cups powdered sugar (plus extra for dusting)
- 2–3 tablespoons heavy cream (or milk, for a lighter option)
- 1 teaspoon vanilla extract (or other flavor extracts like peppermint, almond, or lemon)
- Food coloring (optional, for customization)
Optional Tools:
- Candy molds (for shaping)
- Parchment paper (for rolling and cutting)
- Small cookie cutters (for fun shapes)
Step-by-Step Instructions
Ready to whip up these creamy, flavorful mints? Follow these easy steps:
Step 1: Prepare Your Workspace
Lightly dust your work surface with powdered sugar to prevent sticking. If you’re using candy molds or cookie cutters, have them ready before you begin mixing. This will make the process smoother and faster.
Step 2: Mix the Dough
In a large mixing bowl, beat the softened butter until smooth and creamy. Gradually add the powdered sugar, one cup at a time, mixing on low speed to avoid a powdered sugar cloud. Once combined, increase the speed and beat until the mixture is light and fluffy.
Add 2 tablespoons of heavy cream and the vanilla extract (or your chosen flavoring). Mix until the dough comes together. If the dough is too dry, add more cream, one teaspoon at a time, until it reaches a pliable consistency.
Step 3: Divide and Color the Dough
Divide the dough into smaller portions if you want to make multiple colors or flavors. Knead in a few drops of food coloring into each portion until evenly distributed. Make sure to wear gloves when handling food coloring to avoid staining your hands.
Step 4: Shape the Mints
You can shape the mints in several ways:
By Hand:
Roll small pieces of dough into balls, logs, or other shapes. Flatten slightly if desired to create a more uniform shape.
With Molds:
Press the dough into candy molds to create uniform shapes. Gently tap the mold to release the mints.
With Cutters:
Roll the dough into thin sheets (about ¼-inch thick) on a powdered sugar-dusted surface. Use small cookie cutters to create fun shapes like hearts, stars, or circles. This method adds a personal touch and is perfect for themed events.
Step 5: Let Them Set
Place the shaped mints on a parchment-lined baking sheet. Allow them to rest at room temperature for 1–2 hours to firm up. Alternatively, you can chill them in the refrigerator for 30 minutes to speed up the process.
Step 6: Store and Serve
Once the mints have set, store them in an airtight container at room temperature for up to 2 weeks. Be sure to separate layers with parchment paper to prevent sticking. These mints make excellent after-dinner treats, party favors, or delightful homemade gifts.
Why This Recipe Works So Well
The magic of Homemade Butter Mints lies in their simplicity and versatility. The rich, buttery base provides a smooth, creamy texture, while the powdered sugar ensures they dissolve effortlessly in your mouth. Adding flavor extracts and food coloring allows you to tailor the mints to suit any occasion or personal taste. Together, these elements create a treat that’s as customizable as it is delicious—a true crowd-pleaser.
Variations to Try
While the classic version is divine, here are some creative ways to switch things up:
Flavor Twists
Use peppermint extract for a refreshing minty kick, almond extract for a nutty flavor, or citrus extracts like lemon or orange for a zesty twist. You can easily experiment with different extracts to create a range of unique butter mints.
Layered Colors
Divide the dough into multiple portions and layer different colors for a marbled effect. This works especially well for holiday-themed treats and adds a fun visual element to the candies.
Mini Mints
Roll the dough into tiny balls for bite-sized treats, perfect for weddings, baby showers, or small gatherings. These make for a more delicate and elegant presentation.
Gluten-Free Option
Ensure all packaged ingredients (like powdered sugar) are gluten-free to accommodate dietary restrictions. With this simple swap, these butter mints can be enjoyed by everyone.
Sugar-Free Version
Substitute the powdered sugar with a sugar-free alternative for a lower-sugar option. This allows those watching their sugar intake to enjoy these delicious candies without guilt.
Tips for Success
To ensure that your butter mints turn out perfectly every time, here are some tips to keep in mind:
Use Softened Butter
Cold butter won’t mix properly, and melted butter will make the dough too sticky. Room temperature butter is key to creating a smooth and pliable dough.
Add Cream Gradually
Too much liquid can make the dough sticky, so it’s important to add the cream one teaspoon at a time. This gives you better control over the consistency.
Dust Generously
Keep your work surface and hands dusted with powdered sugar to prevent sticking. It also helps maintain the smooth texture of the dough as you shape it.
Save Leftovers
Store leftover mints in an airtight container to keep them fresh and prevent them from drying out. You can also freeze them for longer storage and thaw them when needed.
Experiment with Shapes
Use themed molds or cookie cutters to match holidays, seasons, or special occasions. You can even create different shapes for parties or weddings to make them extra special.
Serving Suggestions
These Homemade Butter Mints are incredibly versatile and pair well with a variety of occasions. Here are some ideas to enhance your experience:
Weddings and Showers
Package them in pastel colors for elegant party favors or dessert table accents. These butter mints are the perfect touch for a wedding or baby shower.
Holidays
Match the colors to Christmas (red and green), Valentine’s Day (pink and red), or Easter (pastels). You can create seasonal flavors like peppermint for Christmas or lemon for a fresh spring vibe.
Gift Idea
Layer the mints in decorative jars or tins tied with ribbon for thoughtful homemade gifts. They’re a great way to share the love with friends and family.
After-Dinner Treat
Serve them alongside coffee or tea for a sweet finish to your meal. The minty flavor makes them the perfect palate cleanser after a heavy meal.
Party Favors
Wrap individual mints in cellophane or place them in mini candy bags for guests to take home. They make a great party favor that’s both functional and delicious.
Final Thoughts
With their creamy texture, customizable colors and flavors, and melt-in-your-mouth goodness, Homemade Butter Mints are a treat worth making again and again. Whether you’re hosting a gathering, celebrating a special occasion, or simply craving something sweet and satisfying, this recipe delivers big on taste and charm.
So, the next time you’re in the mood for something festive, flavorful, and utterly delightful, give these butter mints a try. Trust us—they’re quick, easy, and absolutely divine!
FAQs
Q: How long do these butter mints last?
A: Store them in an airtight container at room temperature for up to 2 weeks. They can also be refrigerated to extend freshness.
Q: Can I use a different flavor extract?
A: Absolutely! You can use peppermint, almond, lemon, or any other flavor extract to customize your butter mints.
Q: Can I make these mints ahead of time?
A: Yes! You can make these mints ahead of time and store them in an airtight container until you’re ready to serve or give them as gifts.
Q: How do I keep the butter mints from sticking to each other?
A: Store the mints in layers separated by parchment paper to prevent sticking. You can also dust them with extra powdered sugar.
Q: Can I freeze these butter mints?
A: Yes, you can freeze them! Store them in a single layer on a baking sheet until frozen, then transfer them to an airtight container for long-term storage. Just thaw before serving.