Homemade Banana Jam is a beautifully simple recipe that transforms ripe bananas into a rich, caramelized spread with deep flavor and smooth texture. Unlike traditional jams that rely on citrus fruits or pectin, banana jam uses natural sugars and gentle cooking to create a thick, spoonable treat that feels comforting and homemade in every sense.
This recipe stands out because of its minimal ingredients and straightforward method. With just bananas and sugar, you can create a jam-like dessert that works as a spread, filling, topping, or even a standalone sweet snack. The slow caramelization of sugar enhances the natural sweetness of bananas, giving the jam a depth of flavor similar to toffee or dulce de leche, yet lighter and fruit-forward.
Why Homemade Banana Jam Is Worth Making
Bananas are often eaten fresh or baked, but they are rarely used in jam form. That is what makes banana jam so special. It offers a new way to enjoy a familiar fruit, especially when you have very ripe bananas that are too soft to eat on their own.
Homemade Banana Jam is worth making because it:
- Uses simple, affordable ingredients
- Helps prevent food waste by using ripe bananas
- Requires no special equipment or preservatives
- Delivers a naturally sweet, caramelized flavor
- Works in both sweet and dessert-style dishes
Unlike store-bought spreads, this homemade version allows you to control sweetness, texture, and freshness.
Ingredients and Their Purpose
Bananas
Ripe bananas are the foundation of this recipe. The riper they are, the sweeter and more flavorful your jam will be. Overripe bananas with brown spots work best because their natural sugars are fully developed, which enhances caramelization.
Bananas provide body, flavor, and natural thickness to the jam. When cooked, they break down into a smooth, cohesive mixture that thickens without the need for added pectin.
Sugar
Sugar plays a dual role in this recipe. First, it sweetens the jam. Second, and more importantly, it caramelizes when heated, creating a deep golden flavor that defines the final result.
Caramelizing the sugar before adding the bananas adds complexity and richness. It balances the fruit’s sweetness and creates a jam that tastes indulgent without being heavy.
Step-by-Step Guide to Making Homemade Banana Jam
Step 1: Prepare the Bananas
Start by peeling and mashing eight ripe bananas until smooth. You can use a fork, potato masher, or even a hand blender if you prefer a very smooth texture. Set the mashed bananas aside.
Consistency matters here. A smoother mash produces a smoother jam, while a chunkier mash results in a more textured spread.
Step 2: Caramelize the Sugar
Place a heavy-bottomed saucepan over low heat and add the sugar. Allow the sugar to melt slowly, stirring occasionally. At first, it will clump, then gradually dissolve and turn liquid.
Continue heating gently until the sugar transforms into a golden, glossy caramel. Avoid rushing this step. High heat can burn the sugar quickly, creating bitterness instead of sweetness.
Step 3: Add the Mashed Bananas
Once the caramel reaches the right color and consistency, carefully add the mashed bananas. The mixture may bubble and steam, so stir slowly and steadily.
Use a wooden spoon or heat-resistant spatula to fully combine the bananas with the caramel. At this stage, the mixture will look loose and glossy.
Step 4: Cook Until Thickened
Continue cooking over medium-low heat, stirring constantly, for about five to seven minutes. As the mixture cooks, moisture evaporates and the jam thickens.
You will notice the mixture pulling away slightly from the sides of the pan. This indicates that it has reached the correct consistency. The jam should be thick but still spreadable.
Step 5: Cool and Chill
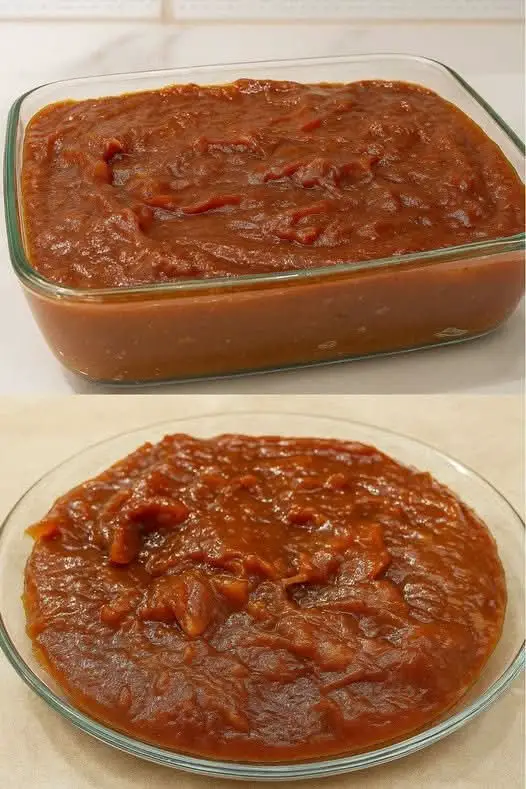
Remove the pan from heat and transfer the banana jam to a glass dish or heat-safe container. Spread it evenly to help it cool faster.
Allow the jam to cool to room temperature, then refrigerate for at least two hours. Chilling helps the jam set fully and enhances the caramelized banana flavor.
Texture and Consistency Tips
- Cook longer for a thicker, firmer jam
- Cook slightly less for a softer, spoonable texture
- Stir constantly to prevent sticking or burning
- Use a heavy-bottomed pan for even heat distribution
The jam will thicken more as it cools, so avoid overcooking if you prefer a softer spread.
Serving Ideas for Homemade Banana Jam
Homemade Banana Jam is incredibly versatile. You can enjoy it in many different ways, depending on the occasion and your preference.
Spread it on toast, pancakes, waffles, or crepes for a comforting breakfast. Use it as a filling for pastries, hand pies, or sandwich cookies. Swirl it into yogurt or oatmeal for natural sweetness. Serve it chilled as a simple dessert with whipped cream or crushed biscuits.
It also works well as a topping for ice cream, cheesecake, or banana bread, adding extra depth and moisture.
Creative Variations
Although the classic recipe uses only bananas and sugar, you can customize it easily.
Add a splash of lemon juice to balance sweetness and enhance flavor. Stir in cinnamon or vanilla for warmth. Add a small pinch of salt to deepen the caramel notes. You can even mix in a spoon of peanut butter after cooking for a banana-peanut spread.
Each variation keeps the base simple while offering a new flavor experience.
Storage and Shelf Life
Store Homemade Banana Jam in an airtight container in the refrigerator. It keeps well for up to one week. Always use a clean spoon to avoid introducing moisture or bacteria.
This jam is not shelf-stable and is not intended for long-term canning. Because it contains fresh fruit and no preservatives, refrigeration is essential.
Nutritional Perspective
Banana jam is naturally rich in carbohydrates and provides energy from fruit sugars. While it does contain added sugar, it avoids artificial additives and preservatives commonly found in store-bought spreads.
Because bananas contain potassium and fiber, this jam offers more nutritional value than many traditional jams, especially when enjoyed in moderation.
Frequently Asked Questions
Can I reduce the amount of sugar?
Yes, but sugar plays a key role in caramelization and texture. Reducing it too much may result in a looser jam with less depth of flavor.
Why did my sugar burn?
Burning usually happens when the heat is too high or the sugar is left unstirred. Always melt sugar slowly over low heat.
Can I freeze banana jam?
Freezing is not recommended, as the texture may change once thawed. Refrigeration works best for this recipe.
How do I know when the jam is done?
The jam is ready when it thickens and pulls slightly away from the sides of the pan. It should coat the spoon thickly.
Can I use this jam as a baking filling?
Yes. It works well as a filling for cakes, pastries, and rolls, especially when chilled and slightly firm.
Does banana jam taste like banana bread?
It has a deeper, more caramelized flavor than banana bread. The caramel gives it a richer, almost toffee-like note.
Conclusion
Homemade Banana Jam proves that simple ingredients can create something truly special. With ripe bananas and sugar, you can make a naturally sweet, caramelized spread that feels comforting, nostalgic, and versatile.
This recipe celebrates the banana in a new way, turning a familiar fruit into a rich, spoonable treat that works across breakfasts, desserts, and snacks. Once you try it, you may find yourself saving ripe bananas just to make another batch.
With its ease, flavor, and flexibility, Homemade Banana Jam is a recipe worth keeping in your kitchen collection.