Homemade Apple Crisp Recipe: A Comforting Fall Classic
Introduction
Welcome to the delightful world of warm, comforting, homemade desserts! Our Homemade Apple Crisp recipe brings together the nostalgic flavors of fall with an easy-to-make dessert that’s perfect for cozy gatherings or as a sweet indulgence. The golden, crunchy topping perfectly complements the tender, spiced apples, creating a dish that’s both rustic and irresistible. Whether you’re hosting a family dinner, celebrating a holiday, or simply craving something warm and comforting on a crisp autumn evening, this apple crisp is the perfect choice.
In this article, we’ll guide you through every step of making the ultimate apple crisp, share some helpful tips to make your dessert even better, and answer common questions about this classic recipe. So, grab your apron and get ready to fill your kitchen with the comforting aroma of cinnamon-spiced apples and baked oats.
Recipe Details
- Servings: 6-8 servings
- Preparation Time: 20 minutes
- Cooking Time: 55-60 minutes
- Total Time: 75-80 minutes
Ingredients
For the Crumb Topping:
- 1/2 cup all-purpose flour, plus 2 tablespoons
- 1/2 cup old-fashioned oats (not instant)
- 1/4 cup packed brown sugar
- 1/4 teaspoon cinnamon
- A pinch of salt
- 3 tablespoons light butter
- 1 teaspoon water
For the Apple Filling:
- 1/4 cup granulated sugar
- 1/4 teaspoon ground nutmeg
- A pinch of ground cloves
- 3 lbs apples (such as Granny Smith or Honeycrisp), peeled, cored, and sliced
- 1 teaspoon vanilla extract
Instructions
Step 1: Preheat and Prepare
Preheat your oven to 375°F (190°C). Lightly spray a 1-1/2 quart baking dish with nonstick cooking spray to prevent sticking and ensure easy serving.
Step 2: Prepare the Crumb Topping
In a medium bowl, combine the 1/2 cup flour, oats, brown sugar, cinnamon, and salt. Using a fork or your hands, cut the light butter into the dry mixture until it resembles coarse crumbs. Add the teaspoon of water and mix until clumps start to form. If the mixture seems too dry, add up to 2 more tablespoons of water, a little at a time, until it holds together.
Step 3: Make the Apple Filling
In a large mixing bowl, combine the granulated sugar, 2 tablespoons flour, nutmeg, and ground cloves. Add the peeled and sliced apples and vanilla extract to the dry mixture, tossing until the apples are evenly coated with the spices.
Step 4: Assemble the Apple Crisp
Transfer the apple filling to the prepared baking dish, spreading it out evenly. Sprinkle the crumb topping over the apples, ensuring the entire surface is covered. The more topping, the better—it’s what gives the apple crisp its signature crunch.
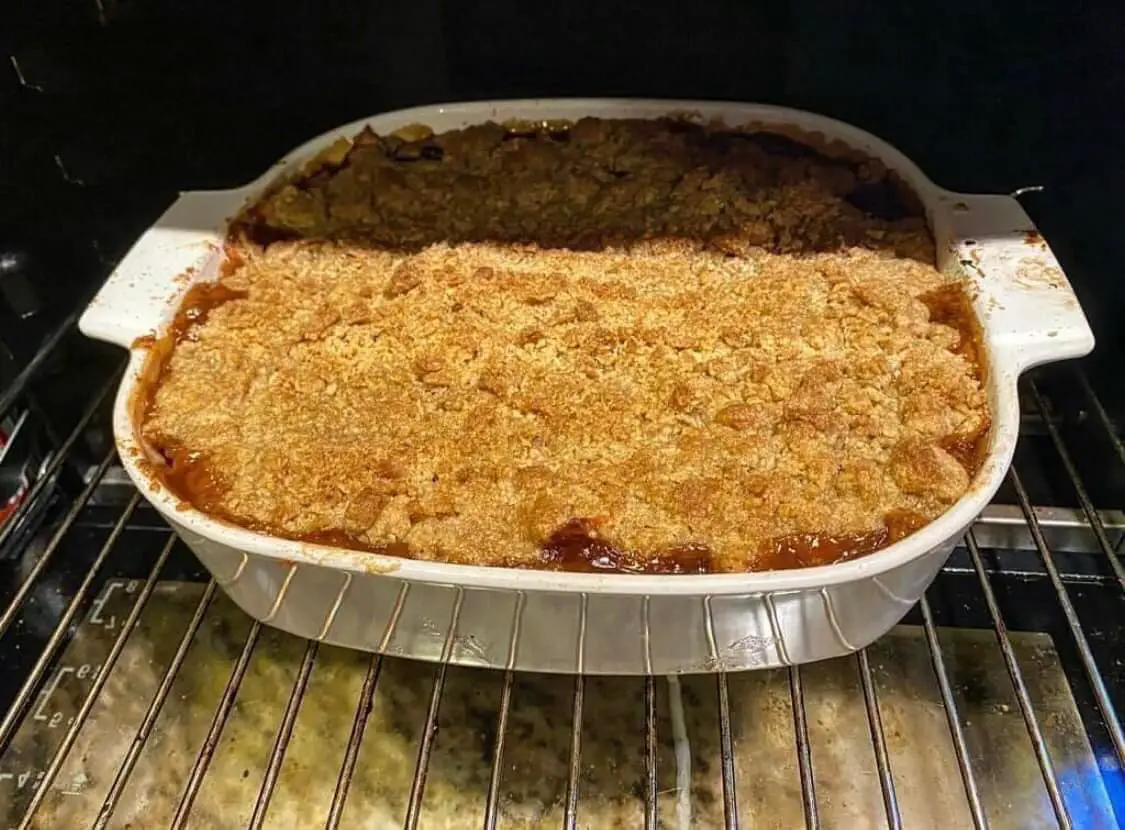
Step 5: Bake to Perfection
Place the baking dish in the preheated oven and bake for 55-60 minutes, or until the apple filling is bubbling and the topping is golden brown and crisp. If the topping starts to brown too quickly, you can loosely cover the dish with aluminum foil to prevent over-browning.
Step 6: Serve and Enjoy
Once the apple crisp is baked to perfection, remove it from the oven and let it cool slightly before serving. This dessert is delicious when served warm or at room temperature. For an extra indulgent treat, pair it with a scoop of vanilla ice cream, a dollop of whipped cream, or a drizzle of caramel sauce.
Recipe Tips and Tricks
Choose the Right Apples
The apples you use will significantly impact the flavor and texture of your apple crisp. Granny Smith apples are a popular choice due to their tartness, which provides a nice contrast to the sweet topping. Honeycrisp apples, on the other hand, lend a juicy sweetness that enhances the overall flavor. Feel free to experiment with a combination of different apple varieties to find your perfect balance.
No Need to Peel (Unless You Prefer)
If you’re short on time or prefer a more rustic dessert, feel free to skip peeling the apples. The peel adds extra texture and fiber to the dish. However, if you’re after a smoother consistency, peeling is recommended.
Keep the Topping Crunchy
To ensure the perfect crisp topping, make sure you use old-fashioned oats, not quick oats. Old-fashioned oats provide a heartier texture, while quick oats can become mushy during baking. Also, don’t skip the step of cutting in the butter—it’s essential for creating that crumbly, buttery topping.
Make it Vegan
For a vegan-friendly version of this apple crisp, simply substitute the light butter with coconut oil or a plant-based butter. The flavor will be just as delicious, and the texture of the topping will remain wonderfully crisp.
Perfect Pairings
Serve your apple crisp with a side of vanilla ice cream, whipped cream, or maple-flavored whipped topping for an added layer of indulgence. These toppings pair perfectly with the warm, spiced apples and crunchy topping.
FAQs
1. Can I use different types of apples for this recipe?
Yes! While Granny Smith and Honeycrisp are popular choices, you can use any type of apple. Fuji, Braeburn, and Pink Lady are all great options. Mixing different types of apples can also provide a more complex flavor profile.
2. Do I have to peel the apples?
No, peeling the apples is optional. Leaving the skins on adds texture and fiber, but if you prefer a smoother filling, peeling is recommended.
3. Can I make this dessert ahead of time?
Yes, you can prepare the apple crisp in advance. Assemble the dish and cover it tightly with plastic wrap or foil. Store it in the refrigerator for up to 24 hours before baking. When ready to serve, bake as directed, adding a few extra minutes if needed.
4. How do I store leftovers?
Leftover apple crisp can be stored in an airtight container in the refrigerator for up to 3 days. To reheat, warm it in the oven at 350°F (175°C) for 10-15 minutes or microwave individual portions for 1-2 minutes.
5. Can I freeze apple crisp?
Yes, apple crisp can be frozen either before or after baking. To freeze before baking, assemble the dish, cover it tightly, and freeze for up to 3 months. When ready to bake, thaw in the refrigerator overnight and bake as directed. If freezing after baking, let the crisp cool completely before wrapping it in plastic wrap and aluminum foil. Reheat in the oven until warm.
Conclusion
Homemade Apple Crisp is a dessert that never goes out of style. With its combination of spiced apples and a crunchy oat topping, this classic dessert is the epitome of comfort food. Whether you’re looking for a treat to enjoy on a cold autumn night or something to bring to a holiday gathering, apple crisp is always a crowd-pleaser. Best of all, it’s easy to make and customize to your preferences.
So, gather your apples, preheat the oven, and get ready to enjoy a timeless dessert that brings the taste of home with every bite!