A wholesome breakfast doesn’t have to be complicated. Sometimes, all you need are simple ingredients, a bit of creativity, and a few minutes in the morning to make something that fuels your body and satisfies your taste buds. This Healthy and Nutritious Snack is a quick, filling, and delicious meal that’s perfect for breakfast, brunch, or even a light lunch.
Made with pantry staples like eggs, milk, and flour, this easy recipe delivers a soft, fluffy texture with a golden, crispy crust. The best part? You can customize it with your favorite fillings — from ham and mozzarella to sautéed veggies or shredded chicken.
Let’s explore how to make this nutritious breakfast from scratch, with helpful tips to make it even better!
Why This Recipe Works
This recipe is a lifesaver for anyone who wants a homemade breakfast that’s healthy, easy, and satisfying. It’s rich in protein, has a balanced ratio of carbohydrates and fats, and can be adapted to different tastes and diets. Whether you’re cooking for yourself or your family, it’s a great way to start the day energized.
Here’s what makes it special:
- Quick to prepare: Ready in less than 15 minutes.
- Flexible: Works with any filling — sweet or savory.
- Wholesome: Made with real ingredients and no preservatives.
- Kid-friendly: A great option for school mornings or lunchboxes.
Ingredients You’ll Need
For the Batter
- 1 egg
- ½ cup milk (4 fl oz / 120 ml)
- 1 tablespoon oil (0.5 fl oz / 15 ml)
- ½ cup all-purpose flour (2.25 oz / 65 g)
- ½ tablespoon baking powder (0.2 oz / 6 g)
- A pinch of salt
For Cooking
- Butter or margarine for greasing
For the Filling (Choose Your Favorite)
- Ham and mozzarella cheese (classic and savory)
- OR shredded chicken and cream cheese
- OR sautéed vegetables (like spinach, bell peppers, and onions)
- OR cooked ground beef with herbs
Step-by-Step Instructions
Preparing the Batter
Start by cracking one egg into a medium mixing bowl. Beat it lightly with a fork or whisk until the yolk and white are well combined.
Add the milk and oil to the bowl, then whisk again until the liquid mixture is smooth.
Gradually sift in the all-purpose flour and a pinch of salt. Stir gently until the batter becomes smooth and lump-free. This ensures even cooking and a soft texture.
Finally, add the baking powder and fold it in gently — this gives your snack its light and fluffy rise. Avoid overmixing at this stage, as it can make the batter heavy.
Preheating the Sandwich Maker
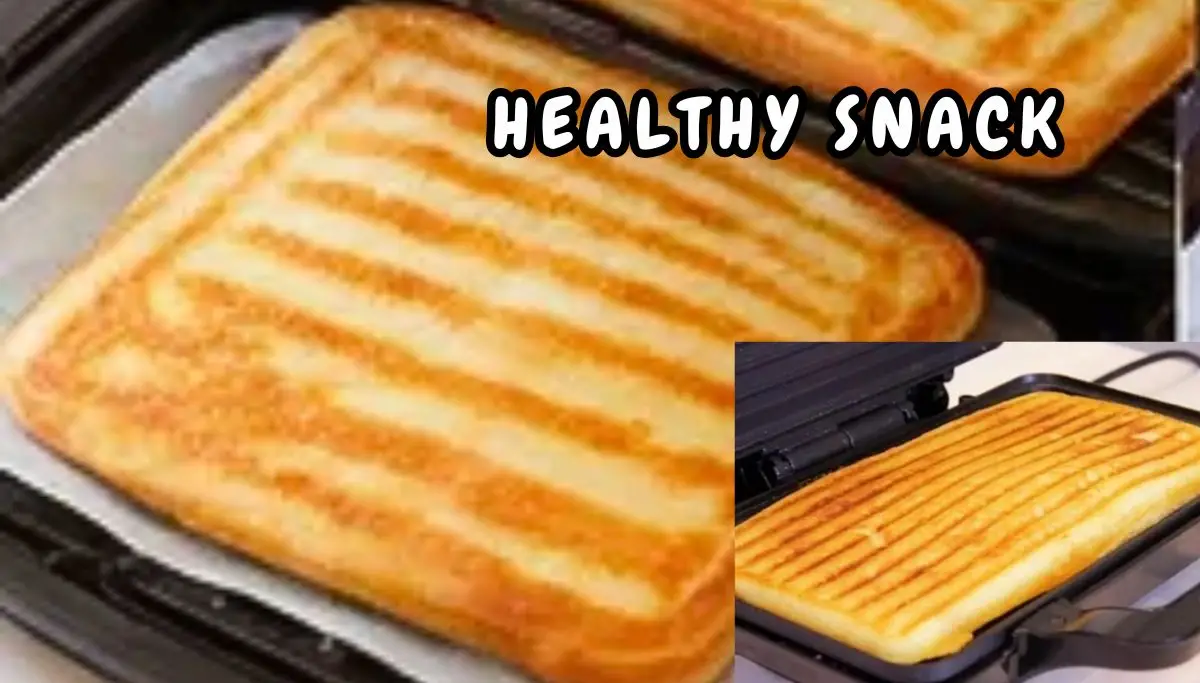
Turn on your sandwich maker and let it preheat for 2–3 minutes. Once it’s hot, switch it off and lightly grease the plates with butter or margarine. This will help prevent the batter from sticking and give the outside a delicious golden crust.
If you don’t have a sandwich maker, don’t worry — a non-stick skillet works just as well (more on that later).
Assembling the Sandwich
Pour half of the batter onto the bottom plate of the sandwich maker, spreading it evenly.
Add your chosen filling — for example, a slice of ham and some mozzarella cheese for a gooey, savory version. You can also use shredded chicken or vegetables if you prefer a lighter, nutrient-packed option.
Then, pour the remaining batter over the filling, spreading it carefully to seal everything inside.
Cooking the Sandwich
Close the sandwich maker and turn it back on. Let it cook for about 3–5 minutes, or until the exterior is golden and crispy.
Once done, open the lid carefully, remove the sandwich using a spatula, and let it cool slightly before slicing.
If using a skillet, pour a layer of batter, add the filling, then cover with more batter. Cook on low-medium heat for 3–4 minutes per side, flipping gently until golden brown and cooked through.
Tips for the Perfect Breakfast Snack
- Use room temperature ingredients: This helps the batter mix evenly and ensures a soft, fluffy texture.
- Don’t skip the baking powder: It makes the batter rise and prevents it from becoming dense.
- For crispier edges: Add a little extra butter or oil to the sandwich maker before pouring the batter.
- Try whole wheat flour: For extra fiber and nutrition, substitute part or all of the flour with whole wheat or oat flour.
- Add flavor: Mix herbs like oregano, basil, or chives into the batter for a savory twist.
- Go sweet: Skip the salt, add a teaspoon of sugar, and fill with peanut butter, banana slices, or melted chocolate for a sweet version.
- Meal prep tip: Make several sandwiches ahead of time and freeze them. Just reheat in a toaster or pan for a quick breakfast on busy mornings.
Nutritional Benefits
This healthy snack is balanced in nutrients and gives your body the energy it needs to start the day strong.
- Eggs provide high-quality protein and essential amino acids.
- Milk adds calcium and vitamin D for stronger bones.
- Flour offers complex carbs for steady energy release.
- Oil or butter gives a touch of healthy fat for satiety.
- Fillings like ham, cheese, or vegetables add flavor, vitamins, and additional protein.
If you’re aiming for a lighter version, you can substitute full-fat milk with skimmed or plant-based milk, and use olive oil instead of vegetable oil.
Serving Ideas
- With a side of fruit: Pair it with fresh berries, sliced apples, or a banana for a complete breakfast.
- With a hot beverage: Enjoy it alongside a cup of coffee, tea, or a smoothie.
- As a snack: Make smaller portions and serve them as healthy afternoon bites for kids or guests.
- For on-the-go mornings: Wrap the cooked sandwich in parchment paper and take it with you.
Variations to Try
- Vegetarian Delight: Fill with spinach, mushrooms, onions, and feta cheese.
- Protein Boost: Use scrambled eggs, turkey slices, and a sprinkle of cheddar.
- Mediterranean Style: Add tomatoes, olives, and mozzarella for a tangy twist.
- Sweet Breakfast Treat: Swap salt for a teaspoon of sugar and fill with strawberries and cream cheese.
This flexibility makes the recipe ideal for anyone — from picky eaters to fitness enthusiasts.
Storage and Reheating
If you have leftovers, let them cool completely, then wrap in foil or an airtight container. Store in the refrigerator for up to 3 days.
To reheat:
- In the microwave: 30–40 seconds until warm.
- In the toaster or sandwich maker: 2–3 minutes for a crispy finish.
You can also freeze them for longer storage — up to 1 month.
FAQs
1. Can I make this recipe without a sandwich maker?
Yes! Simply use a non-stick skillet on the stove. Pour a thin layer of batter, add your filling, and cover with the remaining batter. Cook on both sides until golden.
2. Can I make it gluten-free?
Absolutely. Replace all-purpose flour with a gluten-free blend or oat flour. The texture may vary slightly, but it’s still delicious.
3. How can I make this recipe dairy-free?
Use plant-based milk like almond, oat, or soy milk, and replace butter with coconut oil or dairy-free margarine.
4. What fillings are best for kids?
Kids usually love ham and cheese, or you can make it sweet with banana and peanut butter.
5. How do I keep the sandwich from sticking?
Always grease your cooking surface lightly with butter or oil before pouring the batter.
6. Is this snack good for weight loss?
Yes, if made with healthy fillings and moderate oil. It’s high in protein and can be part of a balanced breakfast plan.
conclusion
this Healthy and Nutritious Snack recipe proves that eating well doesn’t have to be boring or time-consuming. With simple ingredients, endless filling options, and quick preparation, it’s a perfect go-to meal for busy mornings. Light, fluffy, and satisfying, it fuels your day with wholesome goodness — one delicious bite at a time.