Growing potatoes doesn’t require a vast backyard or raised beds. With a bit of creativity and some repurposed materials, you can harvest pounds of homegrown spuds using a milk crate tower. This method is perfect for urban gardeners, apartment dwellers, or anyone looking to make the most of limited outdoor space. Beyond being space-saving, this approach also offers better drainage, aeration, and flexibility compared to traditional planting methods.
Let’s walk through everything you need to know—from setup to harvest—to build and grow a successful potato tower using milk crates.
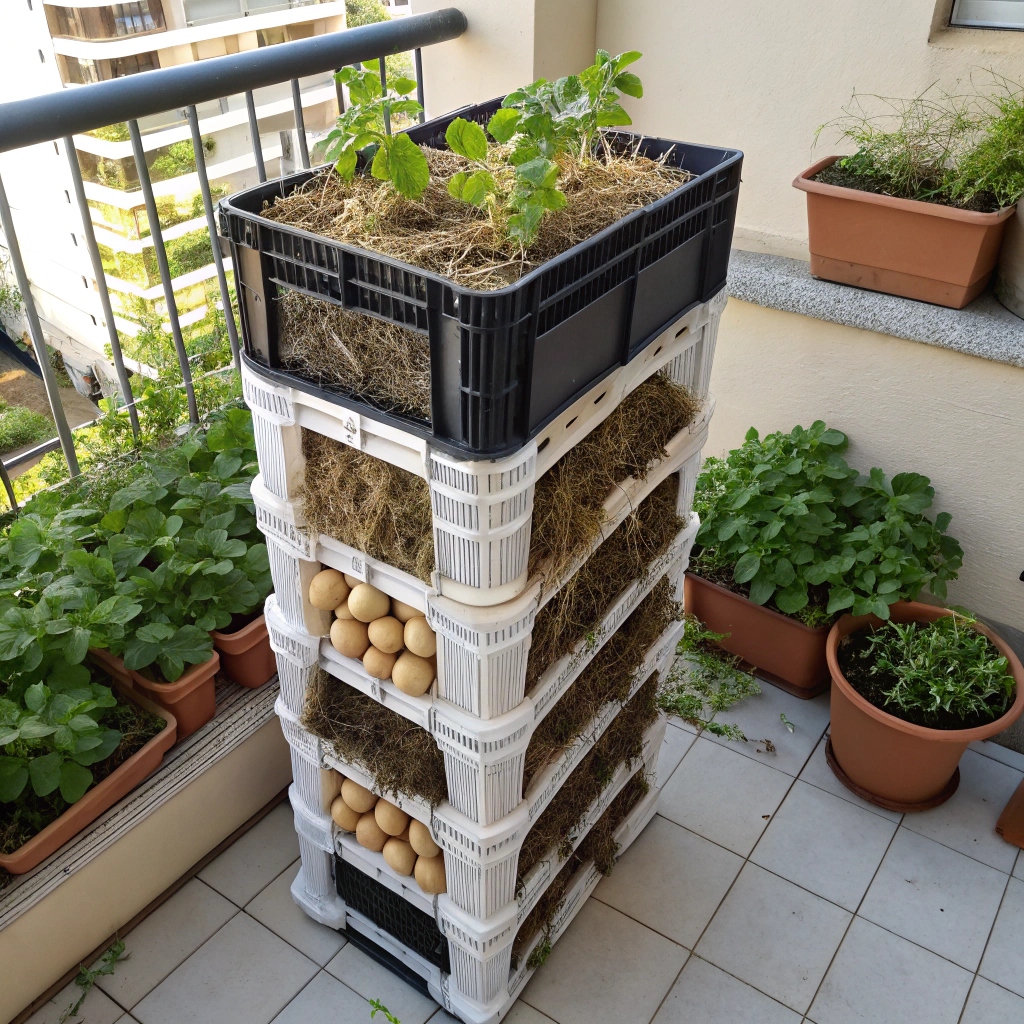
Why Choose a Milk Crate Potato Tower?
Milk crate towers provide a vertical growing solution that maximizes space without compromising yield. Their built-in ventilation promotes healthy root development, while the stackable design makes planting and harvesting easy. This method also simplifies pest control and minimizes weeding.
Materials You’ll Need
Essential Supplies:
- 3 to 6 sturdy milk crates
- Landscape fabric or burlap (to line the inside of crates)
- High-quality potting soil (preferably one formulated for vegetables)
- Straw or hay (helps with drainage and layering)
- Certified seed potatoes
- Watering can or hose with a gentle spray setting
Optional Tools:
- A tarp (to protect your ground or patio surface)
- A small shovel or hand trowel
- A rubber mallet or zip ties (for added stacking security)
Prepare the Crates for Planting
Line the interior of each crate with landscape fabric or burlap. This prevents soil from falling through while allowing excess water to escape. Cut the fabric so it fits snugly inside, covering all sides and the bottom. Secure it by tucking the edges or stapling to the crate rim.
This lining step is crucial. Without it, soil erosion and poor structure could affect your plants’ health and stability.
Layering Soil and Hay for Drainage
Start by placing a generous layer of straw or hay at the bottom of each lined crate. Then add about 4 to 6 inches of potting soil on top of the hay. This layering not only improves drainage but also mimics the loose, well-aerated soil conditions potatoes thrive in.
Repeat this layering technique for each crate as you prepare the tower.
Planting Your Seed Potatoes
Cut your seed potatoes into chunks, each containing at least one healthy “eye” or sprouting point. Let them sit for a day or two to callous over, which helps prevent rot.
Space each piece about 6 inches apart on the soil surface in your first crate. Once placed, cover with 2–3 inches of additional soil. As the plants grow, you’ll continue adding soil to encourage more tubers to develop.
Building the Potato Tower
After planting the bottom crate, carefully place another crate on top. Make sure it’s aligned and stable—especially if you’re stacking more than two or three crates. Continue the layering and planting process for each crate added.
For extra stability, consider securing the crates together with zip ties or placing the entire tower against a wall or fence.
Watering and Ongoing Care
Consistent moisture is key to healthy potato development. Water deeply but avoid waterlogging the soil. A good rule of thumb is to check the top inch of soil—if it’s dry, it’s time to water.
As the plants grow, continue “hilling” by adding soil to cover the stems. This stimulates tuber production along the buried stems, increasing your yield.
Watch for Pests and Disease
Potatoes can attract pests like aphids, Colorado potato beetles, and fungal diseases such as blight. Regularly inspect your plants—especially the underside of leaves—and remove any pests by hand or use organic pest control methods.
Healthy potato plants should be upright with lush, green foliage. Any yellowing or wilting may indicate watering issues, pests, or disease.
Harvesting Your Potatoes
Potatoes are typically ready to harvest 10 to 12 weeks after planting, once the foliage turns yellow and begins to die back.
To harvest:
- Start with the top crate and remove it.
- Gently sift through the soil to locate the potatoes.
- Work your way down crate by crate.
Take care not to damage the skins, especially if you plan to store them. Let the harvested potatoes cure in a dark, cool spot for 5–7 days to toughen their skins before storing.
Benefits of the Milk Crate Method
- Space-saving: Perfect for balconies, patios, and compact backyards.
- Improved drainage: Reduces risk of rot and waterlogging.
- Better aeration: Encourages robust root and tuber growth.
- Mobility: Easy to move or adjust depending on sun exposure.
- Reusable setup: Milk crates and liners can be reused season after season.
Tips for Better Results
- Choose early-maturing potato varieties for smaller towers.
- Rotate crop placement seasonally to avoid soil-borne diseases.
- Mix in compost or worm castings with your potting soil for added nutrients.
- Cover crates during heavy rain to prevent soil washout.
- Add mulch or straw on the top crate to retain moisture and reduce weeds.
FAQs
Can I use regular potatoes from the store as seed potatoes?
It’s not recommended. Store-bought potatoes are often treated to prevent sprouting and may carry diseases. Use certified seed potatoes for best results.
How many potatoes can I expect per crate?
Yield varies, but you can expect 5–10 potatoes per seed piece depending on the variety and care.
Do I need to fertilize the soil?
If you’re using quality potting soil, fertilizing may not be necessary. For longer growing periods, consider a balanced vegetable fertilizer every few weeks.
Can I reuse the soil next season?
It’s best to refresh or rotate the soil, especially after potatoes, to reduce the risk of pests and soil fatigue. Reuse the hay and compost the old soil if healthy.
What’s the ideal sunlight for growing potatoes in crates?
Potatoes need at least 6 hours of full sun daily. More light can lead to healthier foliage and bigger harvests.