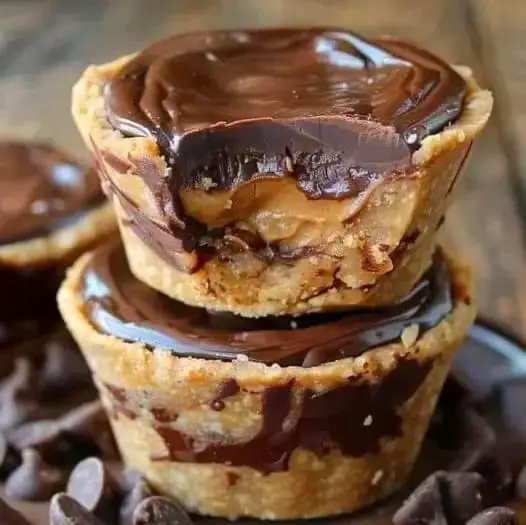
Gourmet Chocolate Peanut Butter Cups Recipe
Discover the joy of homemade Gourmet Chocolate Peanut Butter Cups, a rich and satisfying blend of velvety chocolate and creamy peanut butter. Unlike store-bought versions, these luxurious treats offer a more indulgent experience, perfect for chocolate lovers and peanut butter enthusiasts alike. Whether you’re making them for a special occasion or a quick sweet fix, these cups are sure to impress both you and your guests.
Why You’ll Love These Peanut Butter Cups
- Decadent and Rich: The smooth combination of creamy peanut butter and rich chocolate makes these cups an irresistible treat.
- Easy to Customize: Use milk or dark chocolate, or even mix in some chopped nuts or sea salt for a unique twist.
- Simple and Quick: This easy-to-follow recipe takes just a few steps and is perfect for both beginners and experienced bakers.
Ingredients
For the Chocolate Layers:
- 2 cups milk or dark chocolate chips: Choose your favorite type of chocolate, whether it’s sweet and creamy or dark and intense.
- 1 tablespoon coconut oil: Helps the chocolate melt smoothly and adds a slight gloss to the finished cups.
For the Peanut Butter Filling:
- 1 cup creamy peanut butter: Smooth and rich, perfect for the filling.
- ½ cup powdered sugar: Sweetens the peanut butter without making it gritty.
- 1 teaspoon vanilla extract: Enhances the flavor of the filling.
Optional Garnish:
- Sea salt: Sprinkling a little sea salt on top adds a perfect salty contrast to the sweetness of the chocolate and peanut butter.
Instructions
1. Prepare the Molds
- Line a mini muffin tin with paper liners. This makes it easier to remove the peanut butter cups once they’re set.
2. Melt the Chocolate
- In a microwave-safe bowl, combine the chocolate chips and coconut oil. Microwave in 30-second intervals, stirring between each, until the mixture is fully melted and smooth.
- This step ensures a glossy, smooth chocolate that will form the base and top of your cups.
3. Form the Bottom Chocolate Layer
- Spoon 1 teaspoon of melted chocolate into the bottom of each lined cup. Use the back of the spoon to push some of the chocolate up the sides of the liner, creating a cup shape.
- Freeze for about 10 minutes until the chocolate hardens.
4. Prepare the Peanut Butter Filling
- In a medium bowl, mix together the creamy peanut butter, powdered sugar, and vanilla extract until smooth and well combined.
- This creates the perfect creamy, slightly sweet peanut butter filling for your cups.
5. Add the Peanut Butter Filling
- Remove the chocolate cups from the freezer. Spoon a small amount of the peanut butter mixture into each chocolate cup, leaving enough room for the top layer of chocolate.
- Try to smooth out the filling for an even layer.
6. Seal the Cups
- If the remaining chocolate has thickened, re-melt it by microwaving for an additional 10-15 seconds. Spoon the melted chocolate over the peanut butter filling, ensuring the filling is completely covered.
- Gently tap the tray on the counter to smooth out the tops and remove any air bubbles.
7. Add the Final Touch
- For a gourmet finish, sprinkle each cup with a small pinch of sea salt before the chocolate sets. This adds a delightful salty contrast to the sweet and rich flavors.
- Freeze for another 15-20 minutes until the chocolate is firm.
8. Serve or Store
- Once the cups are firm, carefully remove them from the paper liners. They can be served immediately or stored in an airtight container in the refrigerator for up to 1 week.
Tips for Success
- Smooth Chocolate: Be sure to stir the chocolate between microwave intervals to prevent overheating and ensure a smooth consistency.
- Filling Variations: Try mixing in chopped nuts or mini chocolate chips with the peanut butter filling for extra texture and flavor.
- Storage: Keep these treats refrigerated if you’re making them ahead of time to ensure they stay firm.
Frequently Asked Questions (FAQs)
1. Can I use natural peanut butter in this recipe?
Yes, but keep in mind that natural peanut butter is typically more liquid, so you may need to add a little extra powdered sugar to achieve the right consistency for the filling.
2. What can I use instead of coconut oil?
You can use butter or shortening as a substitute for coconut oil to help the chocolate melt smoothly. However, coconut oil tends to provide a better texture and gloss.
3. Can I make these peanut butter cups dairy-free?
Absolutely! Simply use dairy-free chocolate chips and ensure your peanut butter is dairy-free as well. Coconut oil is already a vegan-friendly ingredient.
4. How do I prevent the peanut butter filling from oozing out?
Make sure you leave enough room when adding the peanut butter so that the chocolate can fully seal the top. If you find the filling too runny, try chilling it in the fridge for a few minutes before adding it to the cups.
5. Can I freeze these peanut butter cups?
Yes! You can freeze the cups in an airtight container for up to 3 months. Thaw them in the fridge for a few hours before serving.
Conclusion
Homemade Gourmet Chocolate Peanut Butter Cups offer a delicious balance of rich chocolate and creamy peanut butter, making them a step above the store-bought versions. These decadent, bite-sized treats are easy to make and perfect for any occasion. Whether you add a sprinkle of sea salt or customize the filling with crunchy nuts, these cups will bring joy to everyone who tries them.
Enjoy crafting these indulgent bites, and feel free to experiment with different types of chocolate or filling variations for a personalized twist!