Golden Fried Pastry is the kind of dessert that captures attention instantly. Crisp, golden ridges on the outside. Light, airy centers on the inside. A glossy coating of sweet lemon-kissed syrup that soaks into every crevice. The contrast between crunchy pastry and cool syrup creates a texture that feels both indulgent and delicate.
This recipe uses a choux-style dough, which means the pastries puff beautifully as they fry. The secret technique of starting them in room temperature or slightly warm oil allows them to expand fully before crisping up, resulting in that signature hollow center and irresistible crunch.
If you love desserts that are dramatic yet surprisingly simple to make, Golden Fried Pastry deserves a permanent place in your kitchen.
Why This Golden Fried Pastry Works So Well
This dessert relies on a few key principles:
- Steam creates lift. The high moisture in the dough turns to steam during frying, causing the pastry to puff.
- Eggs create structure. They give the pastry strength and help maintain its airy interior.
- Cold syrup meets hot pastry. This contrast ensures the syrup absorbs without making the exterior soggy.
- Gradual heating ensures perfect puffing. Starting in cooler oil allows expansion before browning.
When done properly, the result is crisp, golden, and beautifully glazed pastries that stay crunchy even after soaking.
Ingredients Breakdown
For the Dough
2 cups flour
Provides structure and body.
2 eggs
Create elasticity and help the dough puff.
1.5 cups water
Generates steam for expansion.
2 tablespoons butter (or oil)
Adds richness and tenderness.
1 tablespoon cornstarch (optional)
Enhances crispness for extra crunch.
Pinch of salt
Balances sweetness.
For the Syrup
2 cups sugar
Creates sweetness and shine.
1.5 cups water
Dissolves the sugar into syrup.
Squeeze of lemon juice
Prevents crystallization and adds brightness.
For Frying
Vegetable oil
Neutral oil works best for even frying.
Step-by-Step Instructions
Step 1: Make the Syrup First
Always prepare the syrup before the dough so it has time to cool completely.
- Combine sugar and water in a saucepan.
- Bring to a boil.
- Reduce to a gentle simmer for about 10 minutes until slightly thickened.
- Add a squeeze of lemon juice and stir.
- Remove from heat and allow to cool to room temperature.
The syrup must be completely cool before soaking the hot pastries.
Step 2: Prepare the Dough
- In a medium saucepan, combine water, butter, and salt.
- Bring to a boil.
- Add flour (and cornstarch if using) all at once.
- Stir vigorously with a wooden spoon over medium-low heat.
Within 2–3 minutes, the mixture should form a smooth ball and pull away from the sides of the pan.
Remove from heat and allow the dough to cool for about 10 minutes. It should feel warm but not hot.
Add eggs one at a time, mixing thoroughly after each addition. The final dough should be smooth, thick, and slightly sticky.
Step 3: Shape and Fry
Transfer the dough into a piping bag fitted with a large star-shaped nozzle.
The Secret Pro Tip
Pipe the dough directly into room temperature or slightly warm oil. Do not start with hot oil.
As you pipe 2–3 inch lengths, snip the dough with scissors.
Once all pieces are piped, turn the heat to medium.
As the oil gradually heats, the pastries will rise and expand. This slow start ensures proper puffing.
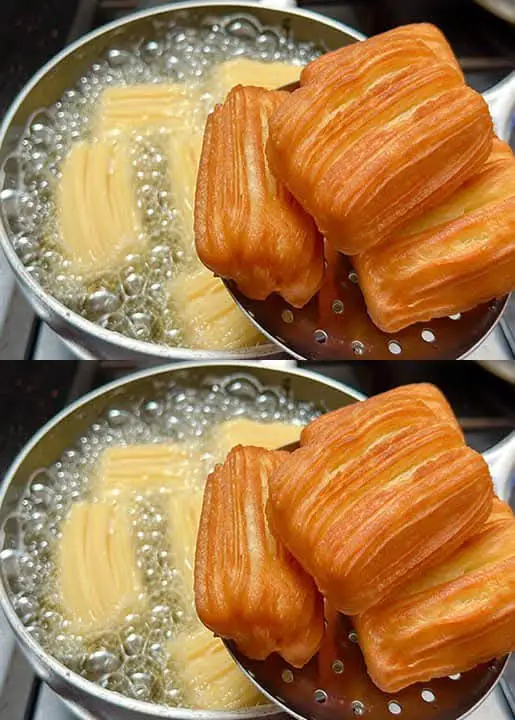
Fry until deeply golden brown and crisp on all sides. Turn occasionally for even coloring.
Step 4: Soak in Syrup
Remove pastries from the oil and immediately place them into the cooled syrup.
Let them soak for 1–2 minutes.
Remove and transfer to a serving plate.
Serve warm or at room temperature.
Expert Tips for Perfect Results
1. Do Not Skip Cooling the Dough
If the dough is too hot when adding eggs, they may cook prematurely, ruining texture.
2. Fry in Batches
Avoid overcrowding the pot. This ensures even cooking and proper puffing.
3. Maintain Medium Heat
Too hot, and the outside browns before the inside cooks. Too cool, and they absorb excess oil.
4. Syrup Temperature Matters
Hot pastries + cold syrup = perfect absorption without sogginess.
Texture and Flavor Profile
Golden Fried Pastry offers:
- A crisp ridged exterior
- A light, airy interior
- Sweet syrup coating with subtle lemon brightness
- Rich yet balanced flavor
The contrast between crunchy and syrupy makes each bite incredibly satisfying.
Creative Variations
Add Cinnamon to the Syrup
Infuse the syrup with a cinnamon stick while simmering.
Drizzle with Chocolate
After soaking, drizzle with melted dark chocolate for extra indulgence.
Dust with Powdered Sugar
For additional sweetness and visual appeal.
Add Orange Zest
Substitute lemon juice with orange zest for a citrus twist.
Serving Suggestions
Serve Golden Fried Pastry:
- With strong coffee
- Alongside tea
- As a festive dessert
- With vanilla ice cream for contrast
They are best enjoyed fresh but remain delicious for several hours after preparation.
Storage Tips
Store at room temperature for up to one day.
Avoid refrigeration, as it softens the crust.
If needed, reheat briefly in an oven to restore some crispness.
Frequently Asked Questions
Why didn’t my pastries puff?
The oil may have been too hot at the start. Begin with room temperature or slightly warm oil.
Can I make the dough ahead of time?
Choux-style dough is best used immediately after mixing.
Can I bake instead of fry?
You can bake at 400°F (200°C) until golden, but the texture will differ from frying.
Why add lemon juice to syrup?
It prevents sugar crystallization and adds a subtle brightness.
Can I use margarine instead of butter?
Yes, though butter provides richer flavor.
How do I know they are fully cooked?
They should be deep golden brown and feel light when lifted.
Final Thoughts
Golden Fried Pastry combines simple ingredients with precise technique to create something truly special. Crisp on the outside, airy on the inside, and coated in glossy syrup, this dessert delivers contrast and indulgence in every bite.
With the right temperature control and attention to detail, you can achieve bakery-quality results at home. Once you master this method, these golden treats may become your signature dessert.