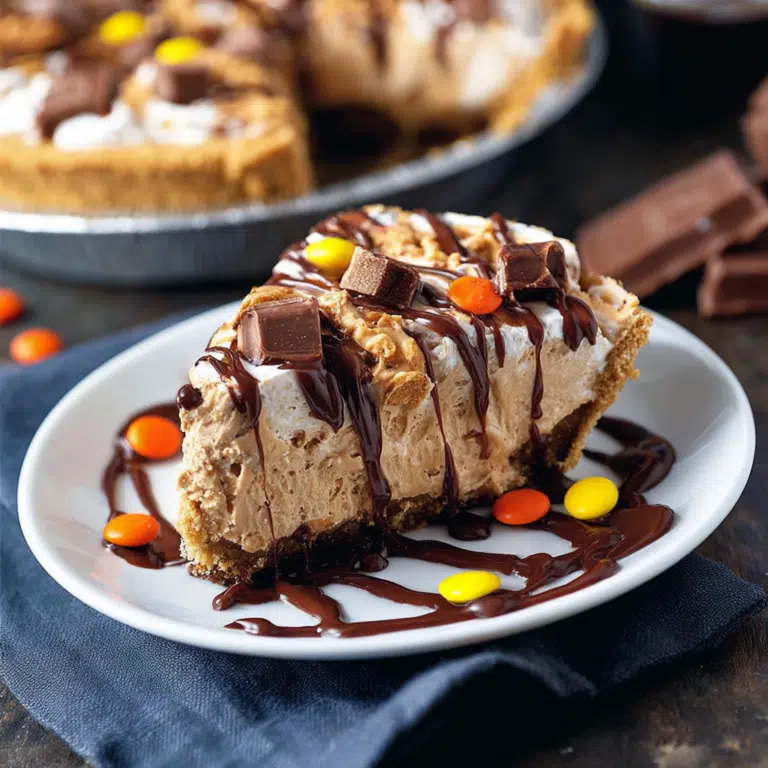
If you’re a fan of peanut butter and chocolate, few desserts can compete with the rich, creamy indulgence of Frozen Reese’s Peanut Butter Pie. This easy no-bake pie combines velvety peanut butter filling, tangy cream cheese, fluffy whipped cream, and plenty of Reese’s candies inside a crunchy Oreo or graham cracker crust. The result is a frozen dessert that’s decadent, refreshing, and guaranteed to impress.
Perfect for birthdays, holidays, summer gatherings, family celebrations, or simply satisfying a sweet tooth, this pie delivers the iconic peanut butter and chocolate combination in every bite. Best of all, it requires no baking, making it an ideal make-ahead dessert.
Why You’ll Love Frozen Reese’s Peanut Butter Pie
This dessert has become a favorite for many reasons.
No Baking Required
The entire recipe comes together without turning on the oven.
Rich Peanut Butter Flavor
Creamy peanut butter serves as the star ingredient, creating a luscious and satisfying filling.
Loaded with Reese’s Candies
Every slice contains crunchy Reese’s Pieces and chunks of mini peanut butter cups.
Perfect Make-Ahead Dessert
Prepare the pie in advance and freeze until ready to serve.
Easy to Prepare
Simple ingredients and straightforward steps make this recipe beginner-friendly.
Ingredients
For the Pie
- 1 (8-inch) pre-made Oreo or graham cracker pie crust
- 8 ounces cream cheese, room temperature
- 1 cup chunky peanut butter
- ¾ cup powdered sugar
- ½ teaspoon pure vanilla extract
- 1 cup heavy whipping cream, whipped to stiff peaks
- ½ cup Reese’s Pieces
- ½ cup chopped mini Reese’s Peanut Butter Cups
For Garnish
- Additional Reese’s Pieces
- Additional mini peanut butter cups
- Chocolate sauce for serving
What Makes This Pie So Special?
Cream Cheese Creates a Cheesecake-Like Texture
The cream cheese provides a smooth and slightly tangy base that balances the sweetness of the candies.
Peanut Butter Delivers Rich Flavor
Chunky peanut butter adds both flavor and texture, creating a filling that’s creamy with occasional crunchy bites.
Whipped Cream Makes It Light and Fluffy
The whipped cream transforms the filling into a mousse-like consistency that freezes beautifully.
Reese’s Candies Add Texture
The candies create bursts of chocolate and peanut butter throughout the pie, making every bite exciting.
Step 1: Prepare the Peanut Butter Base
In a large mixing bowl, combine:
- Room-temperature cream cheese
- Chunky peanut butter
Using a hand mixer, beat the ingredients together on medium speed until completely smooth and creamy.
This forms the rich foundation of the pie filling.
Step 2: Add Sweetness and Flavor
Add the powdered sugar and vanilla extract to the peanut butter mixture.
Mix on low speed until fully combined.
The mixture should become silky smooth with a rich peanut butter aroma.
The powdered sugar sweetens the filling while maintaining its creamy texture.
Step 3: Fold in the Whipped Cream
Carefully fold the whipped heavy cream into the peanut butter mixture.
Use a rubber spatula and gentle folding motions to preserve the air incorporated into the whipped cream.
Continue folding until no streaks remain.
The filling should appear light, fluffy, and mousse-like.
Step 4: Add the Reese’s Candies
Fold in:
- Reese’s Pieces
- Chopped mini Reese’s Peanut Butter Cups
Distribute the candies evenly throughout the filling.
The candy pieces add crunch, texture, and extra peanut butter-chocolate flavor.
Step 5: Fill the Pie Crust
Spoon the filling into the prepared Oreo or graham cracker pie crust.
Use a rubber scraper or spatula to spread the filling evenly.
Smooth the top for a clean and professional appearance.
Step 6: Garnish the Pie
Sprinkle additional Reese’s Pieces and mini peanut butter cups over the top.
The extra candy not only enhances flavor but also creates a visually appealing presentation.
Feel free to be generous with the toppings.
Step 7: Freeze Until Firm
Cover the pie carefully with plastic wrap or foil.
Place it in the freezer for at least 3 hours.
For the best texture and easiest slicing, freeze overnight.
The filling will become firm while maintaining its creamy consistency.
Step 8: Slice and Serve
Remove the pie from the freezer approximately 5 to 10 minutes before serving.
This short resting period makes slicing easier.
Drizzle chocolate sauce over each slice before serving.
The combination of cold peanut butter filling and rich chocolate sauce creates an unforgettable dessert experience.
Tips for Perfect Frozen Reese’s Peanut Butter Pie
Use Room-Temperature Cream Cheese
Softened cream cheese blends more smoothly and prevents lumps.
Whip the Cream Properly
Stiff peaks provide the structure needed for a light and airy filling.
Fold Gently
Avoid overmixing once the whipped cream is added to maintain the fluffy texture.
Freeze Overnight
Longer freezing produces cleaner slices and better consistency.
Use Quality Peanut Butter
Chunky peanut butter adds texture, but creamy peanut butter also works if preferred.
Oreo Crust vs. Graham Cracker Crust
Oreo Crust
An Oreo crust creates a richer chocolate flavor that complements the peanut butter filling beautifully.
Graham Cracker Crust
A graham cracker crust offers a lighter, buttery flavor that allows the peanut butter to take center stage.
Both options work wonderfully, so choose according to your preference.
Creative Variations
Chocolate Peanut Butter Pie
Add mini chocolate chips to the filling for even more chocolate flavor.
Double Reese’s Pie
Mix crushed Reese’s cups directly into the crust before filling.
Salted Peanut Butter Pie
Sprinkle flaky sea salt over the top before freezing.
Peanut Butter Pretzel Pie
Fold crushed pretzels into the filling for a sweet-and-salty variation.
Caramel Reese’s Pie
Drizzle caramel sauce over the filling before freezing.
Perfect Occasions for Serving
Frozen Reese’s Peanut Butter Pie is ideal for:
- Birthday parties
- Holiday celebrations
- Summer cookouts
- Potluck dinners
- Family gatherings
- Graduation parties
- Weekend desserts
- Peanut butter lovers’ celebrations
Its make-ahead convenience makes entertaining easier.
Storage Instructions
Store the pie tightly covered in the freezer.
It remains fresh for up to 2 months.
For best texture, allow slices to sit at room temperature for a few minutes before serving.
Frequently Asked Questions
Can I use creamy peanut butter instead of chunky?
Yes. Creamy peanut butter creates a smoother texture while maintaining the same delicious flavor.
How long does the pie need to freeze?
At least 3 hours, although overnight freezing provides the best consistency.
Can I make the pie ahead of time?
Absolutely. This pie is perfect for making one or two days in advance.
Can I use homemade whipped cream?
Yes. Freshly whipped cream often produces a richer and more luxurious texture.
Why is my filling too soft?
The whipped cream may not have reached stiff peaks, or the pie may need additional freezing time.
Can I add extra candy?
Definitely. More Reese’s Pieces or peanut butter cups make the pie even more indulgent.
How should I store leftovers?
Keep leftover pie covered in the freezer and slice only as needed.
Can I use a homemade crust?
Yes. Homemade Oreo or graham cracker crusts work wonderfully in this recipe.
Conclusion
Frozen Reese’s Peanut Butter Pie combines everything dessert lovers crave: creamy peanut butter, rich chocolate, crunchy candy pieces, and a perfectly chilled texture. The no-bake preparation makes it simple to create, while the impressive presentation makes it ideal for special occasions.
Whether you’re serving it at a summer barbecue, holiday gathering, birthday celebration, or family dinner, this frozen pie delivers a decadent peanut butter and chocolate experience in every slice. One bite is enough to understand why it’s a favorite among Reese’s fans everywhere.

Decadent No-Bake Dessert
Description
A rich and creamy frozen pie featuring peanut butter and chocolate flavors, loaded with Reese’s candies.
Ingredients
Instructions
- In a large mixing bowl, combine cream cheese and chunky peanut butter. Beat on medium speed until completely smooth and creamy.
- Add powdered sugar and vanilla extract to the peanut butter mixture. Mix on low speed until fully combined.
- Gently fold the whipped cream into the peanut butter mixture until no streaks remain to maintain fluffiness.
- Fold in Reese’s Pieces and chopped mini Reese’s Peanut Butter Cups. Distribute evenly.
- Spoon the filling into the pie crust and smooth the top.
- Sprinkle additional Reese’s Pieces and mini peanut butter cups on top.
- Cover the pie with plastic wrap and freeze for at least 3 hours or overnight for best results.
- Remove from freezer 5 to 10 minutes before serving. Drizzle with chocolate sauce and enjoy.
Notes
- For a smoother filling, use creamy peanut butter if preferred.