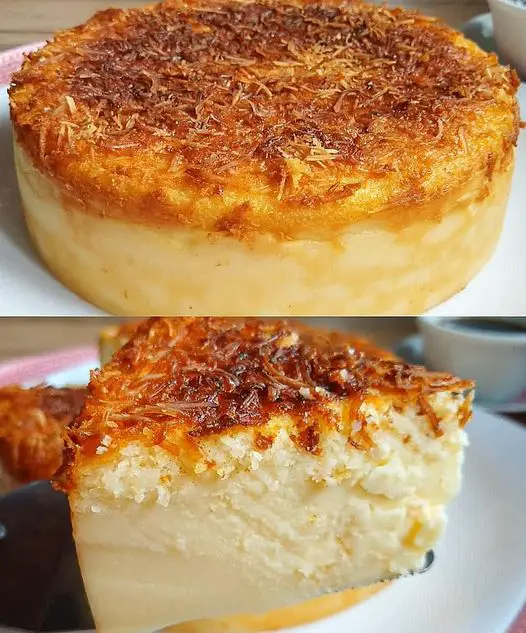
How to Make a Delicious Blender Cake
If you’re looking for a quick, no-fuss cake recipe that delivers incredible flavor and a soft, moist texture, this blender cake is a must-try. Made with simple ingredients and minimal effort, it’s perfect for any occasion—whether as an after-dinner dessert or a midday snack. The best part? You don’t need fancy equipment or techniques. Just blend, bake, and enjoy! Let’s dive into the recipe.
Ingredients
Here’s everything you’ll need to make this delightful cake:
- 4 large eggs
- ¾ cup coconut milk (6.8 fl oz or 200 ml)
- 1 cup shredded dried coconut (3.5 oz or 100 g)
- 4 tablespoons butter or margarine
- 1 can sweetened condensed milk (14 oz)
- 1 ½ cups whole milk (12 fl oz)
- 5 tablespoons cornstarch
Step-by-Step Instructions
1. Prepare the Ingredients
Before starting, ensure all your ingredients are at room temperature for better blending and a smoother batter. Grease and dust a baking pan with cornstarch to prevent sticking.
2. Blend the Wet Ingredients
- Add the eggs, coconut milk, butter, condensed milk, and whole milk to a blender.
- Blend for about 4 minutes until the mixture is smooth and creamy.
3. Incorporate the Dry Ingredients
- Add the cornstarch and shredded dried coconut to the blender.
- Blend again until well combined. The batter should have a consistent texture.
4. Transfer to the Pan
- Pour the batter into the prepared baking pan.
- If desired, sprinkle extra shredded coconut on top for added texture and flavor.
5. Bake the Cake
- Preheat your oven to 350°F (180°C).
- Place the pan in the oven and bake for 50 to 60 minutes.
6. Perform the Toothpick Test
- Insert a toothpick into the center of the cake. If it comes out damp but not wet, the cake is ready.
7. Handle Browning Carefully
- If the top begins to brown too quickly while the center is still undercooked, cover the cake with aluminum foil and bake it in a water bath. This ensures even cooking without burning the top.
8. Cool and Serve
- Allow the cake to cool completely at room temperature before removing it from the pan.
- Slice, serve, and enjoy this moist, flavorful cake with your favorite beverage!
Tips for a Perfect Blender Cake
1. Use Full-Fat Coconut Milk
For the best flavor and texture, choose full-fat coconut milk. Light versions might result in a less creamy cake.
2. Room Temperature Ingredients
Using room-temperature eggs, milk, and butter ensures smoother blending and a fluffier cake.
3. Don’t Overfill the Blender
If your blender is small, mix the batter in batches to avoid spillage and ensure even blending.
4. Customize the Flavor
Feel free to add a teaspoon of vanilla extract or a pinch of cinnamon for added flavor depth.
5. Water Bath Baking
For an ultra-moist cake, bake it in a water bath by placing the pan inside a larger tray filled with hot water.
Frequently Asked Questions
1. Can I use a hand mixer instead of a blender?
Yes, a hand mixer works well if you don’t have a blender. Just ensure all ingredients are thoroughly combined for a smooth batter.
2. What if I don’t have cornstarch?
You can substitute cornstarch with an equal amount of all-purpose flour, though the texture may be slightly denser.
3. Can I use fresh coconut instead of dried shredded coconut?
Absolutely! Freshly grated coconut will add a richer, more authentic flavor, but it might slightly alter the cake’s texture.
4. How should I store this cake?
Store the cake in an airtight container at room temperature for up to 2 days or refrigerate for up to a week. For longer storage, freeze slices wrapped tightly in plastic wrap.
5. Can I make this cake gluten-free?
Yes! Replace cornstarch with a gluten-free alternative like arrowroot powder, and ensure other ingredients are certified gluten-free.
This blender cake is a testament to how simple ingredients and easy techniques can create something truly delicious. Perfect for busy bakers or those new to the kitchen, it’s a crowd-pleaser that’s sure to impress. Try this recipe today, and enjoy a moist, flavorful dessert without breaking a sweat!

