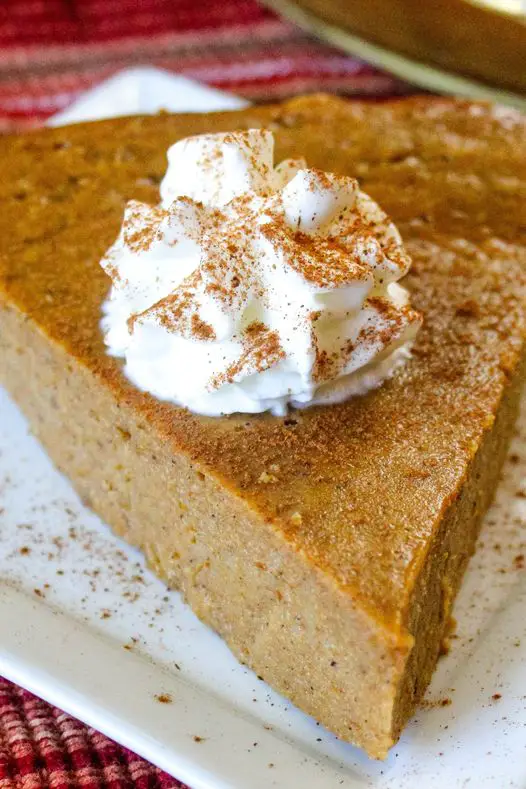
Crustless Pumpkin Pie Recipe
If you’re looking for a lighter, lower-carb take on the classic pumpkin pie, this Crustless Pumpkin Pie is perfect for you! Skipping the crust means this pie is not only easier to make but also reduces calories without sacrificing that creamy, spiced pumpkin flavor we all love. Made with simple ingredients, this pie is a fantastic option for anyone looking to enjoy the seasonal favorite without too much fuss. Serve it with a dollop of whipped cream to make it feel a little more indulgent, and you have a delightful dessert that’s ready to impress!
Ingredients for Crustless Pumpkin Pie
- 1 lb can solid pack pumpkin
- 12 oz can evaporated milk
- 2 large eggs
- 2 large egg whites
- 3/4 cup granulated sugar
- 1 tsp ground cinnamon
- 1/4 tsp ground allspice
- 1/4 tsp ground ginger
- 1/8 tsp salt
- 1/2 cup graham cracker or vanilla wafer crumbs
- 1 cup whipped cream, optional
Instructions for Making Crustless Pumpkin Pie
Step 1: Prepare the Pumpkin Mixture
In a large mixing bowl, combine the solid pack pumpkin, evaporated milk, eggs, and egg whites. Using a hand mixer or whisk, beat the mixture until it becomes smooth and well-blended. Make sure there are no lumps for a creamy pie filling.
Step 2: Add Spices and Sweeteners
Next, add the granulated sugar, ground cinnamon, allspice, ginger, and salt to the pumpkin mixture. Mix thoroughly until all spices are evenly incorporated. These spices give the pie that warm, comforting flavor that makes pumpkin pie such a classic.
Step 3: Incorporate the Crumbs
Gently fold in the graham cracker or vanilla wafer crumbs into the pie filling. The crumbs add a bit of texture to the pie, making it feel like a dessert with a hint of crust without actually needing one.
Step 4: Prepare the Pie Plate
Spray a high-sided 9-inch pie plate with nonstick cooking spray. This ensures your pie will come out easily without sticking, even without a crust.
Step 5: Fill the Pie Plate
Pour the prepared pumpkin pie filling into the greased pie plate, spreading it evenly with a spatula to make sure it bakes uniformly.
Step 6: Bake the Pie
Preheat your oven to 325°F (165°C). Place the pie in the oven and bake for 45-55 minutes. To check for doneness, insert a knife near the center of the pie; it should come out clean. This ensures that the filling has set and your pie is ready.
Step 7: Cool and Refrigerate
Once the pie is done baking, remove it from the oven and allow it to cool on a wire rack. After it has cooled, refrigerate the pie overnight to allow the flavors to fully develop and the texture to become even creamier.
Step 8: Serve and Enjoy
When ready to serve, cut the pie into wedges and add a dollop of whipped cream on top, if desired. The whipped cream complements the spiced pumpkin filling perfectly, creating a lovely balance of flavors.
Tips for Perfect Crustless Pumpkin Pie
- Use Pure Pumpkin, Not Pie Filling: Make sure to use pure canned pumpkin rather than pumpkin pie filling, as the latter contains additional sweeteners and spices that can alter the recipe.
- Room Temperature Ingredients: Using eggs and milk at room temperature helps them mix more evenly with the pumpkin, resulting in a smoother pie filling.
- Adjust Spices to Taste: You can adjust the spice levels to your liking. Add a little more cinnamon if you love a stronger spice flavor, or reduce the ginger if you prefer a milder taste.
- Refrigerate Overnight: Refrigerating the pie overnight not only enhances the flavors but also helps the pie to firm up, making it easier to slice.
- Add a Twist with Toppings: If whipped cream isn’t your favorite, try topping the pie with a sprinkle of cinnamon, a drizzle of caramel, or a handful of chopped pecans for added texture.
Frequently Asked Questions (FAQs)
Q: Can I use fresh pumpkin instead of canned pumpkin?
A: Yes! You can use fresh pumpkin puree, but it should be well-drained and thick. Fresh pumpkin puree can be more watery than canned, so you might need to adjust the baking time slightly.
Q: How long will this crustless pumpkin pie last?
A: The pie will last up to 3-4 days in the refrigerator. Be sure to cover it with plastic wrap or place it in an airtight container to keep it fresh.
Q: Can I make this pie dairy-free?
A: To make this pie dairy-free, use a dairy-free milk substitute such as coconut milk or almond milk in place of evaporated milk. However, it may slightly change the texture.
Q: Can I freeze crustless pumpkin pie?
A: Yes, you can freeze it. Allow the pie to cool completely, then wrap it tightly in plastic wrap and aluminum foil before freezing. To serve, let it thaw in the refrigerator overnight.
Q: What can I use instead of graham cracker or vanilla wafer crumbs?
A: You can use any type of crumbly cookie or biscuit as a substitute. Gingersnaps add a nice spiced touch, or you can go for gluten-free options if preferred.
Q: Can I reduce the sugar in this recipe?
A: Yes, you can reduce the sugar slightly if you prefer a less sweet pie. However, keep in mind that sugar contributes to the texture and flavor, so avoid reducing it too drastically.
Q: Why do I need to use egg whites in addition to whole eggs?
A: Using egg whites helps keep the pie light while still providing structure. The whites allow for a lower calorie count without compromising texture.
This crustless pumpkin pie is not only delicious but also easy to make and lighter than traditional pie recipes. Perfect for fall gatherings, Thanksgiving, or just a cozy dessert, it’s bound to be a hit with family and friends!

