How to Make Creamy Dulce de Leche: A Simple 2-Ingredient Recipe
Dulce de leche is a sweet, caramel-like treat that’s beloved in many parts of the world, particularly in Latin America. Traditionally made by slowly simmering milk and sugar, dulce de leche can be used in a variety of desserts or enjoyed on its own. This simple recipe yields a creamy, smooth dulce de leche using just two ingredients: whole milk and sugar. Whether you’re a seasoned cook or a kitchen novice, this recipe is easy to follow and results in a rich, indulgent caramel spread that you’ll want to eat straight off the spoon.
What is Dulce de Leche?
Dulce de leche, which translates to “sweet milk” in Spanish, is a rich, golden sauce made by caramelizing milk and sugar. The slow cooking process breaks down the sugar and milk, transforming them into a thick, creamy caramel that’s smooth and packed with flavor. It’s a versatile ingredient that can be drizzled over ice cream, spread on toast, or used as a filling for cakes and pastries. The process of making it from scratch may seem time-consuming, but it’s actually quite simple and only requires two ingredients.
Why You’ll Love This Recipe
This homemade dulce de leche recipe is perfect for those who want to make their own version without resorting to the canned variety. The beauty of this recipe lies in its simplicity—it uses only whole milk and sugar, yet delivers a rich, deeply flavored caramel that’s irresistible.
- Only Two Ingredients: You only need whole milk and sugar to create this delectable caramel spread.
- Versatile Use: Dulce de leche can be used in many desserts, from cakes to cookies or even as a topping for pancakes.
- Made from Scratch: The homemade version has a fresher, more natural taste than store-bought alternatives.
Recipe Ingredients
Here’s what you’ll need to make this creamy, rich dulce de leche:
- 2 cups of whole milk (500ml/16.9 fl oz): The higher fat content in whole milk helps to create a creamier, richer texture for your dulce de leche.
- 1 cup of sugar: Sugar is essential for caramelizing and adding that characteristic sweetness.
Step-by-Step Instructions
Step 1: Combine the Milk and Sugar
In a medium-sized saucepan, pour in 2 cups of whole milk and add 1 cup of sugar. Stir the mixture continuously until the sugar has completely dissolved into the milk. This step ensures that the sugar won’t crystallize later on and gives you a smooth base for your dulce de leche.
- Tip: For a deeper caramel flavor, you can experiment with adding a pinch of baking soda. This helps to neutralize the acidity in the milk, allowing the sugars to caramelize more evenly. Just add 1/4 teaspoon of baking soda after the sugar has dissolved.
Step 2: Heat and Stir
Once the sugar has dissolved, place the saucepan over medium heat. Stir frequently, especially as the mixture starts to warm up. After a few minutes, the milk will begin to steam, and bubbles will form along the edges of the pan.
As the mixture heats, keep stirring to prevent the milk from burning or sticking to the bottom of the pan. You’ll need to stir continuously, ensuring the sugar is well-incorporated and doesn’t settle or crystallize at the bottom.
- Tip: Use a wooden spoon or a heat-resistant spatula for stirring. This ensures that the mixture cooks evenly and prevents any sticking.
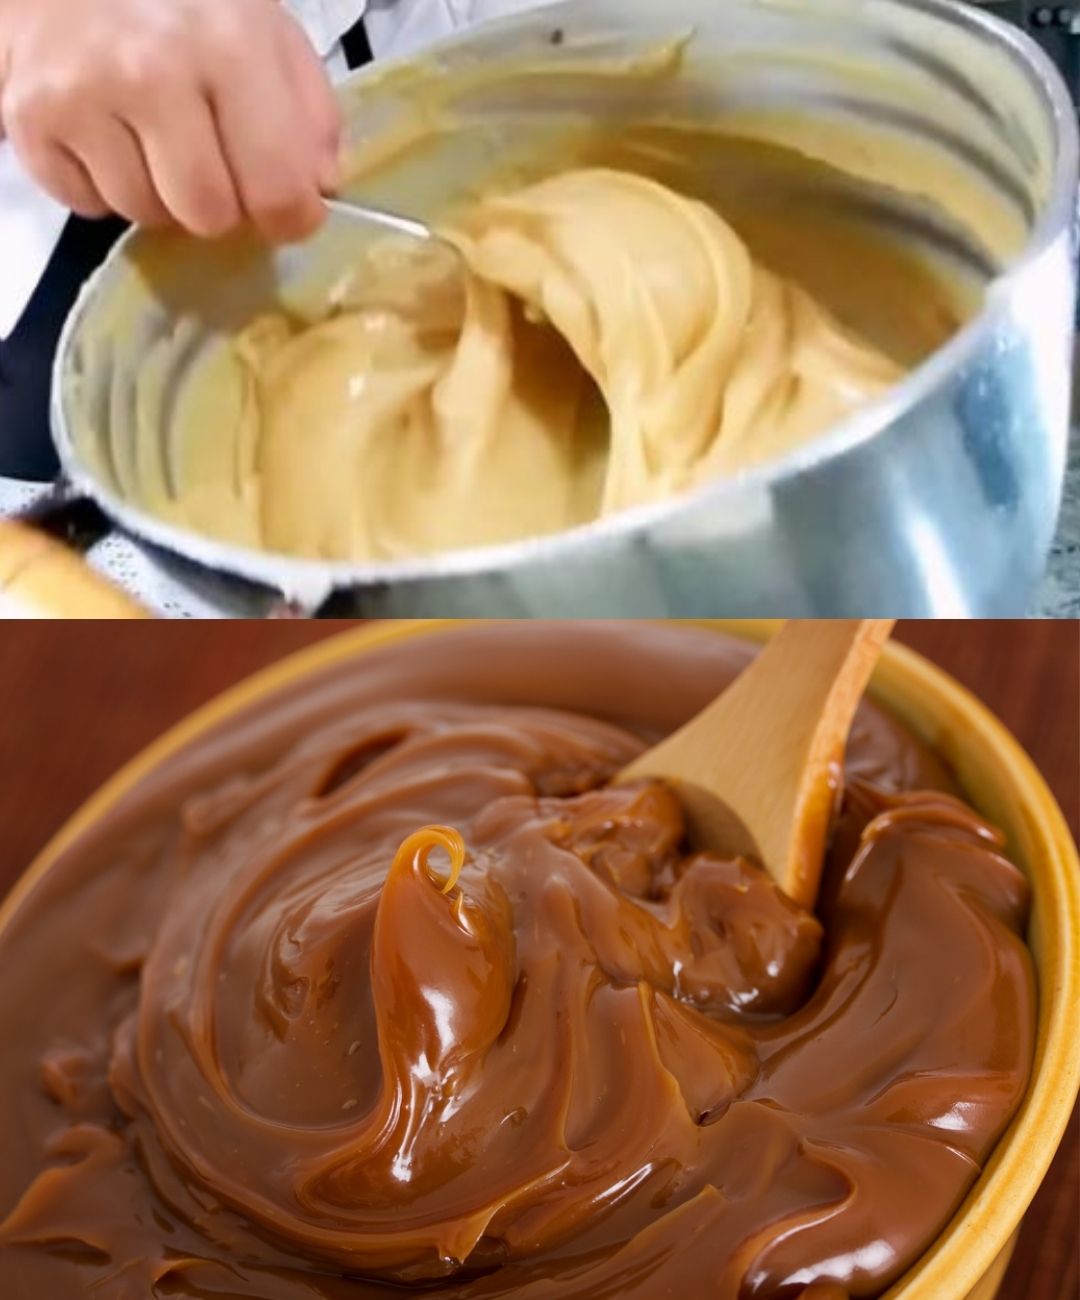
Step 3: Boil and Thicken
As the mixture heats, it will begin to boil. At this point, lower the heat slightly to maintain a steady simmer. Stir continuously as the liquid reduces and begins to thicken. Over time, the milk and sugar will start to change color, turning from white to a light beige.
The key to a good dulce de leche is patience—keep the heat at medium to avoid burning, and stir regularly. This process can take anywhere from 40 to 60 minutes, depending on how thick and dark you want your dulce de leche to be.
Step 4: Look for Signs of Doneness
As the mixture continues to cook, you’ll notice it pulling away from the sides of the pan, forming a thick, creamy consistency. The color should deepen to a light caramel brown. Once the mixture has thickened to your liking and you can draw a line through it with your spatula (and it holds its shape), it’s time to turn off the heat.
- Tip: Be mindful of the texture. If you want a thicker, more spreadable dulce de leche, let it cook a little longer. For a thinner, sauce-like consistency, remove it from the heat a bit earlier.
Step 5: Cool and Serve
Transfer the mixture to a bowl and allow it to cool completely. As it cools, the dulce de leche will continue to thicken, resulting in a rich, creamy consistency. Once cooled, your dulce de leche is ready to use!
Tips for the Perfect Dulce de Leche
- Stir Frequently: Consistent stirring is crucial to prevent the sugar from burning and the milk from curdling. Stirring also helps the mixture thicken evenly.
- Low and Slow: Don’t rush the process by turning up the heat. Dulce de leche requires slow cooking at a medium heat to develop its rich caramel flavor.
- Watch for Color Changes: The transformation from white milk to caramel-brown is your best indicator that the dulce de leche is progressing well. Keep an eye on the color, especially towards the end of the cooking process.
- Adjust the Thickness: You can control the final consistency by adjusting the cooking time. For a thicker dulce de leche, cook a bit longer. If you want a thinner version for drizzling, remove it from the heat earlier.
Frequently Asked Questions (FAQs)
Can I Use Low-Fat Milk?
Whole milk is ideal for making dulce de leche because of its higher fat content, which contributes to the rich, creamy texture. While you can use low-fat milk, it may result in a less creamy consistency and may take longer to thicken. If you do use low-fat milk, consider adding a small amount of cream to enrich the texture.
How Long Does Homemade Dulce de Leche Last?
Homemade dulce de leche can be stored in an airtight container in the refrigerator for up to two weeks. Be sure to allow it to cool completely before storing. When ready to use, you can gently reheat it in the microwave or on the stovetop if it becomes too thick.
Can I Make Dulce de Leche in the Oven?
Yes, you can make dulce de leche in the oven. Place a can of sweetened condensed milk (unopened) in a baking dish, cover it with water, and bake at 350°F for about 90 minutes, or until it turns golden brown. However, the stovetop method using milk and sugar from scratch, as outlined in this recipe, offers a more traditional approach and allows you to control the texture and flavor better.
Can I Add Flavors to My Dulce de Leche?
Absolutely! You can add a splash of vanilla extract for extra flavor or even a pinch of sea salt for a salted caramel version. If you enjoy a hint of spice, try adding a dash of cinnamon or nutmeg as the mixture begins to thicken.
What Can I Use Dulce de Leche For?
Dulce de leche is incredibly versatile. You can:
- Drizzle it over ice cream, pancakes, or waffles.
- Use it as a filling for cakes, crepes, or cookies.
- Spread it on toast or crackers for a sweet treat.
- Stir it into coffee or hot chocolate for a caramel-flavored drink.
Conclusion
Making homemade dulce de leche from scratch is a rewarding experience that results in a creamy, delicious caramel spread perfect for a variety of uses. With just two simple ingredients—whole milk and sugar—you can create a decadent treat that will impress friends and family. Whether you use it to top desserts, fill pastries, or enjoy it on its own, dulce de leche is a must-have recipe for any sweet tooth!