Introduction
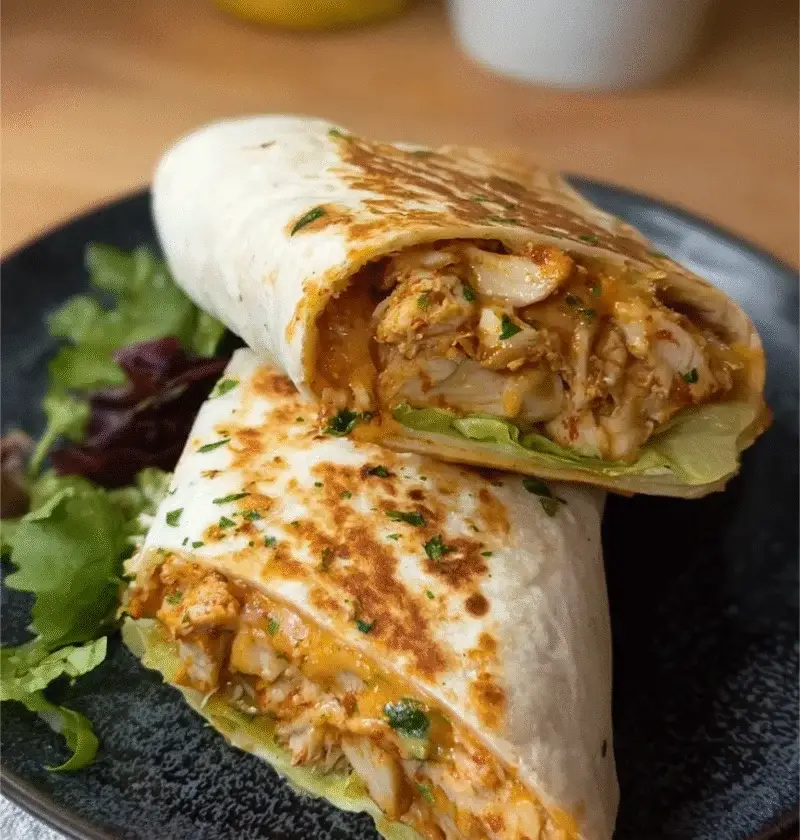
Cheesy garlic chicken wraps are the ultimate comfort food—golden, crisp tortillas hugging savory garlic chicken and gooey melted cheese. They’re fast, flavorful, and endlessly customizable. Whether you’re whipping up a quick lunch, a cozy dinner, or a shareable snack, these wraps fit the bill with ease.
What makes these wraps a staple is their simplicity. With just a handful of ingredients, minimal prep, and flexible flavor profiles, even beginner cooks can master this dish in no time. Want a bit of heat? Add jalapeños. Need more texture? Toss in sautéed veggies. Craving richness? Try creamy sauces or avocado.
This guide will walk you through the process from start to finish—ingredients, detailed steps, delicious variations, expert tips, and helpful FAQs. You’ll have a restaurant-quality wrap ready in under 30 minutes.
Ingredients
Gather the following ingredients before starting:
- 2 boneless, skinless chicken breasts
- 3 cloves garlic, minced
- 1½ cups shredded mozzarella cheese
- 4 large flour tortillas (or whole wheat)
- 2 tablespoons olive oil
- Salt and freshly ground black pepper, to taste
Optional Add-ins:
- ½ cup diced bell peppers
- ½ cup sliced onions
- ½ cup mushrooms, sautéed
- 1 teaspoon chili flakes or jalapeños for heat
- Sliced avocado or a spoonful of guacamole
Fresh, high-quality ingredients will elevate both the flavor and texture of your wraps.
Preparation Steps
Season and Sear the Chicken
- Pat the chicken dry and season generously with salt and pepper on both sides.
- Heat olive oil in a large skillet over medium heat.
- Add the minced garlic and sauté for about 30 seconds until fragrant—do not burn.
- Place the chicken in the skillet. Cook for 5–6 minutes per side until golden brown and fully cooked (internal temp should reach 165°F or 75°C).
- Remove the chicken and let it rest for 5 minutes before slicing into thin strips.
Assemble the Wraps
- Warm the tortillas in a dry pan or microwave for 10–15 seconds to soften.
- Place a tortilla on a clean surface and sprinkle a generous layer of shredded cheese over one half.
- Add sliced chicken evenly over the cheese. Include optional veggies or sauces if desired.
- Fold the tortilla in half to create a semicircle.
Toast the Wraps
- Heat a non-stick skillet or griddle over medium heat.
- Carefully place the wrap in the skillet and press gently.
- Toast each side for 2–3 minutes until the outside is golden brown and the cheese is fully melted.
- Remove from heat and let sit for a minute before slicing.
Repeat the process for remaining wraps.
Custom Variations
These wraps are a blank canvas—get creative with these mouthwatering options:
Spicy Kick
Add thinly sliced jalapeños, sriracha, or crushed red pepper flakes to the filling.
Creamy Touch
Spread a layer of ranch dressing, chipotle mayo, or garlic aioli on the tortilla before adding the chicken.
Veggie-Loaded
Toss in sautéed mushrooms, onions, or spinach for extra nutrition and texture.
Cheese Lover’s Dream
Switch it up with a blend of cheddar, Monterey Jack, or pepper jack cheese for a more complex flavor.
Sweet and Savory
Add thin apple slices or a drizzle of honey mustard for a delightful contrast.
Serving Suggestions
- Pair your cheesy garlic chicken wrap with a side of crispy fries, sweet potato wedges, or a fresh green salad.
- Serve with sour cream, salsa, or hummus for dipping.
- Cut into halves or thirds for a great party platter option or lunchbox meal.
Tips for Success
- Use a heavy-bottomed skillet or grill pan to get that golden crust without burning the tortilla.
- Let the chicken rest before slicing to keep it juicy and tender.
- Layer cheese both under and over the chicken for ultimate meltiness and wrap cohesion.
- Don’t skip warming the tortillas—this prevents tearing and makes folding easier.
- Cook one wrap at a time for even browning and cheese melt.
Make-Ahead and Storage
- Prep Ahead: Cook and slice the chicken up to 2 days in advance. Store it refrigerated in an airtight container.
- Wrap Assembly: Wraps can be assembled a few hours before cooking—store them covered in the fridge.
- Leftovers: Store cooked wraps in the fridge for up to 3 days.
- Reheating: For best results, reheat in a skillet or toaster oven. Avoid microwaving as it can make the tortilla soggy.
Nutritional Info (Approximate, per wrap)
- Calories: 420
- Protein: 28g
- Carbohydrates: 25g
- Fat: 23g
- Fiber: 2g
Note: Exact values depend on tortilla size and optional ingredients used.
FAQs
Can I make cheesy garlic chicken wraps ahead of time?
Yes! While they’re best enjoyed fresh, you can cook and slice the chicken in advance, then assemble and toast the wraps just before serving for maximum crispiness.
Are cheesy garlic chicken wraps suitable for vegetarians?
To make this dish vegetarian, simply substitute the chicken with grilled tofu, tempeh, or a plant-based chicken alternative. Use the same seasonings and steps for flavor.
What’s the best way to reheat these wraps?
Reheat in a skillet over low heat or use a toaster oven to restore crispiness. Avoid the microwave, which can make the tortilla rubbery or soggy.
Can I freeze these wraps?
You can freeze cooked or uncooked wraps. Wrap them tightly in foil or plastic wrap and store in a freezer bag. To reheat, thaw in the fridge overnight and warm in a pan or oven.
What kind of cheese works best?
Mozzarella melts beautifully and gives a gooey texture, but cheddar, pepper jack, provolone, or any cheese blend can be used based on your flavor preference.
Final Thoughts
Cheesy garlic chicken wraps are a meal worth repeating. With crisped tortillas, juicy garlic-seasoned chicken, and melty cheese, they deliver comfort and flavor in every bite. What’s even better is the versatility—add your favorite ingredients, spice them up, or make them vegetarian-friendly.
This recipe is beginner-proof, quick to prepare, and a definite crowd-pleaser. Whether you’re serving it to kids, guests, or just treating yourself, it’s bound to be a favorite.