Prepare to be amazed by this unbelievably simple caramel recipe that requires just one pantry staple—but delivers full-on decadence. Whether you’re a seasoned dessert lover or a kitchen novice, this slow cooker caramel recipe will become your go-to for transforming basic ingredients into a golden, silky-smooth treat. With no stirring, no sugar thermometers, and virtually no effort, you’ll have luscious caramel ready to elevate any dessert or dish.
The Secret Behind the Magic
At the heart of this recipe lies a humble, yet powerful, ingredient:
- 1 (14-ounce) can of sweetened condensed milk
That’s it. No butter. No added sugar. No cream. Just one can of sweetened condensed milk undergoes a slow transformation into a creamy, dreamy caramel that rivals anything you’ll find at the store.
Step-by-Step: Transforming Milk into Caramel Gold
This method uses the slow and gentle heat of a slow cooker to caramelize the sugars naturally found in sweetened condensed milk. The result? Dulce de leche—Latin America’s golden, spoonable treasure.
Prepare the Can
Before anything else, remove the label from the can of sweetened condensed milk. Make sure to peel off all the paper to avoid any burning or floating debris during the cooking process.
Pro tip: Use warm water to loosen stubborn glue, or gently rub it off with a sponge.
Arrange in the Slow Cooker
Lay the can on its side inside your slow cooker. If you’re making multiple cans (a great idea for future cravings or gifting), arrange them so they aren’t stacked or touching the heating element directly.
Fill with Water
This step is critical for both safety and successful results:
- Fill the slow cooker with enough water to completely submerge the can(s).
- The water level should cover the top of the can by at least 2 inches.
This helps prevent pressure build-up and the risk of the can overheating or rupturing.
Set and Forget
- Cook the can on LOW for 8 hours. That’s it.
- No stirring, no flipping, no opening.
By the end of the 8 hours, the condensed milk will have turned into a luxurious, golden caramel.
Note: For a lighter, more spreadable caramel, reduce cooking time to 6 hours.
Remove with Care
When the cooking time is up, carefully lift the can from the hot water using tongs. It will be extremely hot.
Place it on a heat-safe surface or trivet and let it cool completely to room temperature. Do not attempt to open the can while it’s still hot, as the pressurized heat could cause it to erupt.
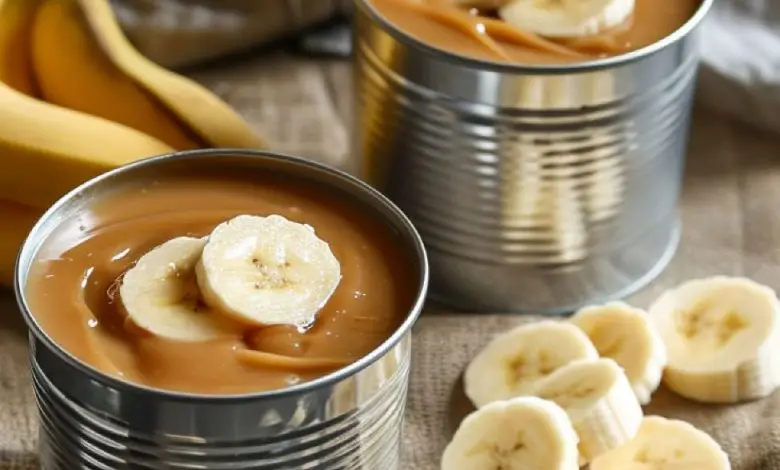
Open to Reveal Your Caramel Treasure
Once the can is fully cooled, open it using a standard can opener. Inside you’ll find a beautifully smooth, thick, and rich caramel, perfect for:
- Spreading on toast
- Layering into cakes or brownies
- Drizzling over ice cream or pancakes
- Stirring into coffee or hot chocolate
- Eating by the spoonful (no judgment here)
Elevate the Flavor
Want to give your homemade caramel a custom twist? Try these easy upgrades after cooling and opening the can:
Add a Pinch of Sea Salt
Transform it into a salted caramel with just a pinch of flaky sea salt.
Stir in Vanilla Extract
Mix in ½ teaspoon of pure vanilla extract to enhance its richness.
Spice It Up
Try a dash of cinnamon or nutmeg for a warm, spiced note that’s perfect in fall and winter treats.
Pro Tips for Success
- Never boil an unopened can directly on the stove. This method is outdated and can be dangerous if left unattended.
- Always keep cans completely submerged during cooking.
- Make multiple cans at once—the unopened caramel lasts as long as the expiration date on the can.
- For faster results, you can prepare this in a pressure cooker in 35–40 minutes (follow your pressure cooker’s specific instructions and safety guidelines).
- After opening, store unused caramel in an airtight container in the refrigerator for up to 2 weeks.
Delicious Ways to Use This Caramel
Here are a few creative ways to use your homemade dulce de leche:
- Banoffee Pie: Layer it with bananas and whipped cream over a graham cracker crust.
- Caramel Cheesecake: Swirl it into cheesecake batter before baking.
- Churro Dip: Warm it up and serve with cinnamon sugar churros.
- Apple Dip: Perfectly pairs with fresh apple slices.
- Gift Idea: Transfer into jars, tie with a ribbon, and share the sweet magic with friends and family.
Frequently Asked Questions
Can I use evaporated milk instead of sweetened condensed milk?
No. Evaporated milk is unsweetened and lacks the sugar content necessary for caramelization. Only sweetened condensed milk will produce proper results.
Why does the can need to be fully submerged?
Keeping the can submerged prevents pressure build-up. If the water level drops below the can, it can overheat or rupture—always check that there’s plenty of water during cooking.
Is it safe to cook canned milk like this?
Yes, as long as the can remains sealed, submerged, and cooked slowly. Avoid high heat or letting the water level drop.
Can I reheat the caramel?
Yes! Scoop the caramel into a heatproof bowl and microwave in short bursts, stirring between intervals. You can also warm it gently in a saucepan over low heat.
How long does it last once opened?
Once opened, the caramel should be refrigerated in a sealed container and used within 2 weeks.
Can I freeze leftover caramel?
You can freeze it, but the texture may change slightly. Freeze in an airtight container, then thaw in the fridge before use and stir well.
Final Thoughts
This one-ingredient caramel is nothing short of magical. It takes almost no effort but delivers gourmet-quality results. Whether you’re spreading it on toast, baking it into pies, or simply enjoying it by the spoonful, this luscious treat proves that sometimes, simple really is best. Keep a can or two of sweetened condensed milk in your pantry, and you’ll always be just hours away from caramel perfection.