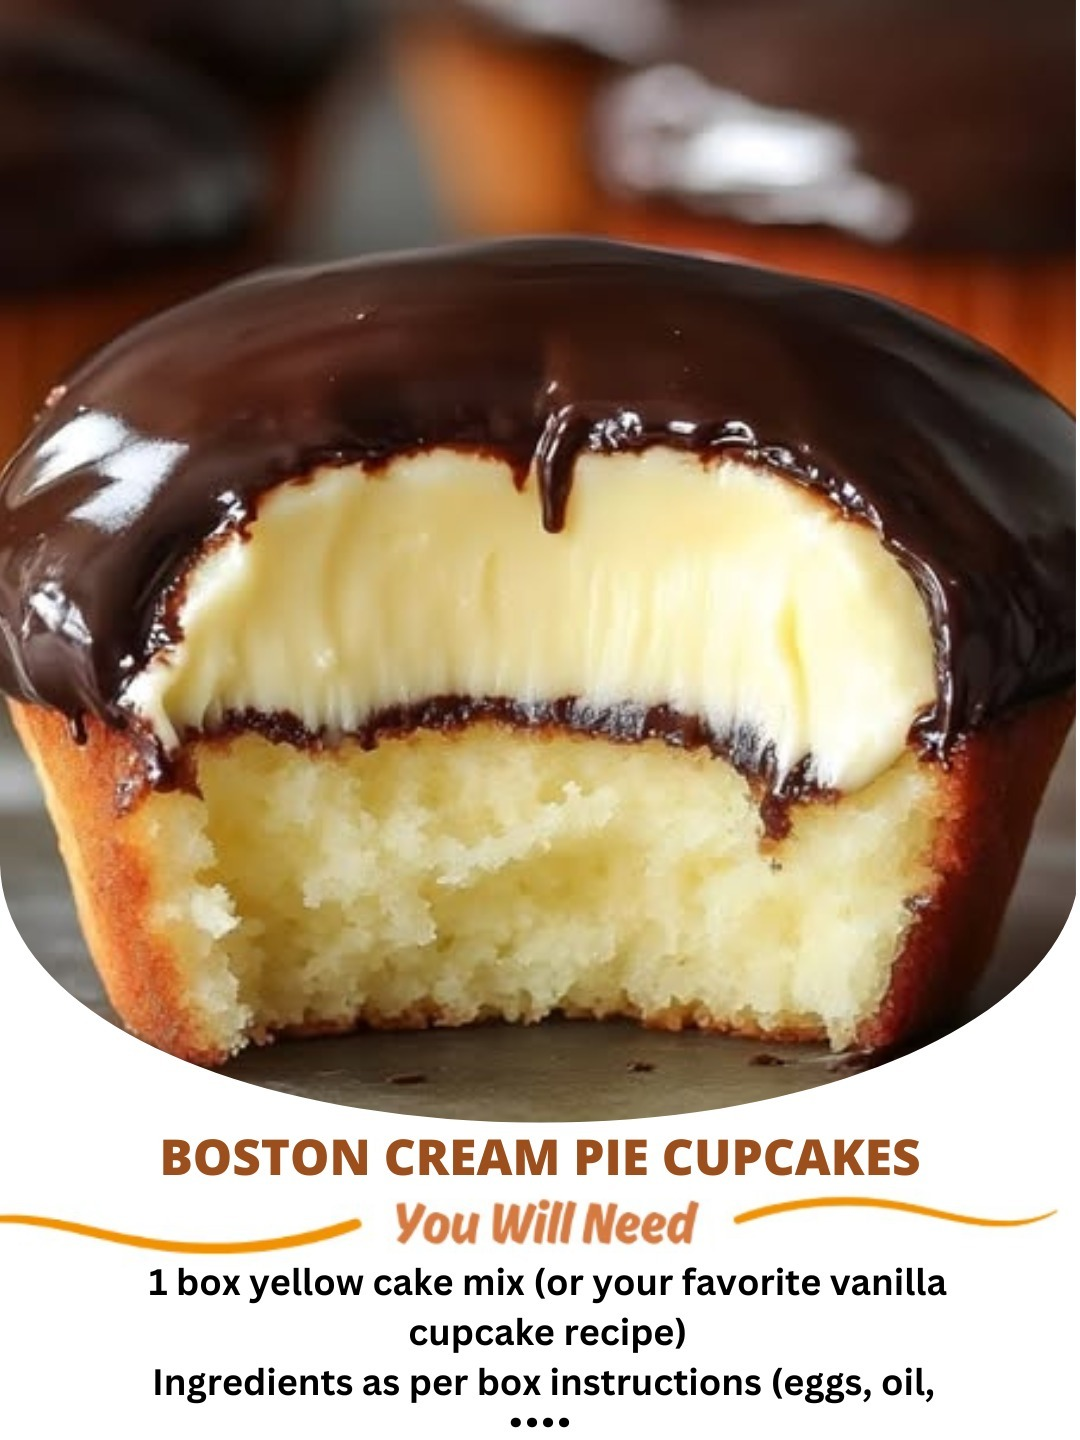
These Boston Cream Pie Cupcakes transform the classic dessert into a fun, easy-to-share treat. With moist vanilla cupcakes, a smooth custard filling, and rich chocolate glaze, each bite is an indulgent layer of flavor. Whether you’re baking for a party, celebration, or craving something sweet, these cupcakes deliver all the iconic flavors without the fuss of baking a full pie. Let’s explore how to make them from scratch and why they’re destined to become a favorite.
Why Boston Cream Pie Cupcakes Are So Popular
The Charm of Miniature Desserts
Bite-sized desserts are not just cute—they’re practical. These cupcakes are easy to transport, serve, and portion. They’re ideal for events or satisfying a sweet tooth without overindulgence.
Timeless Flavor Combo
Each cupcake features the unbeatable trio of soft vanilla cake, silky custard, and glossy chocolate. It’s a crowd-pleasing combination that feels both nostalgic and gourmet.
Easier Than Traditional Boston Cream Pie
While the full-sized version involves layers, trimming, and tricky assembly, this cupcake version simplifies things without sacrificing flavor or texture.
Ingredients You’ll Need
Vanilla Cupcakes
- 1 box vanilla cake mix (or your favorite homemade vanilla cupcake recipe)
- Eggs, oil, and water (as specified on the cake mix box or recipe)
Custard Filling
- 1 cup whole milk
- 3 large egg yolks
- ¼ cup granulated sugar
- 2 tablespoons cornstarch
- 1 teaspoon vanilla extract
Chocolate Glaze
- ½ cup heavy cream
- 1 cup semi-sweet chocolate chips
- Optional: 1 teaspoon vegetable oil or unsalted butter for shine
Step-by-Step Instructions
Bake the Vanilla Cupcakes
- Preheat the oven according to the cake mix instructions (usually 350°F/175°C).
- Line a muffin tin with paper cupcake liners.
- Prepare the batter following the box directions (or your scratch-made recipe).
- Fill each liner about ⅔ full and bake for 18–20 minutes, or until a toothpick inserted in the center comes out clean.
- Cool completely before filling to prevent melting the custard.
Make the Custard Filling
- In a small saucepan, whisk together milk, egg yolks, sugar, and cornstarch until smooth.
- Cook over medium heat, whisking constantly until thickened and bubbling—about 5–7 minutes.
- Remove from heat and stir in vanilla extract.
- Transfer to a bowl, cover with plastic wrap (press directly onto the surface), and refrigerate at least 1 hour.
Fill the Cupcakes
- Once cool, cut out the center of each cupcake using a knife or cupcake corer—don’t go all the way through.
- Spoon or pipe chilled custard into the holes.
- If desired, replace the cupcake tops to conceal the filling.
Make the Chocolate Glaze
- Heat heavy cream until hot but not boiling—on the stove or microwave.
- Place chocolate chips in a bowl and pour hot cream over them.
- Wait 2–3 minutes, then whisk until smooth and glossy.
- Stir in oil or butter if desired for extra shine.
Top with Glaze
- Dip each cupcake top into the chocolate glaze or spoon it over the top.
- Let the glaze set at room temperature or refrigerate briefly if you’re in a hurry.
Serving Suggestions
Perfect for Celebrations
Arrange these cupcakes on a tiered platter for birthdays, holidays, or tea parties. Their elegant appearance makes them party-worthy.
Add Creative Toppings
Decorate with:
- Chocolate curls
- Gold leaf for a luxe look
- Crushed nuts for texture
- Colorful sprinkles for fun
Pair with Your Favorite Beverage
Serve with coffee, milk, or a vanilla latte. The balanced sweetness complements drinks beautifully.
Store or Prep in Advance
- Store unfilled cupcakes and custard separately for up to 2 days.
- Assemble just before serving to maintain freshness and texture.
Tips for Perfect Boston Cream Cupcakes
- Chill the Custard Thoroughly: This ensures it thickens properly and doesn’t run when inserted into the cupcakes.
- Don’t Skip the Wrap: Pressing plastic wrap directly on the custard surface prevents a skin from forming.
- Use a Piping Bag: For neat, mess-free filling, a piping bag with a round tip makes the job faster and tidier.
- Cool Cupcakes Completely: Adding custard or glaze to warm cupcakes can cause leaks and soggy texture.
- Let the Glaze Set: If transporting, chill briefly to allow the chocolate to firm up slightly.
- Want a Bakery Look? Use metallic cupcake liners and a swirl of piped glaze for presentation.
Final Thoughts
These Boston Cream Pie Cupcakes bring together the best of both worlds: classic comfort and effortless presentation. With a tender vanilla base, a creamy pocket of custard, and a glossy chocolate topping, each cupcake is a layered experience of flavor and texture.
Whether you’re baking a batch for guests, gifting a dozen, or enjoying one solo with your favorite drink, these cupcakes offer a sweet, satisfying twist on a beloved dessert. You don’t need to be a professional baker to create something this delightful—just a love for good food and a little time in the kitchen.
Frequently Asked Questions
Can I make these cupcakes ahead of time?
Yes, you can bake the cupcakes and prepare the custard 1–2 days in advance. Store them separately and assemble just before serving for best results.
Can I use instant pudding instead of custard?
You can, but the texture and flavor won’t be as rich as homemade custard. If short on time, vanilla pudding can be a decent substitute.
How do I keep the chocolate glaze from running?
Make sure cupcakes and glaze are cool. You can also let the glaze thicken slightly before applying or chill the cupcakes after glazing to help set it.
Do I need to refrigerate leftovers?
Yes, because of the custard filling, these cupcakes should be stored in an airtight container in the refrigerator for up to 3 days.
Can I freeze them?
It’s best to freeze the unfrosted cupcakes. The custard may separate or become watery after thawing, so add the filling and glaze fresh if freezing in advance.
Can I use dark chocolate instead of semi-sweet?
Absolutely! Dark chocolate adds a richer, less sweet flavor if that’s your preference.
Are these safe for kids?
Yes! Just make sure to store them properly and avoid any hard decorations that could pose a choking risk for toddlers.