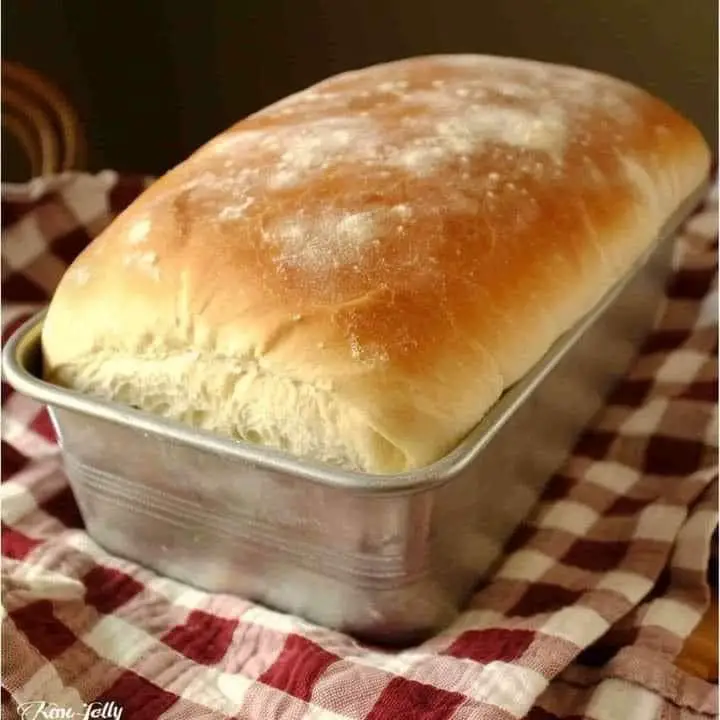
Homemade Amish White Bread: A Timeless Recipe
There’s nothing quite like the smell of freshly baked bread wafting through the house. Amish White Bread, with its soft, fluffy texture and slightly sweet flavor, is a beloved classic that’s perfect for everything from sandwiches to toast. This easy-to-follow recipe will guide you through the process of making delicious, homemade bread that’s sure to impress.
Ingredients
To make Amish White Bread, you will need the following ingredients:
- 2 cups warm water (about 110-120°F)
- 2/3 cup white sugar
- 1 1/2 tablespoons yeast
- 1 1/2 teaspoons salt
- 1/4 cup vegetable oil
- 6 cups flour
Directions
Preparing the Dough
- Activate the Yeast:
- Place 2/3 cup of white sugar and 2 cups of warm water (110-120°F) in a large mixing bowl.
- Sprinkle 1 1/2 tablespoons of yeast over the water and sugar mixture. Allow it to dissolve and become foamy for about 5-15 minutes. This step ensures that the yeast is active and ready to help the bread rise.
- Mix the Ingredients:
- Add 1 1/2 teaspoons of salt, 1/4 cup of vegetable oil, and 3 cups of flour to the yeast mixture. Stir together until well combined.
- Incorporate Remaining Flour:
- Gradually add the remaining 3 cups of flour. Switch to a dough hook attachment if using a stand mixer, and mix until the dough begins to pull away from the sides of the bowl.
Kneading and Rising
- Knead the Dough:
- Transfer the dough to a lightly floured surface. Knead it briefly to ensure all ingredients are fully incorporated and the dough is smooth.
- First Rise:
- Place the kneaded dough in a greased bowl, flipping it once to coat both sides with oil. Cover the bowl with plastic wrap or a damp, warm towel.
- Set the bowl in a draft-free area and let the dough rise until it has doubled in size, about 1 hour.
- Punch Down the Dough:
- Once the dough has risen, remove the cover and gently punch it down to release the air.
Shaping and Second Rise
- Shape the Loaves:
- Turn the dough out onto a lightly floured surface. Divide it in half.
- Flatten each half into a rectangle and roll it up tightly into a loaf, pinching the ends to seal.
- Prepare the Pans:
- Place each shaped loaf into a greased 9×5-inch bread pan. Cover the pans with plastic wrap or a damp towel.
- Second Rise:
- Allow the dough to rise again until it has doubled in size, about 30-50 minutes.
Baking
-
Preheat the Oven:
- Preheat your oven to 350°F (175°C).
-
Bake the Bread:
- Once the loaves have risen, bake them in the preheated oven for 25-30 minutes, or until the tops are golden brown and the bread sounds hollow when tapped.
-
Finish the Bread:
- Remove the loaves from the oven and immediately brush the tops with melted butter. This gives the bread a soft, golden crust and adds a lovely shine.
-
Cool the Bread:
- Allow the bread to rest in the pans for about 10 minutes. Then, carefully remove the loaves from the pans and transfer them to a cooling rack. Let the bread cool completely before slicing to maintain its structure and texture.
Tips for Perfect Amish White Bread
Ingredient Quality
- Yeast: Make sure your yeast is fresh and active. Expired or inactive yeast will result in bread that doesn’t rise properly.
- Flour: Use high-quality, unbleached all-purpose flour for the best results. You can also experiment with bread flour for a chewier texture.
Technique
- Water Temperature: The water should be warm, not hot. Water that’s too hot can kill the yeast, while water that’s too cool won’t activate it properly.
- Kneading: Knead the dough until it’s smooth and elastic. This develops the gluten, which gives the bread its structure and chewiness.
- Rising: Ensure the dough rises in a warm, draft-free area. If your kitchen is cool, you can place the dough in an oven with the light on or near a warm stove.
Baking
- Oven Temperature: Make sure your oven is fully preheated to 350°F before baking. An accurate oven thermometer can help ensure the correct temperature.
- Baking Time: Keep an eye on the bread during the last few minutes of baking. If the tops are browning too quickly, you can cover them loosely with foil.
FAQs About Amish White Bread
Can I Use Whole Wheat Flour Instead of All-Purpose Flour?
Yes, you can substitute whole wheat flour for part of the all-purpose flour. Keep in mind that whole wheat flour absorbs more liquid, so you may need to adjust the water content. Start with half whole wheat and half all-purpose flour, and experiment from there.
Can I Make This Recipe by Hand If I Don’t Have a Stand Mixer?
Absolutely! You can mix and knead the dough by hand. It will just require a bit more elbow grease. Knead the dough on a lightly floured surface for about 8-10 minutes until it’s smooth and elastic.
How Do I Store Homemade Bread?
Store homemade bread in a bread box or an airtight container at room temperature for up to 3 days. For longer storage, you can freeze the bread. Slice it first, then wrap it tightly in plastic wrap and place it in a freezer-safe bag. Thaw at room temperature or toast slices directly from the freezer.
Can I Add Ingredients to the Dough?
Yes, you can add various ingredients to the dough for extra flavor. Try adding herbs, shredded cheese, or dried fruit during the mixing stage. Be sure to not overload the dough, as it can affect the rise and texture.
How Can I Tell If My Bread Is Fully Baked?
To check if your bread is fully baked, tap the bottom of the loaf. It should sound hollow. You can also use a thermometer to check the internal temperature, which should be around 190-200°F.
What Can I Use Instead of Vegetable Oil?
You can substitute vegetable oil with other oils like canola, sunflower, or even melted butter for a richer flavor. Just keep the measurements the same.
Enjoy Your Homemade Amish White Bread
Baking bread at home can be a deeply rewarding experience. With this recipe, you’ll have soft, delicious Amish White Bread that’s perfect for any occasion. Whether you’re enjoying it fresh out of the oven with a pat of butter or using it to make the best sandwiches, this bread is sure to become a favorite in your household. Happy baking!