Introduction to Homemade Cheese with Olives
Imagine the delight of serving your guests a platter of cheese that you’ve crafted yourself, right in the comfort of your kitchen. Making cheese at home may seem like a daunting task, but with this simple recipe, you’ll discover that it’s not only possible but incredibly satisfying. Whether you’re a seasoned home cook or just starting your culinary journey, this easy homemade cheese recipe with olives will have you reaching for your apron time and time again. Let’s dive into the world of homemade cheese-making and explore why this delicious endeavor is worth every minute of your time.
The Allure of Homemade Cheese
Simplicity in Every Step
One of the most appealing aspects of making cheese at home is its simplicity. With just three basic ingredients—whole milk, lemon juice or vinegar, and olives—you can create a delightful cheese that rivals any store-bought variety. No need for specialized equipment or advanced culinary skills. If you can simmer milk and mix a few ingredients, you’re well on your way to becoming a cheese-making pro.
Customization: Make It Your Own
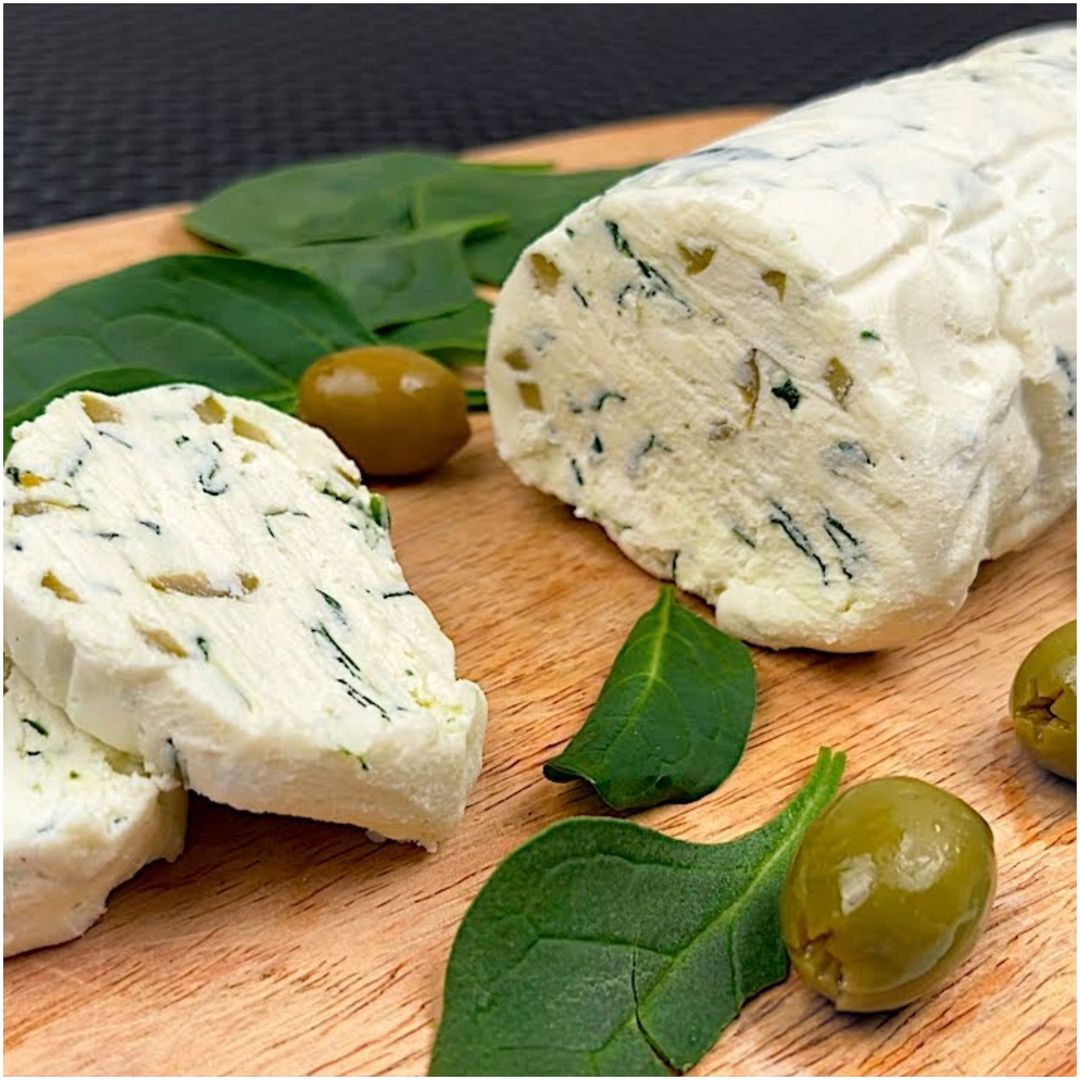
Homemade cheese isn’t just about following a recipe; it’s about personalizing it to suit your tastes. This recipe includes chopped olives, which add a burst of flavor and a touch of sophistication. Whether you prefer the briny taste of green olives or the rich, earthy notes of black olives, you have the freedom to experiment and create a cheese that’s uniquely yours. Want to add a bit of spice? Consider incorporating some crushed red pepper flakes or herbs like thyme or rosemary. The possibilities are endless!
Quality You Can Trust
When you make cheese at home, you have complete control over the ingredients, ensuring that your final product is free from unnecessary additives, preservatives, or artificial flavors. This is especially important for those who are health-conscious or prefer to eat clean. By using whole milk and natural ingredients, you’re creating a cheese that’s wholesome, nutritious, and packed with flavor.
How to Make Easy Homemade Cheese with Olives
Ingredients You’ll Need
- 1 liter of whole milk: The base of your cheese, providing richness and creaminess.
- 2 tablespoons of lemon juice or vinegar: Acts as a coagulant, helping the milk curdle and form curds.
- 1/2 cup of chopped olives (green, black, or a mix): Adds a burst of flavor and a delightful texture to the cheese.
- Salt to taste (optional): Enhances the flavor, but can be omitted if preferred.
Step-by-Step Instructions
Step 1: Heat the Milk
Start by pouring 1 liter of whole milk into a large pot. Place the pot over medium-low heat and allow the milk to gradually warm up to a gentle simmer. Be sure to stir occasionally to prevent the milk from scorching at the bottom of the pot. Heating the milk slowly is key to achieving the right texture for your cheese.
Step 2: Curdling the Milk
Once the milk reaches a simmer, it’s time to add your coagulant—lemon juice or vinegar. Slowly pour in 2 tablespoons of lemon juice or vinegar while gently stirring the milk. You’ll notice the milk begin to curdle almost immediately, separating into curds (the solid part) and whey (the liquid part). Continue to stir gently until the curdling process is complete.
Step 3: Separate the Curds and Whey
Remove the pot from the heat and let it sit for a few minutes. This resting period allows the curds to fully separate from the whey. Next, line a colander with cheesecloth and place it over a bowl to catch the whey. Carefully pour the curds into the colander, allowing the whey to drain away. If you want a firmer cheese, you can press down on the curds with a spoon to remove more whey.
Step 4: Add Flavor with Olives
Once the whey has drained, it’s time to infuse your cheese with flavor. Add 1/2 cup of chopped olives to the curds and mix well. The olives not only add a pop of color but also bring a delightful savory flavor that complements the creamy cheese. If you’d like, you can season the mixture with a pinch of salt to taste, though this step is optional.
Step 5: Shape and Chill the Cheese
Gather the edges of the cheesecloth together and twist them to form a ball. Squeeze out any excess liquid by gently pressing the cheese ball. Place the cheese on a plate and refrigerate for at least 1 hour. Chilling the cheese helps it firm up, making it easier to slice or spread.
Step 6: Serve and Enjoy
Once your cheese has chilled, it’s ready to enjoy! You can serve it with crackers, bread, or as part of a charcuterie board. The combination of creamy cheese and savory olives is sure to be a hit at any gathering. Enjoy the satisfaction of knowing that you made it yourself, from start to finish.
Tips for the Perfect Homemade Cheese
Use Fresh, High-Quality Milk
The quality of your cheese depends largely on the quality of the milk you use. Opt for whole milk that’s fresh and free from additives. Organic or locally sourced milk can add an extra layer of richness to your cheese.
Experiment with Flavors
Don’t be afraid to get creative with your cheese. Besides olives, you can add herbs, spices, or even dried fruits to customize the flavor. Try different combinations until you find your favorite.
Save the Whey
Don’t throw away the whey after draining the curds. It’s packed with nutrients and can be used in smoothies, soups, or even as a substitute for water in baking.
Adjust the Texture
If you prefer a creamier cheese, you can leave a bit more whey in the curds before shaping. For a firmer texture, continue to press out as much whey as possible.
Frequently Asked Questions (FAQs)
Can I use non-dairy milk to make this cheese?
This recipe is designed for whole milk, which has the necessary fat content to create curds. Non-dairy milk may not curdle in the same way, so it’s not recommended for this particular recipe.
How long will the homemade cheese last?
Your homemade cheese can be stored in the refrigerator for up to a week. Keep it wrapped in cheesecloth or in an airtight container to maintain its freshness.
Can I freeze homemade cheese?
Freezing homemade cheese is not recommended, as it can alter the texture. It’s best to enjoy it fresh.
What can I do with leftover whey?
Leftover whey is highly nutritious and can be used in various recipes, including smoothies, soups, and baked goods. It can also be added to your compost or used as a natural fertilizer in the garden.
Is it necessary to use cheesecloth?
Cheesecloth is ideal for draining whey and shaping the cheese, but if you don’t have any on hand, a clean, thin kitchen towel can be used as a substitute.
Conclusion
Making cheese at home is a rewarding and delicious experience that anyone can master with a few simple ingredients and a bit of patience. This homemade cheese with olives offers a delightful combination of creamy texture and savory flavor that’s sure to impress your family and friends. So why not give it a try? Roll up your sleeves, embrace your inner cheesemaker, and enjoy the process of creating something truly special in your kitchen.