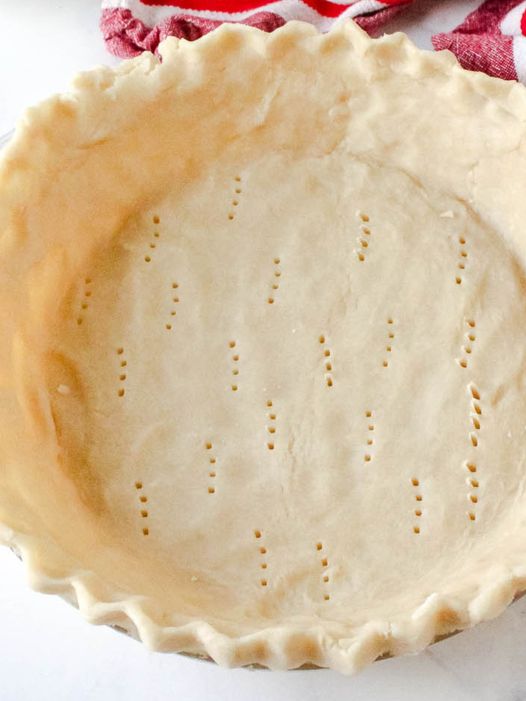
100-Year-Old Pie Crust Recipe: A Timeless Classic
There’s something truly magical about baking a pie from scratch, especially when the recipe has stood the test of time. This 100-Year-Old Pie Crust Recipe is a tribute to generations of bakers who relied on simple, quality ingredients to create tender, flaky crusts. Whether you’re baking a sweet apple pie or a savory chicken pot pie, this crust is versatile enough to suit any filling.
Passed down through generations, this recipe captures the essence of traditional baking. With just six basic ingredients, it delivers a crust that’s both buttery and perfectly crisp. Let’s honor the legacy of classic baking by recreating this timeless pie crust recipe.
Ingredients for 100-Year-Old Pie Crust
Here’s what you’ll need to make two generous pie crusts:
Dry Ingredients:
- 4 cups All-Purpose Flour: The foundation of the crust, providing structure.
- 1 ¾ cups Shortening: For an authentic experience, lard was traditionally used, but shortening works wonderfully to create a tender texture.
- 3 tablespoons Sugar: Adds a touch of sweetness. For savory pies, you can reduce this amount.
- 2 teaspoons Salt: Enhances the overall flavor.
Wet Ingredients:
- 1 Egg: Acts as a binder, bringing the dough together.
- ½ cup Ice Water: Ensures the dough stays cool and easy to work with.
How to Make 100-Year-Old Pie Crust: Step-by-Step Instructions
Step 1: Prepare the Dry Ingredients
In a large mixing bowl, combine:
- 4 cups of all-purpose flour
- 1 ¾ cups of shortening
- 3 tablespoons of sugar
- 2 teaspoons of salt
Using a pastry cutter or your hands, blend the ingredients together until the mixture resembles coarse crumbs. This step is crucial for creating the flakiness in the final crust.
Step 2: Mix the Wet Ingredients
In a small bowl, beat 1 egg and mix it with ½ cup of ice water. The ice water helps keep the shortening cool, preventing it from melting too quickly and ensuring a tender crust.
Step 3: Combine Wet and Dry Mixtures
Gradually pour the egg and water mixture into the bowl of dry ingredients. Mix gently until the dough comes together. Be careful not to overwork the dough, as this can result in a tough crust.
Step 4: Shape and Chill the Dough
Once the dough forms:
- Divide it into two equal portions.
- Shape each portion into a ball and then flatten it slightly into a disk. This makes it easier to roll out later.
- Wrap each disk tightly in plastic wrap and refrigerate for at least 30 minutes. Chilling the dough allows the fats to solidify, ensuring a flaky texture during baking.
Step 5: Roll Out the Dough
- Lightly flour your work surface and rolling pin.
- Roll out one disk of dough to your desired thickness (about ⅛ inch is ideal for most pies).
- Carefully transfer the rolled-out dough to your pie dish, pressing gently to fit it into the edges.
- Trim any excess dough, leaving about an inch overhang for crimping or sealing.
Step 6: Baking Tips
- For a pre-baked crust: Preheat the oven to 400°F (200°C). Prick the bottom of the crust with a fork to prevent air bubbles, then line it with parchment paper and fill it with pie weights. Bake for 15-20 minutes or until golden brown.
- For a filled pie: Follow the specific recipe instructions for your pie filling.
Tips for Perfect Pie Crust Every Time
- Keep Everything Cold: The key to a flaky crust is cold ingredients. Use ice water, and chill your shortening or lard if necessary.
- Don’t Overwork the Dough: Mixing or kneading too much can activate the gluten in the flour, resulting in a tough crust.
- Use a Pastry Cutter: A pastry cutter helps blend the shortening and flour evenly without melting the fats.
- Chill Before Rolling: Letting the dough rest in the fridge ensures easier rolling and prevents shrinkage during baking.
- Roll Evenly: Turn the dough frequently while rolling to maintain an even thickness.
- Patch Holes Carefully: If the dough tears, don’t panic. Patch it with a small piece of dough and press lightly to seal.
FAQs About 100-Year-Old Pie Crust
1. Can I Use Butter Instead of Shortening?
Yes, you can substitute butter for shortening. However, butter has a lower melting point, so work quickly and keep the dough cold to achieve the best results.
2. Why Is My Pie Crust Tough?
A tough crust usually results from overmixing or overworking the dough. Be gentle when combining the ingredients and rolling out the dough.
3. Can I Freeze the Dough?
Absolutely! Wrap the dough tightly in plastic wrap and place it in a freezer-safe bag. It can be frozen for up to 3 months. Thaw it in the refrigerator before rolling.
4. How Do I Prevent the Dough from Sticking While Rolling?
Lightly flour your work surface and rolling pin. If the dough becomes too soft, chill it for a few minutes before continuing.
5. Is This Recipe Suitable for Savory Pies?
Yes! Simply reduce or omit the sugar for a perfect savory crust.
6. What If I Don’t Have a Pastry Cutter?
You can use two knives or your hands to blend the shortening and flour. Work quickly to prevent the fats from melting.
7. Can I Double the Recipe?
Certainly! This recipe is scalable, but ensure you have enough space in your refrigerator for the extra dough.
A Classic Recipe for Generations
This 100-Year-Old Pie Crust Recipe embodies the simplicity and timelessness of traditional baking. Whether you’re recreating a family heirloom recipe or experimenting with your own fillings, this crust is a reliable base for any pie. With its tender, flaky layers and buttery flavor, it’s no wonder this recipe has endured for over a century. Happy baking!

